Monday, December 6, 2010

Ready, Set, FILE! - Oval

I must travel back underground for work to that special place where I break nails.  I showed the Collateral Damage from my last visit.  In terms of functionality, my nails are a bit long right now. This is a perfect time to show you more free edge shaping since I need to trim them slightly to prevent further catastrophe. Last time I did a post on shaping it was for a square shape, today it will be round/oval. If you are not sure what shape free edge is best for you check out my post on nail shape and balance. Nails Beautiqued has a similar post, but includes more shapes. There are some pretty options, but as she points out they weaken your nail plate since the require sidewall filing and I personally don't recommend them, especially if you want to avoid not only breaking your nails but also tears. However, if your life style allows it, by all means rock it!

My normal free edge nail shape is squoval and since the last shaping post I've been rocken the square. Unfortunately, it was making me feel like I had slight man hands.  You see, I have pretty large wide square palms and wide nail beds and fingers and I felt like the square nail shape was accentuating the butchiness. I must say, I was really looking forward to a change.

Lets start with some before and after shots. I have two fingers to show you.  First my pinkie.
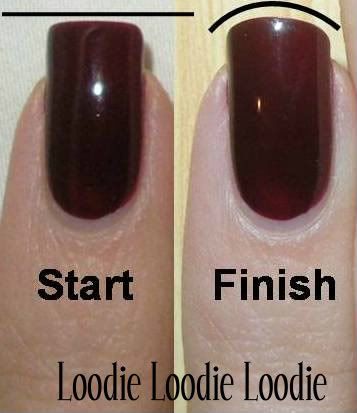


My pinkie has a higher arching C-curve and as a result the free edge is much easier to shape into a square. However, in my opinion, it's also much harder to shape into an oval or round. The degree of the convex shape (more oval or less oval and round like) that you can obtain will depend on your natural C curve. This was really as oval as I could get it. Some could even argue that this is squoval like. What ev's.
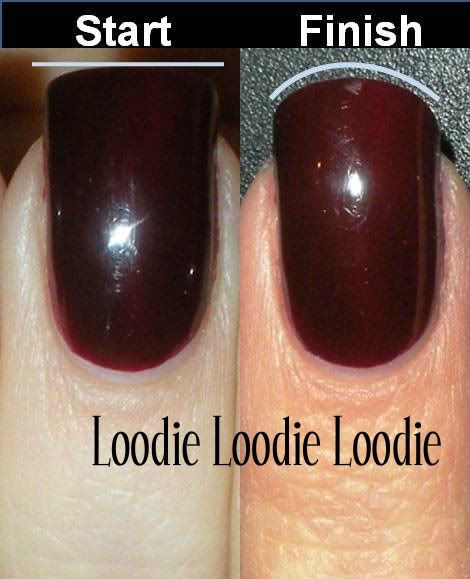


This is my ring finger. This finger slightly flairs at the free edge because the C-curve is not as high, therefore whenever I try to shape the nail into the square shape it looks slightly softer than my pinkie, pictured above. It was much easier to shape into the oval shape.

Before we begin, I suggest getting familiar with some nail file lingo. You must use the right file for the job to prevent damaging the nail plate, preventing peels and maintain the overall health of the nail plate. That post can be found here. It describes my preference and suggestions as well as explanations for the files I use, grit strength, etc. Furthermore, the following posts are helpful for general filing, and tips:
Taking down length
Shaping into a square


Lets start.
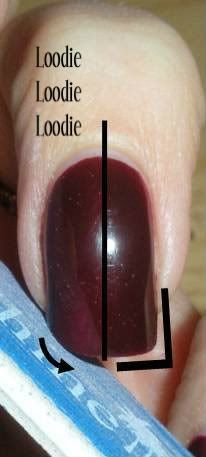


The oval and round shapes have no corners, duuh pretty obvious, so our first step is to eliminate them.  Again, depending on your own C-curve, this maybe be tedious or a piece of cake. The safe way to do this is to file from corner to middle as shown in the picture. Avoid the sidewalls close to where the nail tip grows.  You can find some pictures and an explanation for why in this post. To avoid this sensitive area, hold the file at a 45° angle to start, then sweep to the middle.  At the end of that sweep you want to maintain the file at a slight angle. If the file starts to go horizontal to the nail tip it will create a flat nail tip and will look like a squoval. Do each side separately and try to maintain the round/oval shape.  I prefer to do this step with a 220/320 file since my nails are fairly hard and thick. Use a 400 file if your nails are soft or thin. If you prefer a glass file then use it. 
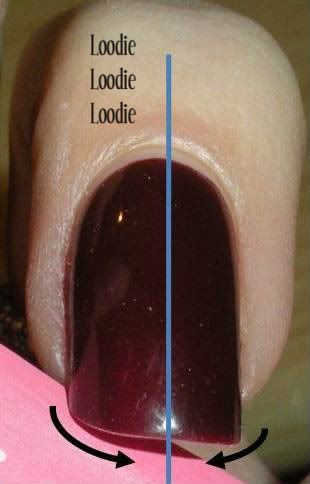


To further refine the round/oval shape, hold the file at a 45° angle again but this time get slightly under the nail free edge. This will further help to round free edge and get rid of any nail shavings. Use a 400/600 file to refine the shape.  The 600 grit file will also help seal the nail plate and prevent peeling or ripping the nail plate layers.
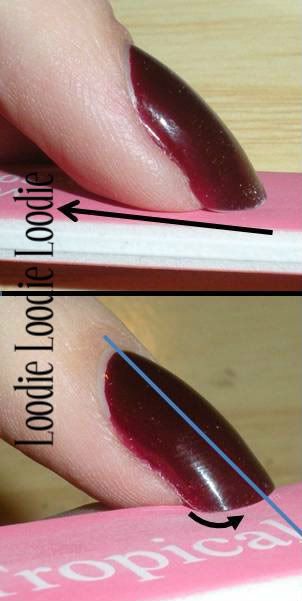


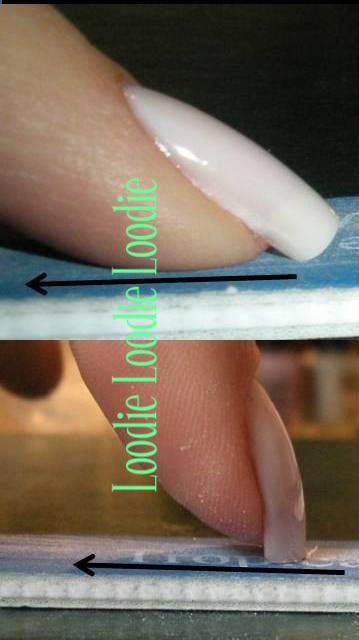
The 'nail shavings" I talked about in Ready, Set, FILE! - Square may also be prevalent here.   Here is how to get rid of them while maintaining the oval shape.

1. Place the nail on top of a file at a 45° to the file, as pictured.
2. File down in one direction.

Use 400/600 grit file for this.

Although these steps will help seal the nail plate, sealing is best done with the polish off and will be covered here

I realize this step is only useful if you have significant free edge to work with, otherwise just do the underneath sweep as pictured to the left, being careful not to injure the precious sidewall.

The 'ontop' nail shavings can be handled in the same way as in the square shape post.
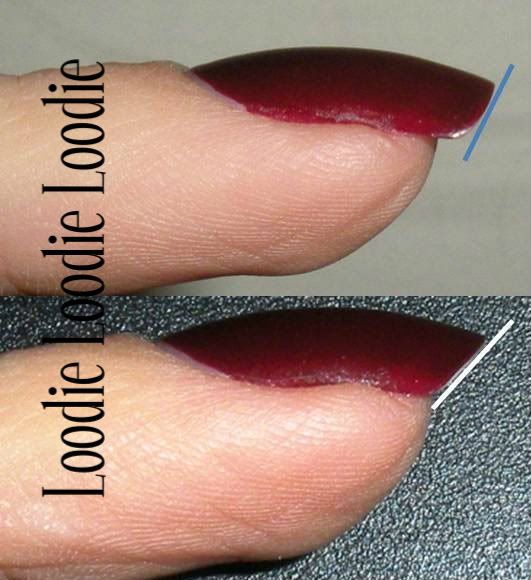


The higher your C-curve the more changes you will see in profile. Here is an example. The top photo is sort of a squoval shape, while the bottom is oval/round. The tip is more blunt in the squoval and pointier in the oval/round.

Now you are ready to take off the polish and seal the plate further!You can find that post here.


The next post in this series: Squoval!

Saturday, December 4, 2010

Nail Hardeners: Are formaldehyde based hardeners right for you?

I received an email recently from Cristina (from the MUA nail boards) that made me realize I needed to add some information to the Formaldehyde based Nail Hardener post. Check that one out first if you haven't already. The concern in this email was about the safety of formaldehyde based hardeners as well as whether it was the right hardener to use.

First safety:
Usually the amount of formaldehyde in these types of hardeners is 1-3% and they are ALL safe at this level. The only safety issue that I can foresee is allergy related, but at these low concentrations this is usually not a problem. It's a good idea, however, to avoid skin contact to prevent irritation. If you are allergic, so be it and avoid it altogether, before anaphylactic shock sets in ... yikes.

Since these hardeners are relatively safe, I think the next main concern is whether your nail condition needs this type of nail hardener.

Is Formaldehyde based hardener right for you: 
Each person considering a nail hardener needs to evaluate the condition of their nails at the moment. Are your nails soft or hard? Thin or thick? Peeling or cracking? Once you know where you stand you can decide if "formaldehyde based" is suitable for you.

What do I mean by soft or hard?
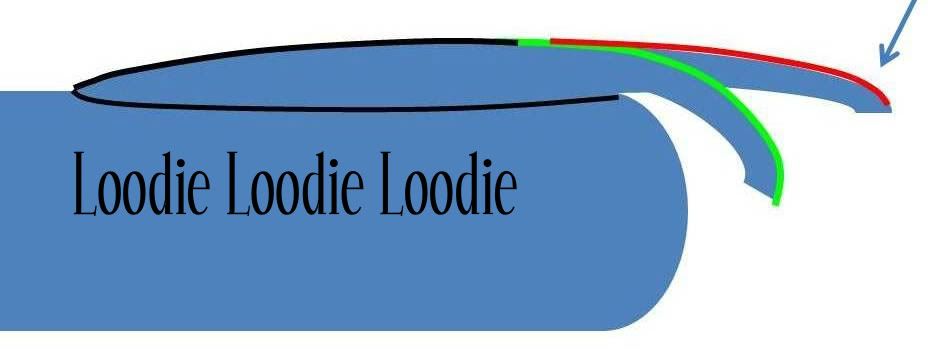
Are your nails really pliable? When you push down on your nails free edge does it bend easily without much resistance or pretty solid? Check out the schematics to help you determine the answers:


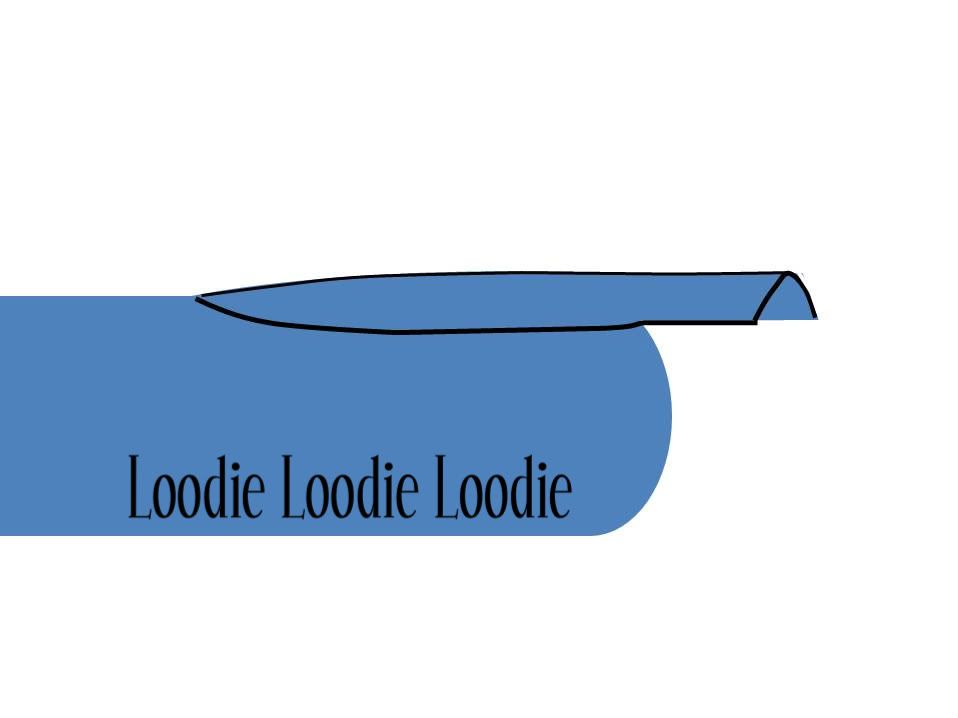
What? You don't have blue fingers? hee hee, I just realized the blue after I made it and it took forever so you'll just have to accept it.  Anyway, let's pretend this is a normal nail at rest.


If you can push down on your nails free edge and it bends easily without much resistance, like the green, they are probably soft. If they provide some resistance, like the red, they are hard. Of course you can have some variability and call it something in between. This is just a guide.


What do I mean by thin or thick?
Pretty self explanatory, I hope.

What do I mean by peeling or cracking?

This shows peeling. (thanks to google)


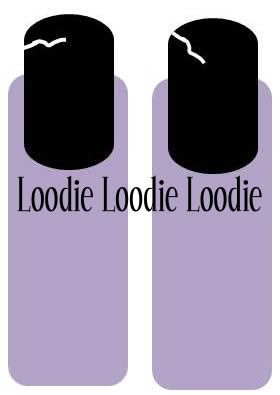
This is cracking.

I couldn't find a good picture of cracking so this schematic will also have to do. I hate cracks that happened horizontally below the free edge, big ouch. I will put a link here soon, about my preferred method of fixing such a catastrophe. 


Formaldehyde based hardeners are best for soft, peeling thin nails. Your nail plate is made up of a protein called keratin. Keratin is fibrous and has naturally occurring cross linkages between the filaments. Formaldehyde reacts with the keratin in your nail plate and increases the cross linkages between these fibers. As a result, the nail plate becomes harder. These linkages prevent peeling by linking more of the nail plate layers together and makes the nail plate thicker (imagine how thicker those nails in that picture above would be if the nail plate was all fused together and not sloughing off).

There is nothing wrong with formaldehyde based hardeners, as I have already mentioned in the last post, but too many cross links in the keratin causes nail plate brittleness. Some brands have higher concentrations of formaldehyde than others (usually these are trade secrets) and overuse can cause brittleness; therefore, I generally suggest intermittent use of these types of treatments. That way you can get the desired hardness, then back off so the nail doesn't get too brittle. 

If your nails are cracking this could be a sign that your nails are already hard (with plenty of cross linkages in the keratin) but lack flexibility. A formaldehyde based hardener may not be a good idea. Instead, a good moisturizer (oil/balms/butter/cuticle creams) needs to be used frequently throughout the day. A different type of treatment should probably be considered if moisturizing alone doesn't do the trick. More on that in a later post.

If you have thick nails I give you a high five. Nothing wrong with that, except make sure its not some underlying fungus condition. Otherwise, the only down side is more work filing.

If  another combination describes your nails condition, for example: soft and dry (I would imagine this on thin problem nails), then another treatment or combination of treatments may be right for you. I will cover this in greater detail as I go through the different treatments in the series.

A few final words. Whichever treatment you choose, keep in mind that they all takes time to see results. The damaged nail plate has to grow out and the new treated nail plate will eventually surface. The nail plate may take a full six months to grow out from the cuticle to the nail tip.

I hope this addition is helpful to the series.

Edit: There is a difference between formaldehyde and formaldehyde resin.  That post can be found here.

Next post : Protein Nail Treatments


The complete series:

Categories of Hardeners and Formaldehyde
Are Formaldehyde Hardeners right for you?
Protein Based Hardeners
Formaldehyde + Protein Based Hardeners
Formaldehyde or Protein Based Hardeners + Moisturizers
Fluoride Based Nil Treatments Part I
Fluoride Based Nail Treatments Part II 
Dimethyl Urea Base Hardeners 
Nail Conditioners Post or Video Review of DermaNail
Formaldehyde vs. Formaldehyde Resin 

Thursday, December 2, 2010

Off with the Red! (minus the bloody looking fingers)

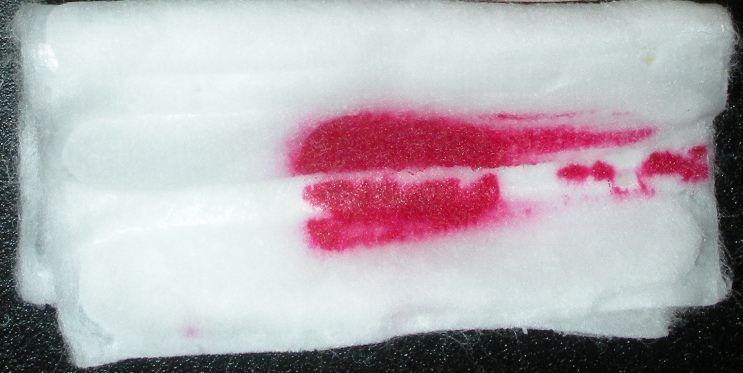
The perfectionist in me is not happy. I was frankening a little last night and slightly messed up the blood red perfection that was Revlon's Valentine. Nothing traumatic otherwise it would have come off straight away, but enough that I was itching all day at work to go to a near by lab and attack the acetone bottle. I decided to wait since then I would have to walk around with naked nails, which you wouldn't catch me dead with. Besides I wanted to show you how to remove dark polishes without leaving your fingers a mess, in my case a bloody mess.

What you will need:
1. Either a cotton pad, felt pad, or a cotton round that you have unrolled and flattened. 
Surface area is key to keeping your fingers and cuticle area polish free while removing it.
2. Nail Polish Remover - preferably acetone.
I prefer acetone because it is quick and safe (contrary to what many believe, think or whatever). Simple truth is, it is one of the safest solvents, second only to water, for nail care use. Due to its low boiling point, it evaporates quickly and therefore barely has the capacity to penetrate skin. Furthermore, even if you soaked your nails in acetone (lets say to remove acrylics, gels, etc.) the amount of acetone that does makes it into your blood stream is at very safe low levels with respect to health standards. Non-acetone removers can often times be even worse for you.  They are just as drying and not as effective at dissolving polish and thus force longer exposure times to your skin and nail. If you are bothered by how dry acetone makes your hands you have several options, buy a moisturizing acetone based polish remover, add glycerin to your acetone, or moisturize with oils or balms before and after use.  If you are interested in a making your own moisturizing remover, put on your goggle and read this post.  However, beware that you must clean the nail surface before applying fresh polish, otherwise the glycerin/oils/waxes/etc may interfere with polish adhesion.  Okay enough ranting....these are the steps I take to remove dark polish.


Steps to non-bloody looking cuticles and fingers
1. Place acetone on pad and soak well.  Not dripping, but don't be stingy either.
2. Place pad on finger covering way past the cuticle area. 
3. Let the pad sit for 5-10 seconds while you press down on the nail. I can't show you the pressing part since I have to take the darn picture, so use your imagination.
    

4. Pressing firmly swipe down and only down! You can shimmy side to side slightly, but you don't want to move up and down and get the polish on your finger.You may have removed all of it or just partially.
5. Obviously, I have a big ol' strip still left so I just flip over the cotton pad and repeat steps 2 - 4 on that same nail. You can continue to unfold and reveal the clean parts of the pad to further avoid polish on your fingers. 
6.  If you get any polish on your skin remove immediately with a clean part of the acetone soaked pad.
If you plan on polishing after this you can move on to that step now. Or you can moisturize first, do some cuticle work, and then clean the nail plate again before polishing.  Those steps will be covered in detail in another post.

Next post - Nail Hardeners: Are formaldehyde based hardeners right for me? 

Wednesday, December 1, 2010

In a pinch

I always stress moisturizing the cuticle area and nails because, in my opinion, this is one of the most important factors in nail health.  By balancing nail hardness with flexibility we can help eliminate peeling, cracking, breaking and promote healthy long nail growth.

It's good to keep some sort of nail moisturizer within reach where ever you happen to be.  Home, work, bedside, book bag, purse, jacket pocket, you get the picture.

One day I was on a long car ride and threw my bag and jacket in the trunk.  My nails were feeling really dry and I was suddenly in a real pinch. What to do???

I checked my jean pockets and found chap-stick.


I said what the hell lets check out the ingredients!
They are:
Ethylhexyl Palmitate, Ceresin, Beeswax, Squalane, Jojoba Oil, Shea Butter, Sweet Almond Oil, Vitamine E, Phenoxyethanol.

I have to admit, I had no idea what the first two and last ingredients were, but my thought was if they are okay for my mouth, they were more than okay for my fingers. I was very familiar with the other ingredients as either moisturizers or moisture sealants, so I didn't hesitate any further. I scraped some off and went to town.

For any other nerds out there, I later found out that ethylhexyl palmitate is used primarly as a solvent/carrying agent/emollient, Ceresin is a wax, and Phenoxyethanol is used to kill bacteria.

What a great substitute in a pinch, but not a replacement for a good moisturizer as I have discussed previously.

Monday, November 29, 2010

Ready, Set, FILE! - Square

This post will show how to file the nail free edge into a square shape. Obviously free edge is necessary, but the more the better because otherwise the nail corners maybe somewhat round.  However, if you keep at it you can eventually get sharp corners (that is if you want it).

Previously, I went over how to take down nail length and files, so you may want to visit those posts, there are some good tips. If you are not sure if square is right for you, the post on nail shape and balance may be helpful.


Nails with a high arching C-curve can easily achieve this nail shape and require the least amount of filing. If your C-curve is not as arched you may need more length or work on the side walls to achieve this look. I have to warn people, however, about messing with the side walls of their nail bed. I have found it is vital to nail strength so I discourage people from filing it, but if you must I have a few tips.


Before you begin you need a proper file.  I already posted on what I prefer and why so I suggest you check it out before you read on.  In general, a file with a grit strength of  320/400 will work for shaping.

Here is a before and after picture.


The before nail is some what squoval and we are going for a square nail shape.

I think this nail shape is the simplest for high arching C-curves because you only need to file straight across. Keep the file straight and steady in the horizontal direction (to the nail bed) until it is square enough to your liking.


I do have a few tips.

If you are filing in a horizontal direction, either sawing away with the proper grit file or in one direction, you will eventually end up with "nail shavings."


There may be shavings under the nail or on top as shown in the pictures.  We need to eliminate them to have both a clean look as well as to help seal the nail plate.


To get rid of the "on top" nail shavings:

1. Start the file flush with the nail bed
2. In one sweeping motion, of down and around, move the file 270° around the nail tip.


To get rid of the "under" nail shavings:


1. Place the nail at either a 45° angle OR 90° angle to the file.
2. File down in one direction.

Either will work depending on how square you want it. The 45° angle will give you a softer square look, i.e. rounder edges.


Although these steps will help seal the nail plate, sealing is best done with the polish off and will be covered in another post.  


Another way to soften the square shape is to take a finer grit file (320 or 400) and file from the corner to the center of the nail bed as shown in the pictures.  You can see the nail looks slightly more round on the right.  Now we are getting into the realm of squoval, and that will be another post.


Now a few words (and pictures) about filing the side walls of your nails beds.


If you are going to file the side walls, do not do it like this. Filing this way can injure the cuticle, skin and weaken the nail walls where a good bit of strength lies.


Here is a picture of one my nails. I used to have trouble with splitting and breaking right at the edge. The more I would file the side the more breaks I would get. The nail would crack before I could grow it very far from the free edge. Keeping that side wall intact (along with other things I will link here soon) eliminated that problem.

So is there a "safe" way to file the side wall? 


If you must file, to even something out, make sure the file only hits the free edge and lies at least at a 45° angle to the nail side wall. Be very gentle and light handed. Use a high grit of at least 400 to be as gentle as possible. (Ignore that I have a 320 file pictured, its for demonstration purposes only.)


Video version of the square shape can be found here.


If you have any questions or comments please let me know.
Now I have to grow my nails a bit so I can show you Oval and then file back to Squoval!

Other posts about filing:
Files
Nail Shape and Balance
Taking down Nail Length
Oval Post and Video Post (to be linked)
Squoval
Sealing the nail plate

Saturday, November 27, 2010

Roy G Biv!
Color Club's Revvvolution ..... so good it has 3 v's

I don't know where my brain or eyes were during the whole holographic craze (Oh I know, deep into Quantum Mechanics falling in love with Schrodinger's Equation and his awesome particle in a box!), but lucky for me I just discovered it some 3 months ago and let me tell you we're in the honeymoon phase. 

Okay enough dork talk, let's get to the pictures.


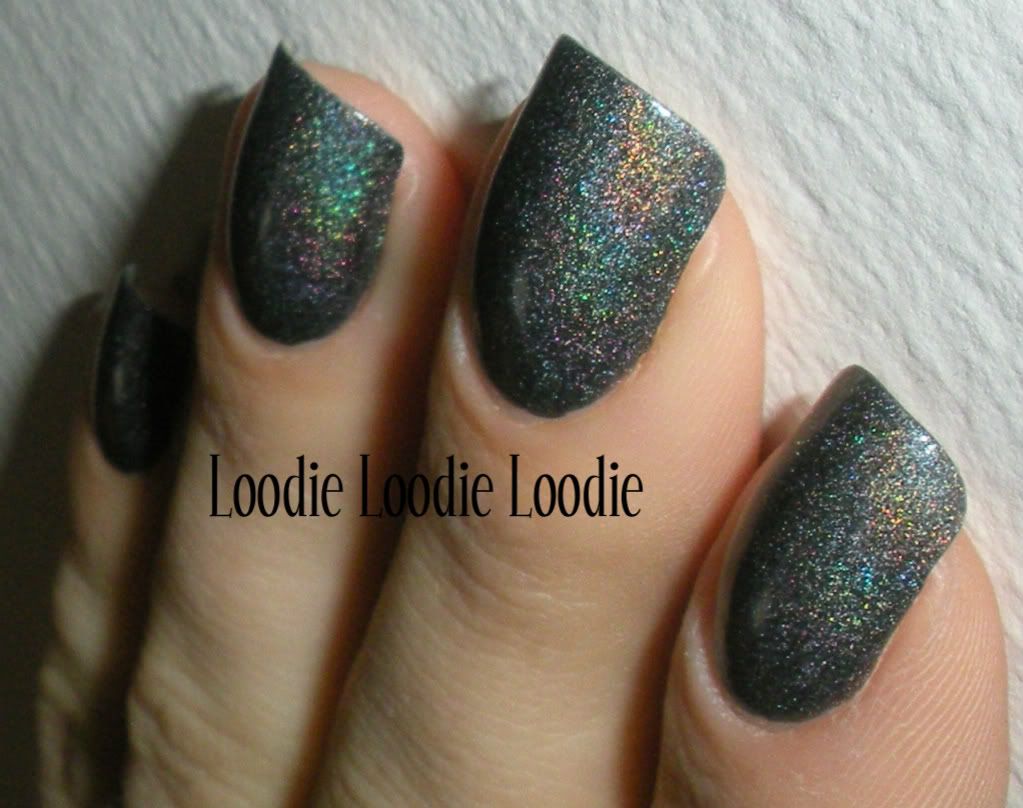
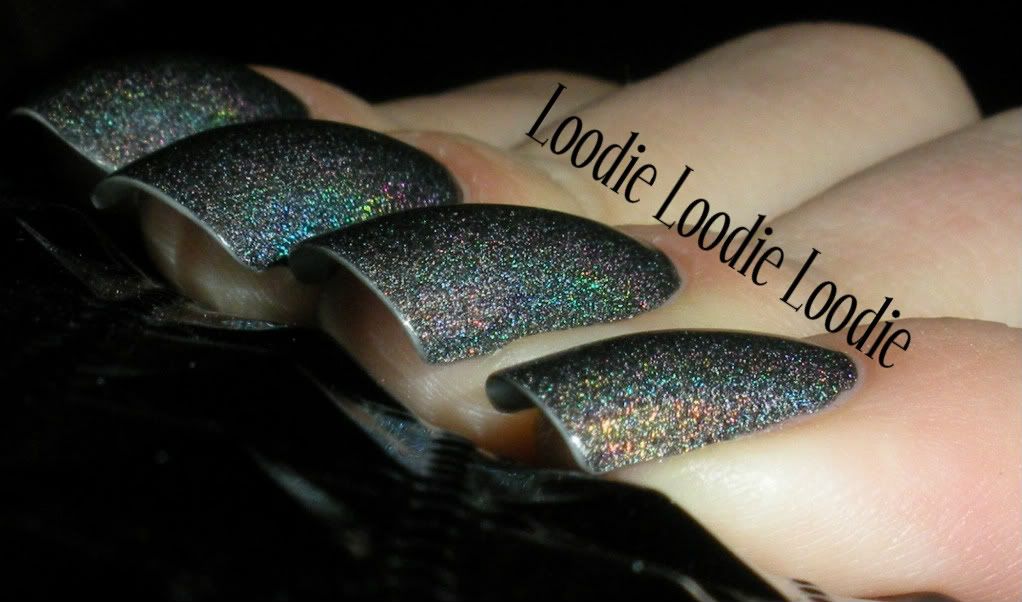
Where have you been all my life.  This baby goes on like a buttery dream.  The consistency is thick but very smooth.  It just glides on.  Because of the thicker formula its really easy to control.  It dries to a semi suede finish and a shiny topcoat may dull the holo effect.  However, even with topcoat, it still works magic in sunlight.


Look at it carefully and you will notice
Red, Orange, Yellow, Green, Blue, Indigo, Violet


Sun light is pretty hard to come by in my apartment.  Here was a sliver, but I couldn't get it very well.


The flash will have to do.


Here is one really close up from a wear test I will do on Revvvolution, so excuse the tip wear.

The ear test for Color Club Revvvolution can be found here.


ME LIKEY.

Thursday, November 25, 2010

Other rules to live by

Big Nail No No's

Just a round up of nail NO NO's, some already mentioned, but will be re-mentioned because they are important.

1. Soaking nails in water for long periods of time.

When your nails are submerged in water for long periods of time they tend to absorb a lot of it.  This causes the nail beds to soften and swell up a bit.  If you have any curving in your nails, you will notice after a long shower, they will become wider and un-curve a bit.  Your nails are at their weakest at this point so treat them kindly and do not do #2, attempt to file or apply polish!  Eventually your nail will dry up and harden.  However, as they dry, if you do not seal in some moisture, your nails can become very dry and hard and even become brittle.  Furthermore, as you can imagine, iterations of this wet/dry cycle can cause further peeling and breaking since the nail plate layers have weakened and can become separated.

Moreover, adding very hot water to this whole cycle makes things even worse.  So, what does this mean ... No dishes!....that's what men are for.  If one of those is not around, buy a nice pair of rubber gloves.  Same goes for heavy duty house work.  Gloves are your friend.  This does not mean "don't wash your hands."  What this does mean is, keep your hands clean with soap and water as needed and moisturize immediately after.

Proof of concept (via pictures) can be found here.

2. Nails are not tools .... anymore.

Yes, a nails job was once to provide aid and help with everyday tasks in the jungles or where ever we came from (again a bio expert I am not).  But, we have since evolved and developed tools to replace nails.  Long nails further developed (ca. Ming Dynasty) as a symbol of  wealth, attesting to a lack of manual labor.  I have found that using nails as tools is the easiest way to promote peeling, chipping and breaks.  Avoid at all costs!

Example: The following tutorial shows how to peel an orange (or other fruit with a rind) without using nails!


a. Get yourself an orange and hold it in one hand.
(I believe I am showing a tangerine.)


b. Get yourself a spoon and hold it in the other. (maybe not so butch like)


 c. Bring them together.


d. Pierce the fruit with the spoon.


e. Separate the rind away from the fruit, working back and forth in a sawing motion.


f. Eventually the rind will become loose and you can easily grab it and pull it off the fruit.  Don't forget to also handle the core with the spoon.

Yay, nails saved!


Or you could just get a knife and cut it up.
 
By the way, teeth should no longer be used as tools either, at least only for things like opening soda cans, because after all a girls gotta eat.  A spoon (or knife or fork) is also great for opening a soda can.  Try it, and tell me if it works for you.

3. Using too rough of a file (low grit). Discussed in greater detail here.
4. Don't cut the wrong "cuticle". Discussed in greater detail here.
5. Don't ignore nutrition or illness. Nail treatments are not a substitute for underlying medical conditions.
6. Don't avoid moisturizing your nails.

If you have any you want to add, please comment and I will add them.

Tuesday, November 23, 2010

Nail Hardeners

The wonderful world of nail treatments.  Boy back in the day this was it for me.  I loved trying new products,  but since I was a tween/teen/young adult without moola, I would buy one treatment at a time.  I used to save my lunch money, yes we are talking starving for nail polish, and stand in the makeup isle at Wal-mart/CVS/Sally's for hours, reading each and every bottle over and over (ingredients, claims, etc) trying to decide which product would be magic to my nails.  I always used up every bottle and often repurchased to see how and if the ingredients did their magic.  I wanted to know what each ingredient did.  What a weirdo, I know, but now I can tell you what I learned.

I think one of the biggest questions out there is, what is the best nail hardener?  The answer is not a simple one, but this series of posts will try to rationalize the possibilities. This entire series assumes your overall health is good, because no topical nail treatment can help you if you have some underlying illness.

Another very important factor to remember is that nail hardness is not the same thing as flexibility. Hard nails are great because they are strong, but there is such a thing as over hardening the nail plate. The harder that your nails get the more brittle they become. The nail plate must balance both characteristics, hardness and flexibility, to retain health, stability, and length. We can balance the hardness with nail flexibility by moisturizing and taking a break from nail hardeners intermittently if needed (that depends on the type you use)! Furthermore, you will find the healthier the nail plate the longer you nail polish will last (that is if you want it to).

There are, in my mind, only 6 categories of nail hardeners because each category of nail hardener works in essentially the same way.

1. Formaldehyde based - this post and here.
2. Formaldehyde free, protein based
3. A mix of #1. and #2 ... post here.
4. There are three subcategories: post here.
a.) #1 with conditioners, b.) #2 with conditioners, or c.) #3 with conditioners: all here
5. Fluoride based, Part I and Part II
6. Dimethyl Urea based
....................................................
7. Nail Conditioner - DermaNail ( or NeoCeuticals Nail Conditioning Solution)
Video Review for DermaNail

#7 is different, I have not encountered anything else like it on the market.

I would encourage everyone to start reading the ingredients of all your nail products, especially nail treatments, so that you can eliminate similar class products that have not worked for you.  I will take you through the different categories and how they work.  Although, I may mention a few brand names from each category, I do not favor any, rather I favor categories. Personally, I like #2, #5, and #7.
 
Formaldehyde based nail hardeners:

Your nail bed is comprised of a protein called keratin. This protein has naturally occurring cross linkages which give nails their hardness.  However, not enough cross-links and the nail is very flexible and lacks strength.  One way to create more cross-links in keratin is with the use of formaldehyde.

Formaldehyde based nail hardeners are the most common type of nail hardener and contain 1-3 % formaldehyde. (Note: Formaldehyde is not the same as Formaldehyde Resin) Formaldehyde reacts with keratin and creates more cross-linkages.  Bottom line - they work. However, I have two main hang up's with this category.

1. Overtime and overuse of formaldehyde based hardeners causes the keratin to form too many cross-links and as a result the nail becomes very hard, looses its flexibility and becomes brittle.

2. Formaldehyde is a skin irritant and overtime people can build up an allergy.  Skin contact should be avoided.

Overall, these hardeners work, but should be used intermittently to avoid brittle nails and possible worsening of your nail's condition (i.e. more chipping, peeling, etc.). And as always, moisturizer should play an important role in nail maintenance.

EXAMPLES: Do check ingredients to make sure formula's didn't change!
- Nail Tek is a popular brand that salons may recommend
- OPI makes Nail Envy
- There are many many more! Pretty much each brand name has one.
- I have also seen nail hardeners (off brand) at the dollar store, just check the ingredients.

Next up: Are formaldehyde based nail hardeners right for you?

Sunday, November 21, 2010

A nice bloody red for the holidays!

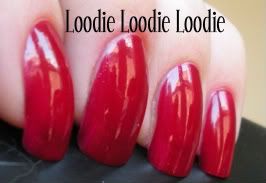
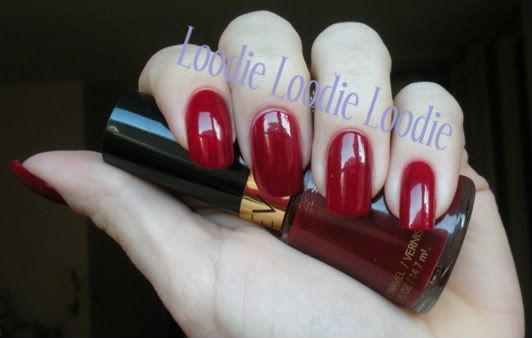
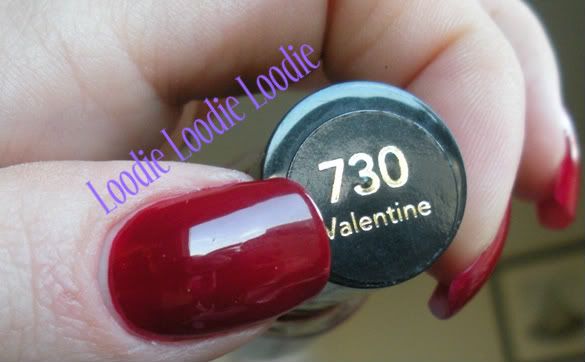
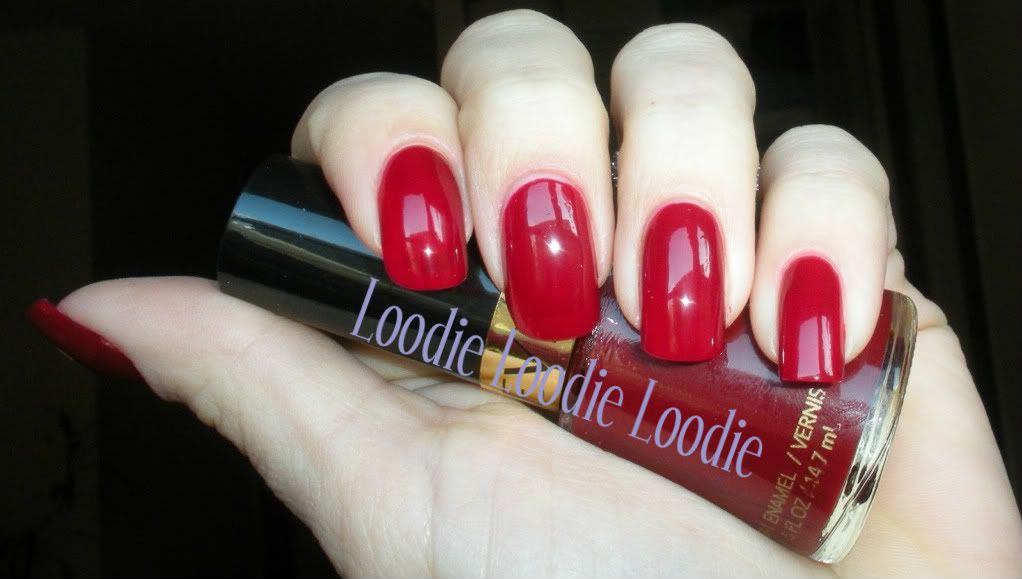
I have been looking for a nice red to fit my skin tone for the holiday's.  CVS was having a nice sale on both L'Oreal and Revlon products so I scooped up Revlon's Valentine (730) and Perplex (826) and L'Oreal's Lady Luck (450) and Caught Red-Handed (470).  Perplex is obviously not red, but I had to see what all the hoopla was about from the MUA nail boards.  Today I am going to show Revlon's Valentine.

Revlon Valentine


Base: Sally Hansen Salon Nail Lacquer in clear (x1)
Color: Revlon Valentine (730) x3
Top: None

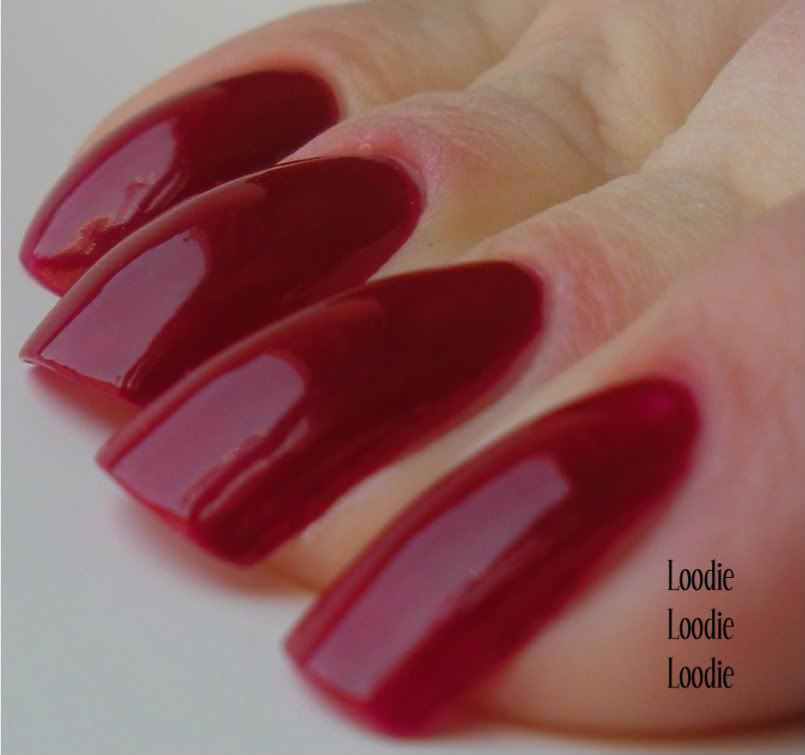
What a sweet jelly like polish.  I love the darkness of this red.  It feels really rich.

Three coats was just about opaque.


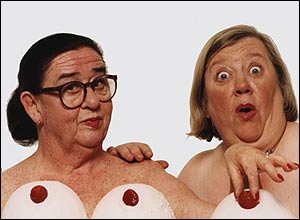
When I first put this color on I felt slightly like an old lady, a la the two fat ladies (especially Jennifer), but I like it a lot!


Here is a picture with flash

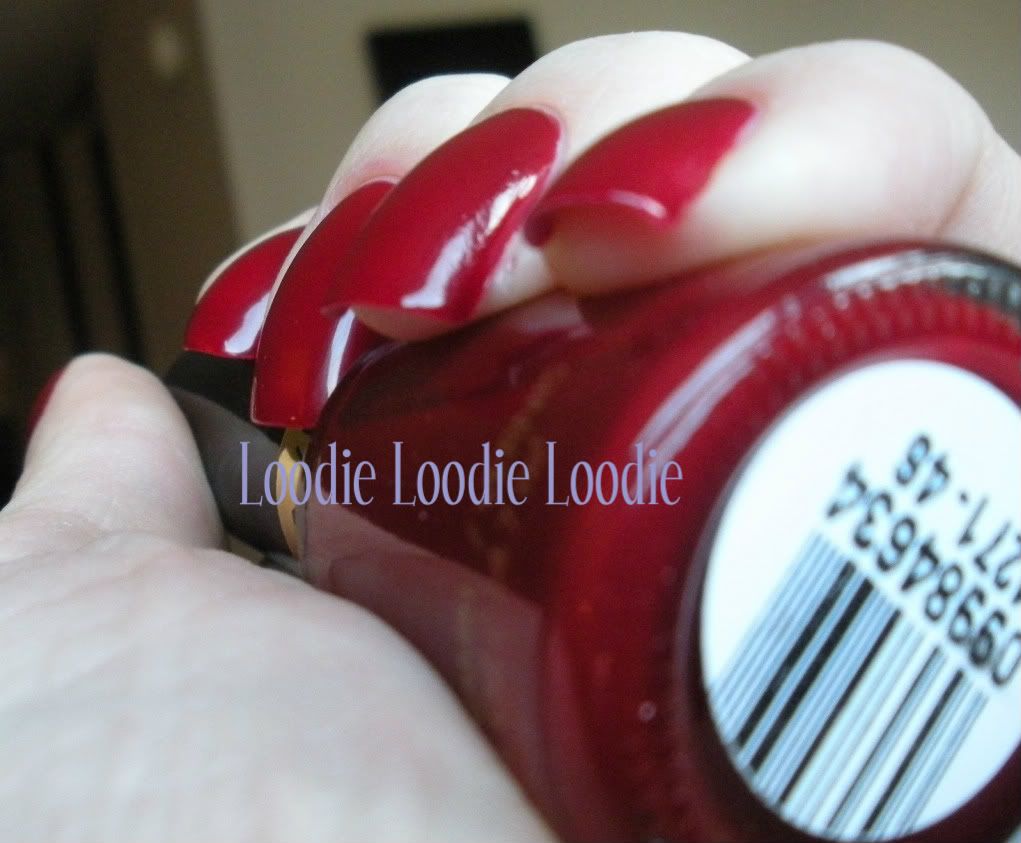
Its hard to catch the true color with camera, but these are pretty close.


 Here is a picture with only two coats.  This is still a very nice color but there is some obvious nail line.


Here are a few more:


With flash.


Without flash.
My skin looks a bit washed out, but the color is more accurate.


In terms of application, it went on fairly streak free.  My only problem (with Revlon in general) is that sometimes if the coat is too thick or applied too soon over a previous coat, I get tiny bubbles.  Thin coats are key with ample dry time in between since I don't favor fast dry topcoats.  Top coat was completely unnecessary because the formula was soooo shiny/glossy.  I will however put on a topcoat every day (or other day) to make the mani last.


I hope everyone has a bloody good holiday!
What's your favorite red?

Removing dark colors is a pain. Here is how to do it neatly.

Friday, November 19, 2010

Are you a cutter?!

To cut or not to cut cuticles?  That is the question.  This question always seems to divide the MUA nail boards and raises up a storm of answers. 

I feel like one day we might battle .... the cutter's in one corner, ready to slice em and the non-cutters in the other corner ready to spray with cuticle remover.  How can we end this controversy??!!  Dare I say it ... I think I have an answer to make both parties happy ... but, it's not a short one.

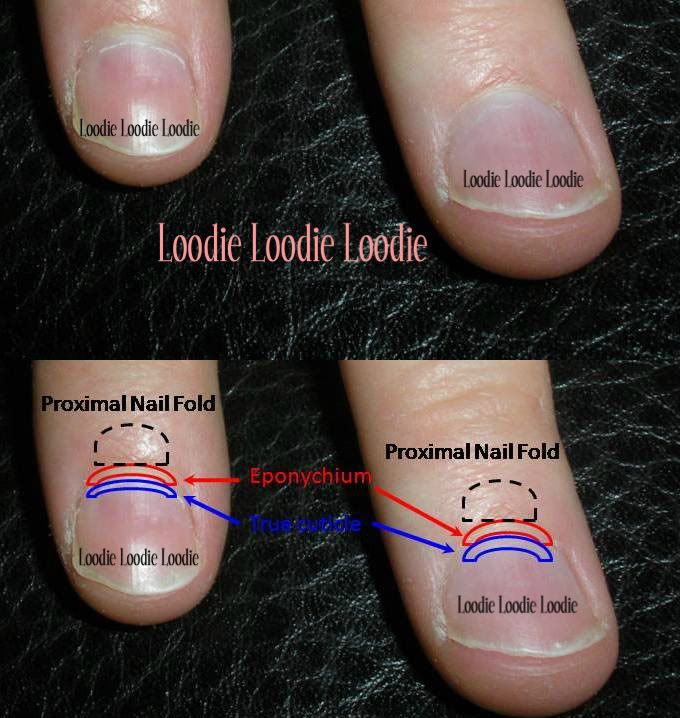
I think there is a lot of misinformation or misunderstanding out there.  The bottom line is, the normal person either doesn't know or understand nail anatomy and wrongly identifies the "cuticle".  So lets all get on the same page.  The graphic below shows some nail parts.  We only need to concentrate on a couple terms at the moment.

The cuticle is comprised of living and dead tissue. There are two thin skin strips between the nail tip (distal edge) and the proximal nail fold. The skin strip closest to the proximal nail fold is called the eponychium and is alive, while the skin that grows on the nail plate is dead and is considered the true cuticle; it is located right underneath the eponychium.  So, just to summarize and finally clear the air, when we refer to the cuticle we are referring to the "true cuticle" (dead tissue) and not the "eponychium"  (live tissue).


Warning: Google image eponychium at your own risk ... it's mega gross!

With that said, it is completely safe to remove the dead cuticle (true cuticle).  Notice I said "remove" and not cut.  You should choose which ever method you are most comfortable with. 

It's no fun unless we have real pictures of fingers so, lets take a look of what to expect on your own fingers.

My husband was nice enough to be provide his nasty fingers for today's viewing.  Yes, I said nasty.  He won't let me fix them, so the consequence is of course name calling. 


The top image shows just the fingers and the bottom has all the parts labeled.  Look at the finger on the top left, I have slightly pushed back the true cuticle so you can see it (clearly more crusty white).  If you look very carefully to the finger on your top right you may just be able to see the true cuticle.  The true cuticle can be pushed back all the way to the eponychium, removing it thereafter can be done by trimming or with a cuticle remover.

Do your own research online and check out your own fingers.  If you are unsure about what is what, go to a reputable manicurist and get a manicure. (I stress reputable!)  I am sure they would be willing to show you where your cuticle is since this is what they learned in school.    

A couple of points I want to make:

1. Cutting the true cuticle is fine as long as you are confident in what you are trimming off.
2. Cutting the eponychium (or any live skin) can lead to infection, not to mention ragged cuticles.
3. Not everyone needs to cut their cuticles, this depends on what they have going on down there. Sometimes a cuticle remover is all that is necessary.
3. Simply pushing back the true cuticles would be a good start.  AND don't forget to moisturize!
 
I will eventually post how to remove cuticles both by cutting/trimming and with a cuticle remover.  Stay tuned!

Post about using cuticle remover can be found here.

My final words of caution .... Be careful before you start cutting away or you may end up like some of those Google images for eponychium .... gross!