I must travel back underground for work to that special place where I break nails. I showed the
Collateral Damage from my last visit. In terms of functionality, my nails are a bit long right now. This is a perfect time to show you more free edge shaping since I need to trim them slightly to prevent further catastrophe. Last time I did a post on shaping it was for a
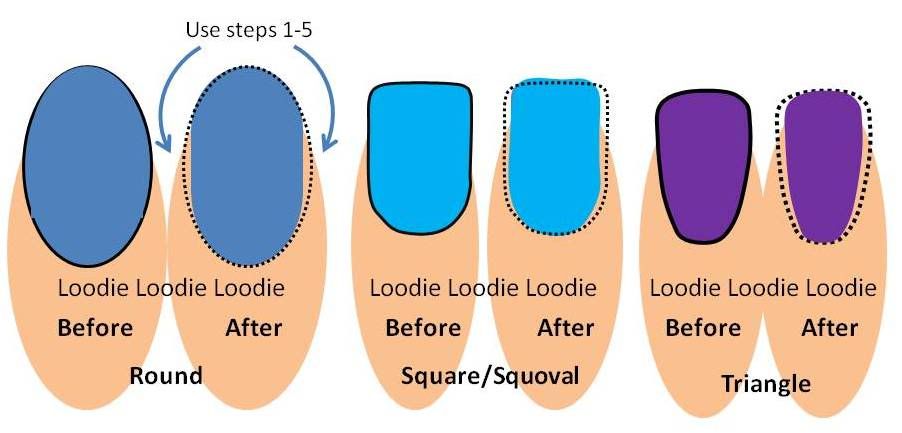
square shape, today it will be round/oval. If you are not sure what shape free edge is best for you check out my post on
nail shape and balance.
Nails Beautiqued has a similar post, but includes more shapes. There are some pretty options, but as she points out they weaken your nail plate since the require
sidewall filing and I personally don't recommend them, especially if you want to avoid not only breaking your nails but also tears. However, if your life style allows it, by all means rock it!
My normal free edge nail shape is squoval and since the last shaping post I've been rocken the square. Unfortunately, it was making me feel like I had slight man hands. You see, I have pretty large wide square palms and wide nail beds and fingers and I felt like the square nail shape was accentuating the butchiness. I must say, I was really looking forward to a change.
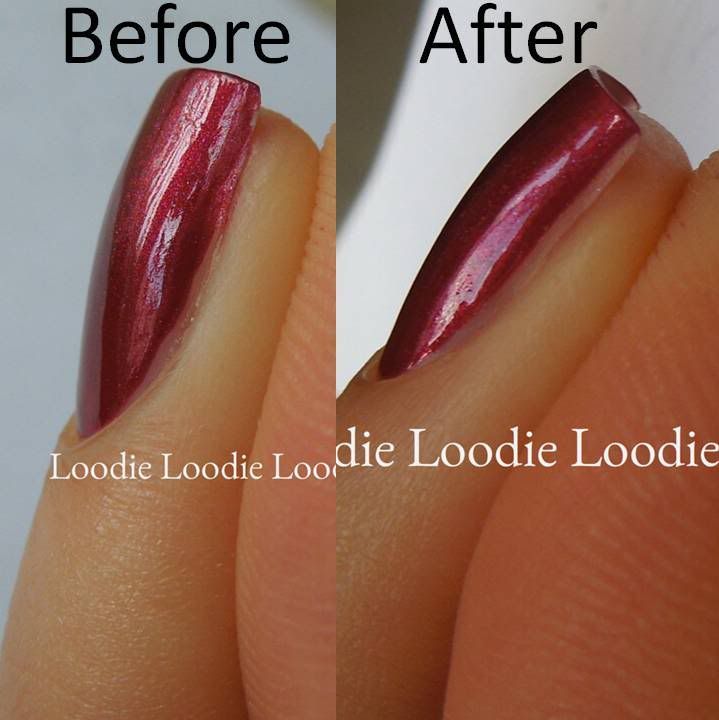
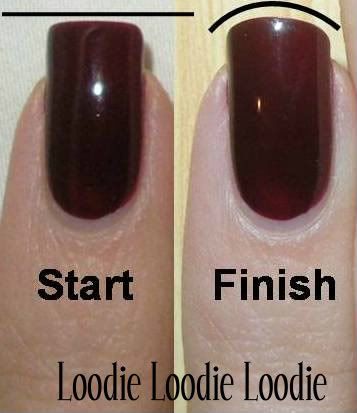
Lets start with some before and after shots. I have two fingers to show you. First my pinkie.
My pinkie has a higher arching
C-curve and as a result the free edge is much easier to shape into a
square. However, in my opinion, it's also much harder to shape into an oval or round. The degree of the convex shape (more oval or less oval and round like) that you can obtain will depend on your natural C curve. This was really as oval as I could get it. Some could even argue that this is squoval like. What ev's.
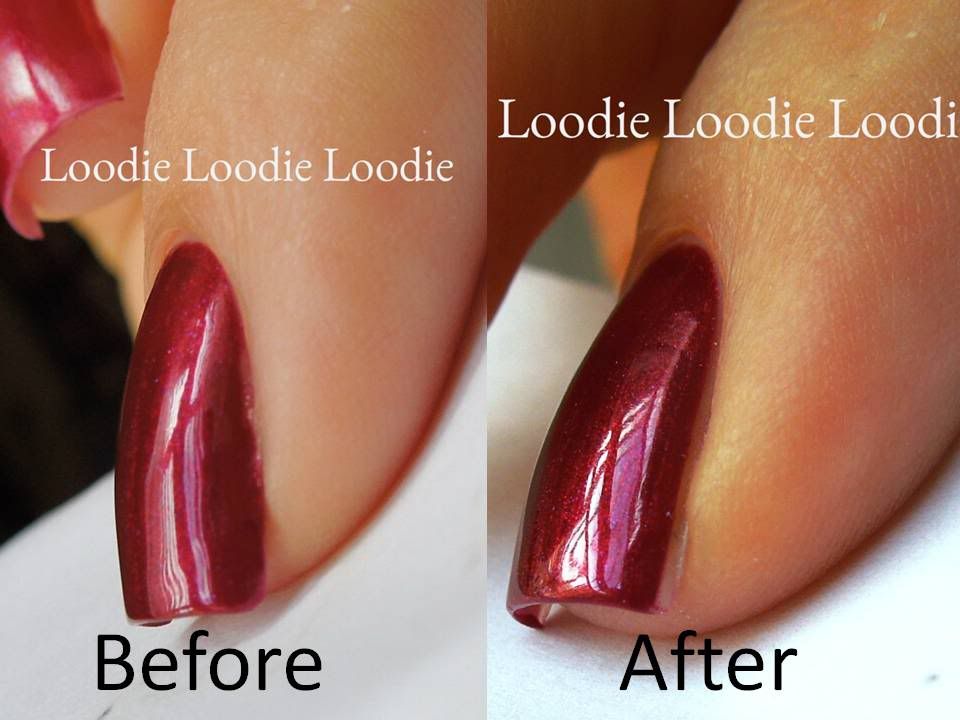
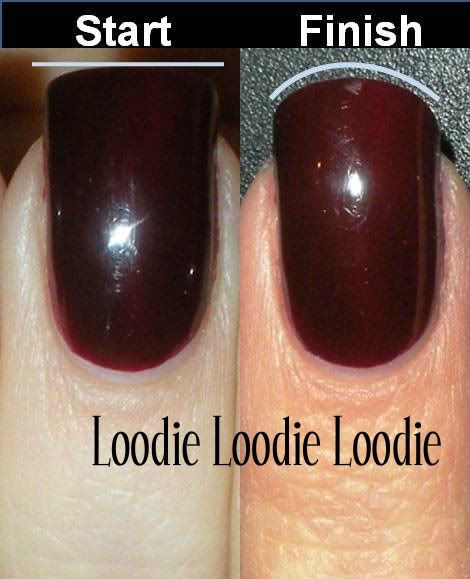
This is my ring finger. This finger slightly flairs at the free edge because the
C-curve is not as high, therefore whenever I try to shape the nail into the square shape it looks slightly softer than my pinkie, pictured above. It was much easier to shape into the oval shape.
Before we begin, I suggest getting familiar with some nail file lingo. You must use the right file for the job to prevent damaging the nail plate, preventing peels and maintain the overall health of the nail plate. That post can be found
here. It describes my preference and suggestions as well as explanations for the files I use, grit strength, etc. Furthermore, the following posts are helpful for general filing, and tips:
Taking down length
Shaping into a square
Lets start.
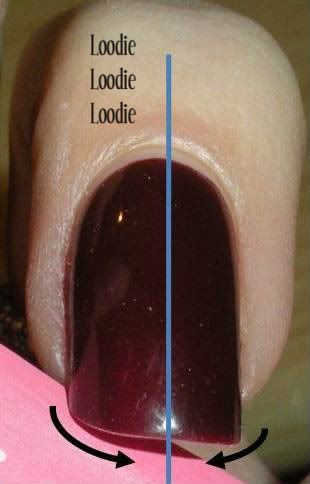
The oval and round shapes have no corners, duuh pretty obvious, so our first step is to eliminate them. Again, depending on your own
C-curve, this maybe be tedious or a piece of cake. The safe way to do this is to file from corner to middle as shown in the picture. Avoid the sidewalls close to where the nail tip grows. You can find some pictures and an explanation for why
in this post. To avoid this sensitive area, hold the file at a 45° angle to start, then sweep to the middle. At the end of that sweep you want to maintain the file at a slight angle. If the file starts to go horizontal to the nail tip it will create a flat nail tip and will look like a squoval. Do each side separately and try to maintain the round/oval shape. I prefer to do this step with a 220/320 file since my nails are fairly hard and thick. Use a 400 file if your nails are soft or thin. If you prefer a glass file then use it.
To further refine the round/oval shape, hold the file at a 45° angle again but this time get slightly under the nail free edge. This will further help to round free edge and get rid of any nail shavings. Use a 400/600 file to refine the shape. The 600 grit file will also help seal the nail plate and prevent peeling or ripping the nail plate layers.
The 'nail shavings" I talked about in
Ready, Set, FILE! - Square may also be prevalent here. Here is how to get rid of them while maintaining the oval shape.
1. Place the nail on top of a file at a 45° to the file, as pictured.
2. File down in one direction.
Use 400/600 grit file for this.
Although these steps will help seal the nail plate, sealing is best done with the polish off and will be covered
here.
I realize this step is only useful if you have significant free edge to work with, otherwise just do the underneath sweep as pictured to the left, being careful not to injure the
precious sidewall.
The
'ontop' nail shavings can be handled in the same way as in the
square shape post.
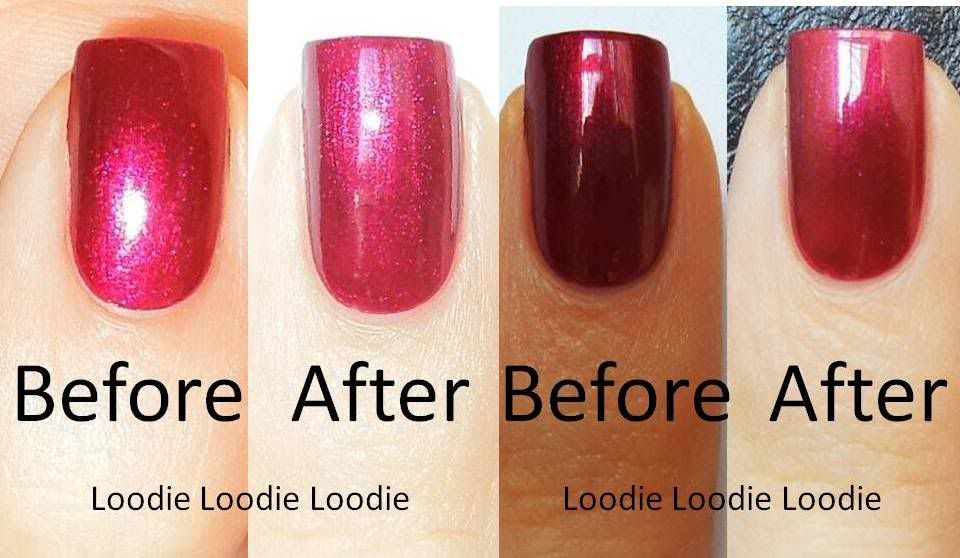
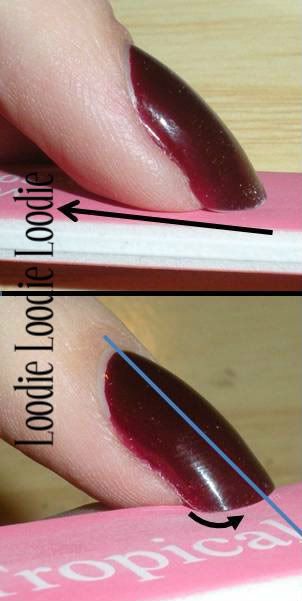
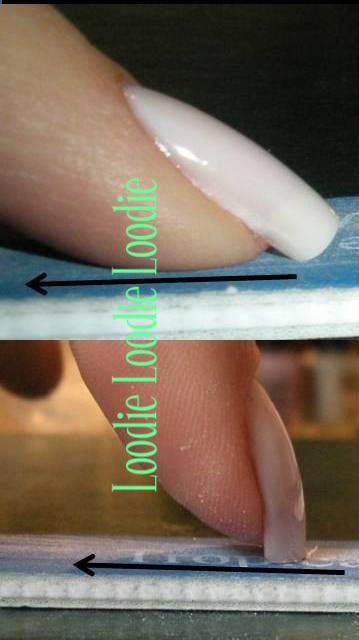
The higher your
C-curve the more changes you will see in profile. Here is an example. The top photo is sort of a squoval shape, while the bottom is oval/round. The tip is more blunt in the squoval and pointier in the oval/round.
Now you are ready to take off the polish and seal the plate further!You can find that post
here.
The next post in this series:
Squoval!


