As a follow up to my last post, here is a video for my lovely Youtube followers! As always the actual blog post is more detailed, click here to visit.
My channel: http://www.youtube.com/user/loodieloodieloodie
Showing posts with label Acetone is safe. Show all posts
Showing posts with label Acetone is safe. Show all posts
Friday, July 29, 2011
Tuesday, July 26, 2011
Moisturize Your Nails with Acetone ... kinda
One of the most effective solvents for nail polish removal is ACETONE. I have previously described acetones’ positive attributes (regarding efficiency and safety) in this post. However, if you change your nail polish often or soak off polish, acetone can eventually dry out skin. Umm can we just look at this picture … redonk!
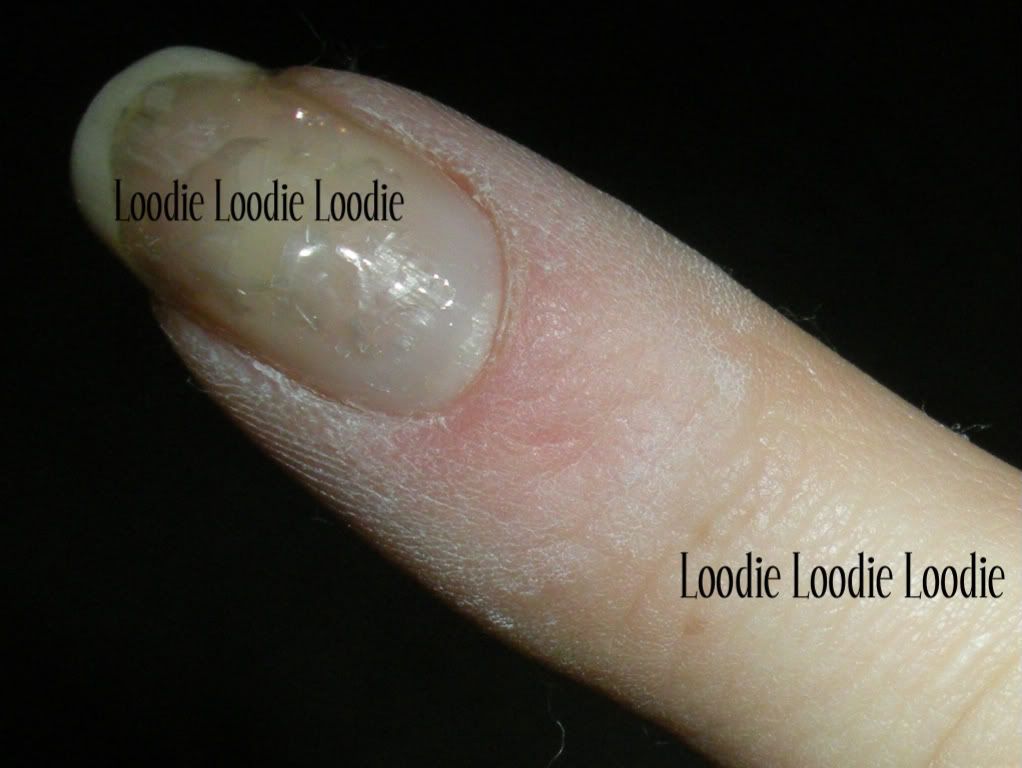
This is a picture from the Nail Fix Series. I use Shellac (or other gel nail polishes) for nail breaks and after removal my hands look like they have been mummified, lol.
So what are some options for us? How about a moisturizing nail polish remover?
Everyone LOVES Zoya Remove +, am I right? In particular Rachel Marie ;) I will have to agree with the fact that it is a great remover. Not only is it effective, but it is very moisturizing and great for the nails and cuticles. However, the smell and price seriously disturb me. For non-licensed people, Zoya Remove is $10 per 8oz ($25 per 32 oz.). Let’s take a look at the ingredient list:
Zoya Remove + ingredients are:
2-propanone, water, glycerin, fragrance, violet 2
In layman’s terms, the Zoya Remove + ingredients are:
Acetone, water (surprised they didn’t use aqua or something fancier lol), glycerin, stink, unnecessary dye.
Considering I buy acetone for $5 per 32 oz. at the local nail supply store this is crazy!! F U unnecessarily expensive products! Guess what? We can make our own moisturizing remover for way cheaper! :D
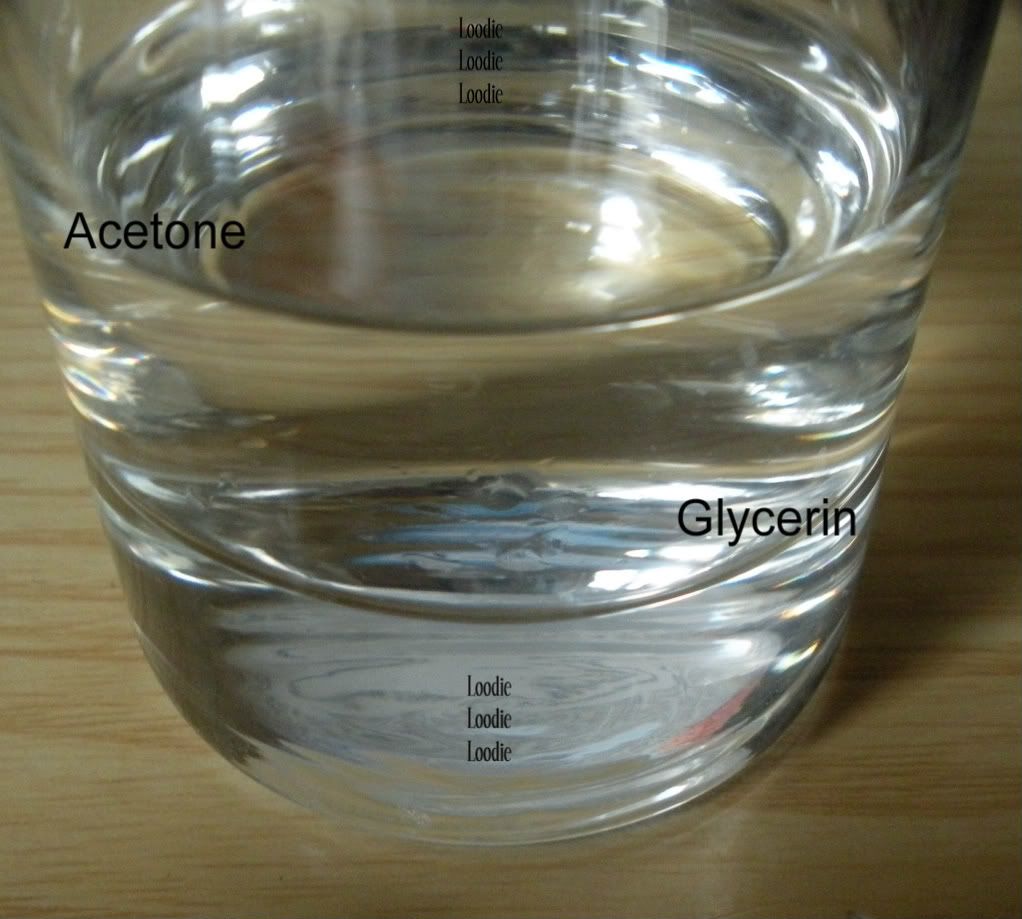
There is a lot of talk on the MUA nail boards on this topic, so you may already know that the basic recipe for moisturizing polish remover is … Acetone + Glycerin, however I have something science-y to add to this recipe with lots of pictures!
An inherent physical property of Glycerin is that it is ONLY PARTIALLY soluble in acetone. This is why the recipe often quoted on the nail boards is accurate and will work, BUT there is a slight problem. If you put an excess of glycerin in acetone at some point they will NOT (and simply CANNOT) mix any further. If anything you will see two separate solutions, similar to oil and water (or another visual ... yummy salad dressing - oil and vinegar :D) … here is an actual picture of glycerin in acetone.

As a side note: Glycerin is more dense than Acetone so it sinks to the bottom. Haha, I just tricked you into learning something, yay!
Now, if you have the right proportions you can get them to mix completely.

I tried to mix it well, but darn it I added too much glycerin from the start for it to mix in a miscible manner.
So how do we fix this problem? With science of course! :)

Another inherent physical property of Glycerin is that it is completely miscible in water! It will mix in any proportions of water and never separate. Furthermore, Acetone is miscible in water. So the beautiful thing is that we can jam more glycerin in acetone by adding a small bit of water! Water helps to keep the glycerin that can no longer mix with acetone in solution.
Add a splash of water and mix well!
As you begin to mix, the solution will initially be hazy.
COOL DUDE!
Want to see a video of this? click here

Here is the resulting solution after adding water to a solution containing excess glycerin in acetone and thoroughly mixing.
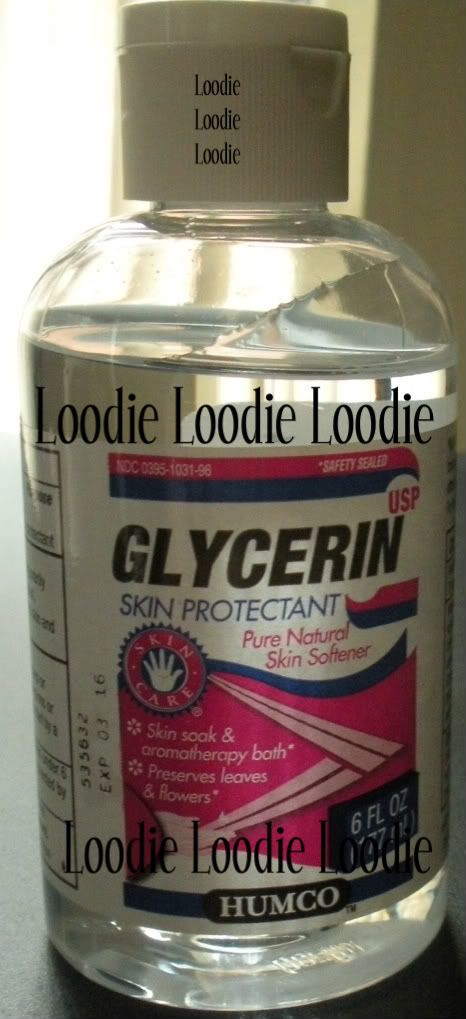
You can find glycerin in your local pharmacy. I had problems, my eyeballs kept glazing right past it, but the pharmacist helped me find it immediately.
This one was about $7 per 6oz.
The recipe:
As a guideline only, I would say 1-2 tablespoons of glycerin per 200mL of acetone.
Then add small splashes of water until the solution is mixed completely.
However, you can play around with different amounts glycerin and adjust to your personal preference. You should adjust the water amounts to your glycerin levels of choice. Only add as much water as necessary to incorporate the glycerin because it weakens the effectiveness of the acetone.
Caution:
Although I showed you the process in a glass, that was just so that you could see the different layers. You should do your mixing in the acetone bottle. It's much easier and safer to mix with a cap on. Watch your eyes and try not to get acetone in them, because I almost did. After you mix it well in the bottle, you might want to loosen the cap to release any built up pressure, then close it back up for storage purposes.
Another thought:
In my initial post about acetone, I mentioned that glycerin may interfere with polish adhesion. From personal experience, I can't say this is necessarily true, at least not as true as it is for oils and waxes. So, I kinda retract this statement, but would love your opinion or experience on the topic!
Short Video Version
Short Video Version
Thursday, December 2, 2010
Off with the Red! (minus the bloody looking fingers)
The perfectionist in me is not happy. I was frankening a little last night and slightly messed up the blood red perfection that was Revlon's Valentine. Nothing traumatic otherwise it would have come off straight away, but enough that I was itching all day at work to go to a near by lab and attack the acetone bottle. I decided to wait since then I would have to walk around with naked nails, which you wouldn't catch me dead with. Besides I wanted to show you how to remove dark polishes without leaving your fingers a mess, in my case a bloody mess.
What you will need:


1. Either a cotton pad, felt pad, or a cotton round that you have unrolled and flattened.
Surface area is key to keeping your fingers and cuticle area polish free while removing it.

2. Nail Polish Remover - preferably acetone.
I prefer acetone because it is quick and safe (contrary to what many believe, think or whatever). Simple truth is, it is one of the safest solvents, second only to water, for nail care use. Due to its low boiling point, it evaporates quickly and therefore barely has the capacity to penetrate skin. Furthermore, even if you soaked your nails in acetone (lets say to remove acrylics, gels, etc.) the amount of acetone that does makes it into your blood stream is at very safe low levels with respect to health standards. Non-acetone removers can often times be even worse for you. They are just as drying and not as effective at dissolving polish and thus force longer exposure times to your skin and nail. If you are bothered by how dry acetone makes your hands you have several options, buy a moisturizing acetone based polish remover, add glycerin to your acetone, or moisturize with oils or balms before and after use. If you are interested in a making your own moisturizing remover, put on your goggle and read this post. However, beware that you must clean the nail surface before applying fresh polish, otherwise the glycerin/oils/waxes/etc may interfere with polish adhesion. Okay enough ranting....these are the steps I take to remove dark polish.
Steps to non-bloody looking cuticles and fingers

1. Place acetone on pad and soak well. Not dripping, but don't be stingy either.

2. Place pad on finger covering way past the cuticle area.

3. Let the pad sit for 5-10 seconds while you press down on the nail. I can't show you the pressing part since I have to take the darn picture, so use your imagination.

4. Pressing firmly swipe down and only down! You can shimmy side to side slightly, but you don't want to move up and down and get the polish on your finger.You may have removed all of it or just partially.

5. Obviously, I have a big ol' strip still left so I just flip over the cotton pad and repeat steps 2 - 4 on that same nail. You can continue to unfold and reveal the clean parts of the pad to further avoid polish on your fingers.
6. If you get any polish on your skin remove immediately with a clean part of the acetone soaked pad.
If you plan on polishing after this you can move on to that step now. Or you can moisturize first, do some cuticle work, and then clean the nail plate again before polishing. Those steps will be covered in detail in another post.
Next post - Nail Hardeners: Are formaldehyde based hardeners right for me?
Next post - Nail Hardeners: Are formaldehyde based hardeners right for me?
Subscribe to:
Posts (Atom)