The following is my brain daydreaming...
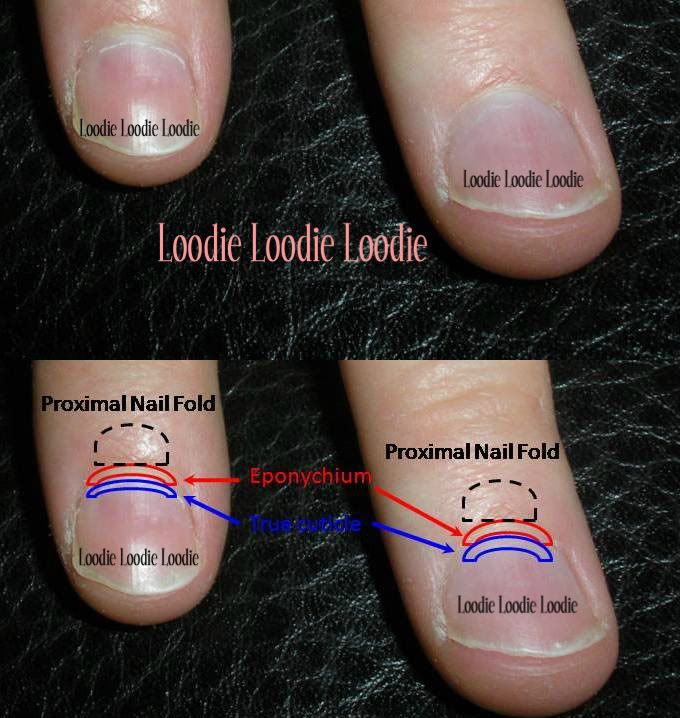
I imagine after a polish has dried (or cured) it can have small pores (or cracks). That, I can accept. Whether it actually happens is another question. However, I do remember seeing the following video explaining how soak off gels work, which supports the mere possibility in regular polish.
In this situation, a chemical solvent (or perhaps the word molecule may be more appropriate) seeps through these engineered cracks or pores and is able to reach the dissolvable portion of the product. Is this possible for regular polish or treatments?
Let's assume the mere possibility:
My mind can imagine such a process for treatment products. Perhaps after the first layer has dried/cured enough cracks or pores exist and the treatment molecules are small enough to fit through and make it to the nail nail surface. However, how likely would it be that companies actually engineer their treatment products like this? I have no idea.
Now let's assume this does NOT occur with regular polish and treatments:
There are two main reasons I can think of for these directions to exist, both are purely based on my gut and experience. My guess is they have you reapply the product merely as a coat of physical protection, which in reality any decent base coat or topcoat can provide (it's likely more cost effective too).
The other thought I had was, these directions are a marketing/selling tool. They make the consumer feel like they are doing something everyday to help their nail situation. Meanwhile, more of the product is used up, forcing the consumer to buy more to sustain their results. In the end the consumer feels like they have really contributed to their nail health (yay accomplishment!), while the company is ecstatic over their bottom line (they probably get a party with fancy champagne and hors d'œuvres *jealous*).
I like to beat the system. Ya know, stick it to the man! Treatments that come as a lacquer, I generally only apply to the actual nail surface. All other subsequent coats would either be a base coat or topcoat, depending on whether I already applied colored polish.
Summary:
This is all just me thinking aloud. I have no proof of anything. I wish I could be more concrete, but until I learn something new, I say don't waste your expensive treatment products as extra layers.
As a reward for making it all the way to the bottom of this post I'll show you meat and a franken:

Because who doesn't like meat in their mouth, duh!
Prosciutto.
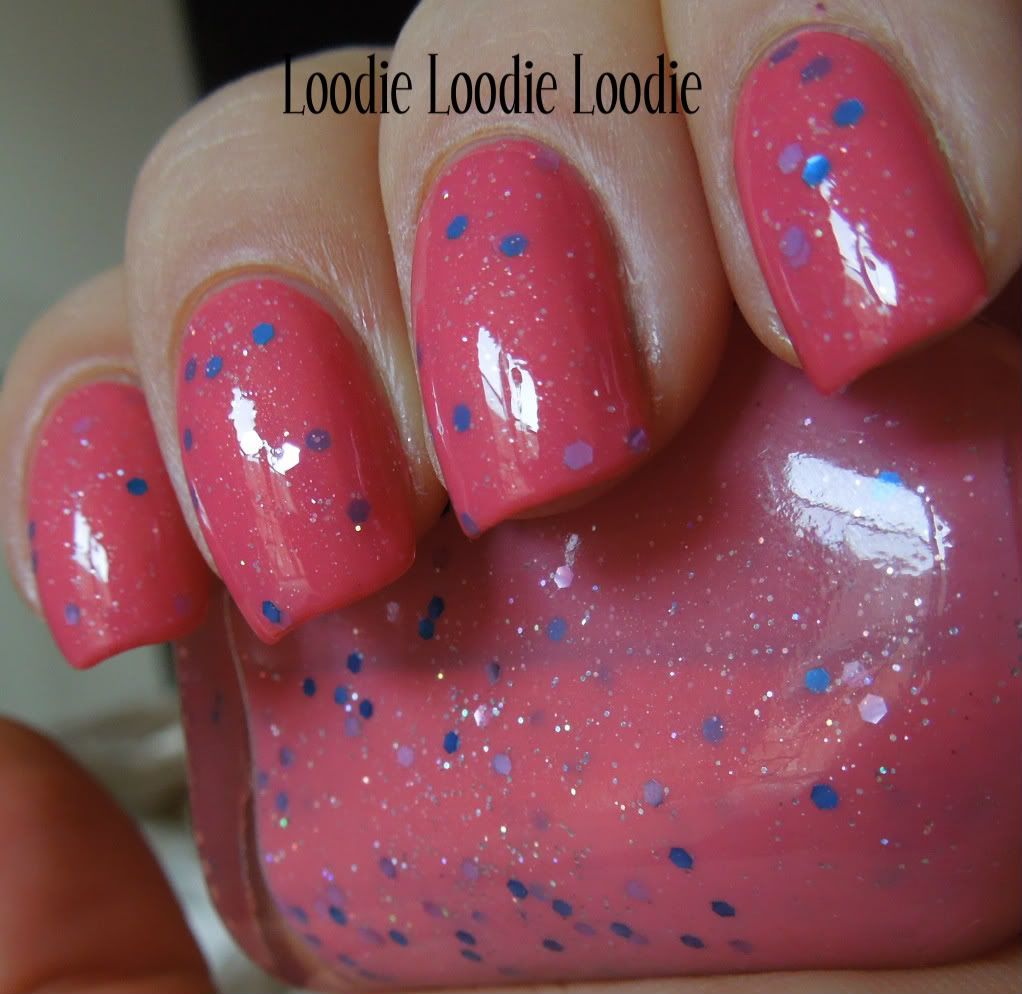
The franken!
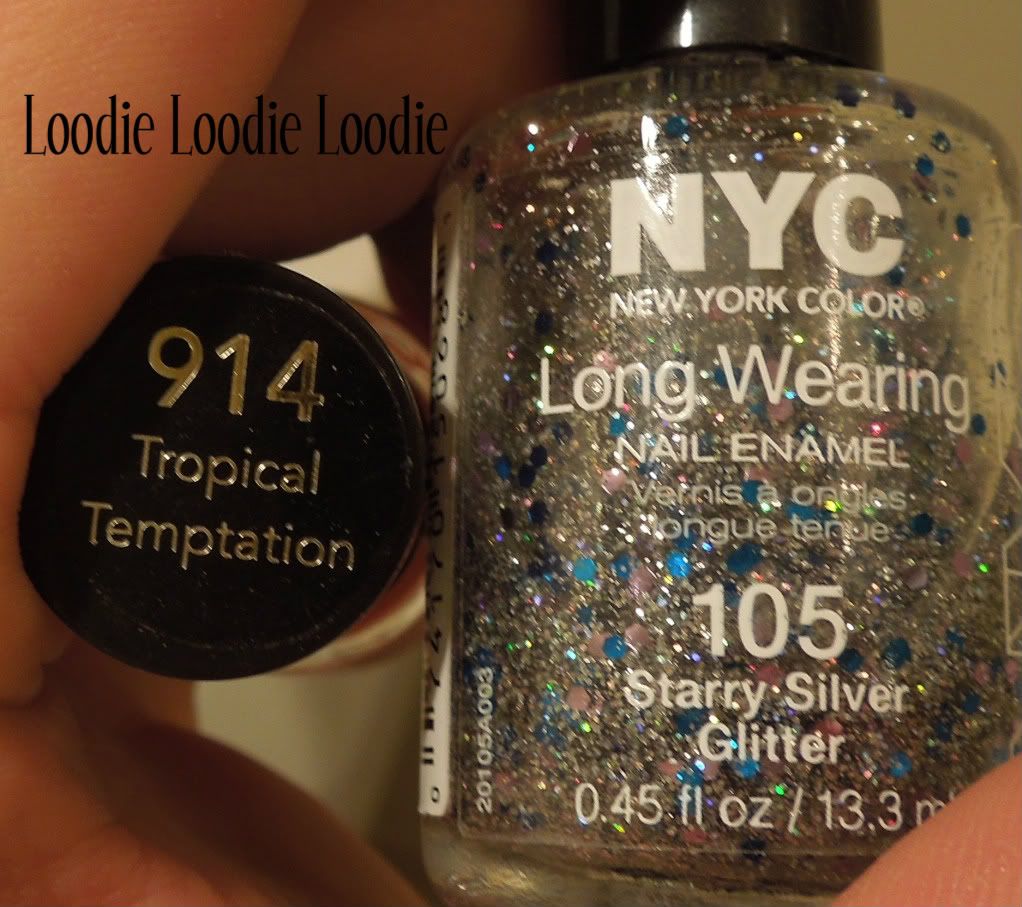
I used Revlon - Tropical Temptation and NYC - Starry Silver Glitter.
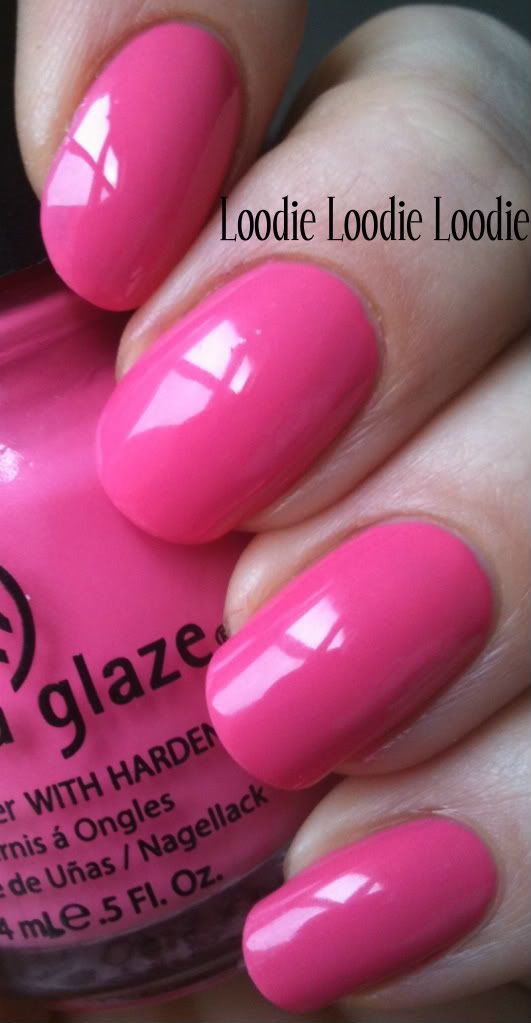
I've swatched Revlon - Tropical Temptation here. It somewhat resembles Revlon - Make Mine Mango here.
I have a Nail Treatment/Hardener Series, click here.


