Showing posts with label Before and After. Show all posts

Tuesday, December 4, 2012

Proof is in the pudding

I do love it when readers try things and then send me pictures. It's quite gratifying. I mean, I know the things that spew from this blog work for me, but to have someone else get something out of it is pretty terrific!

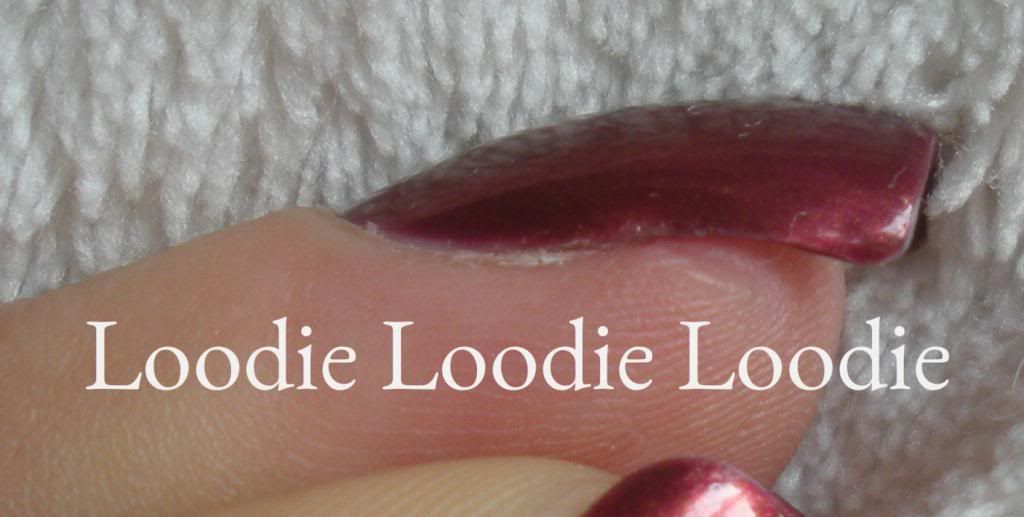
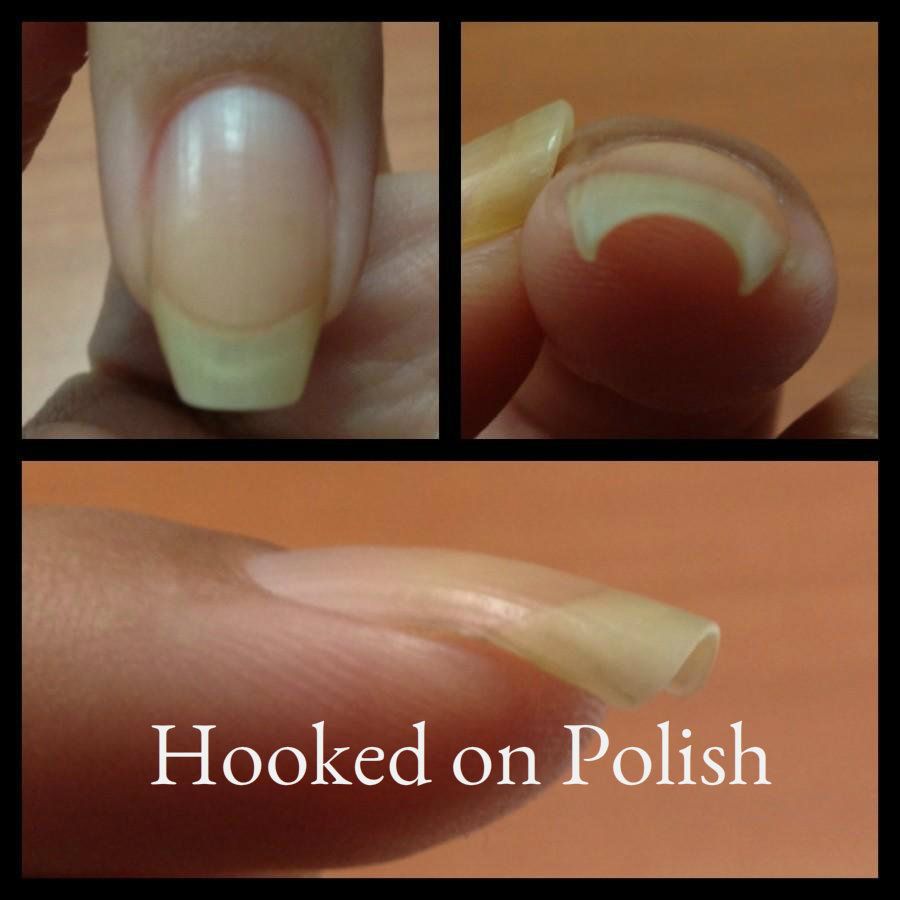
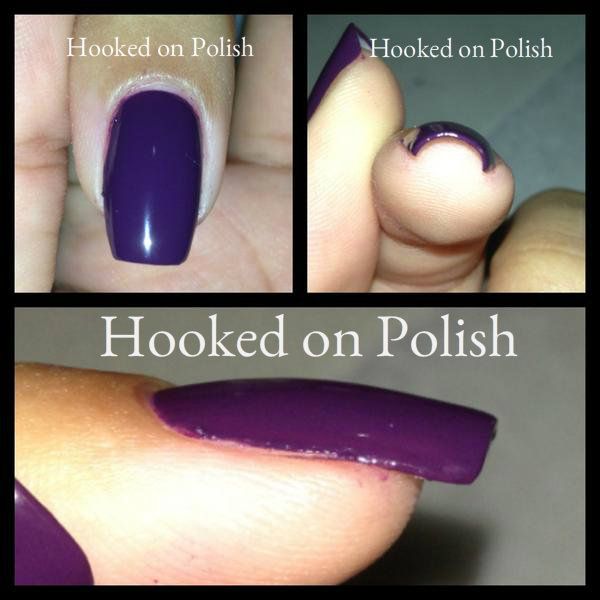
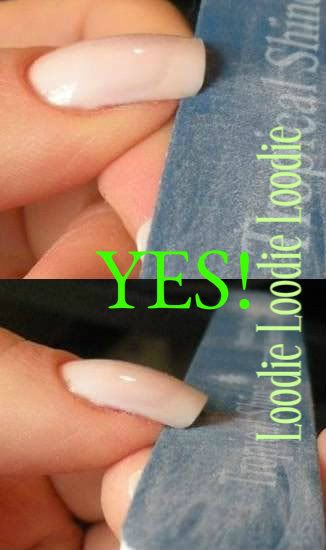
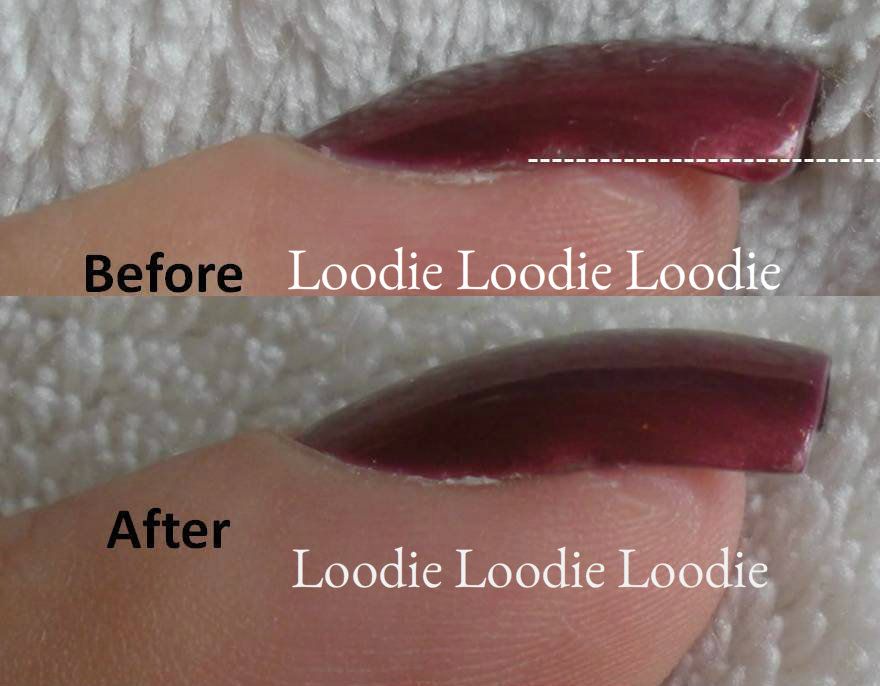
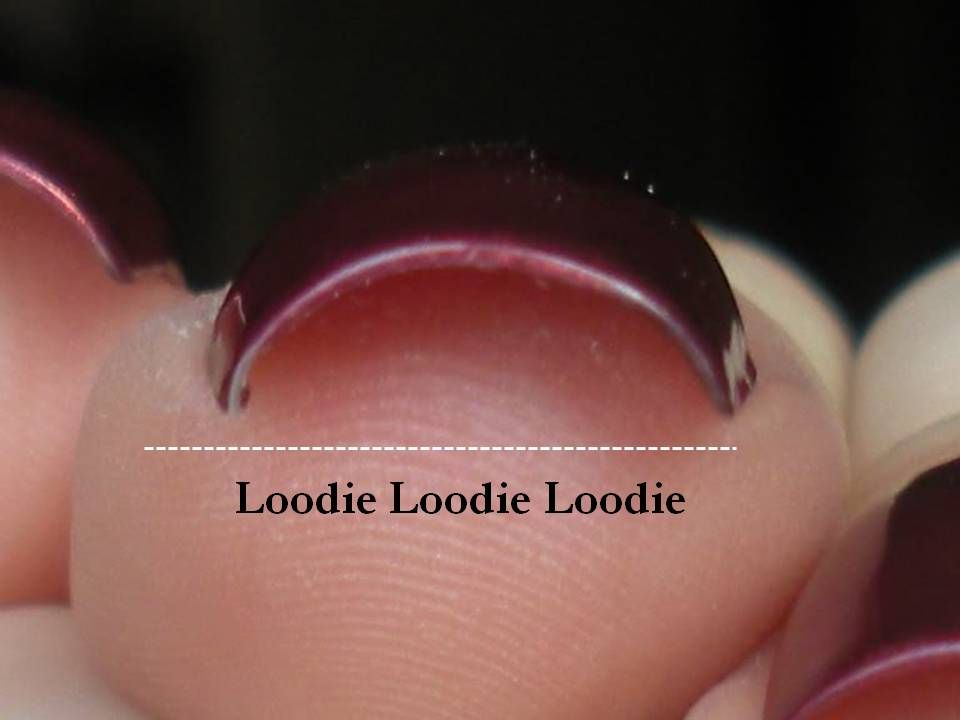
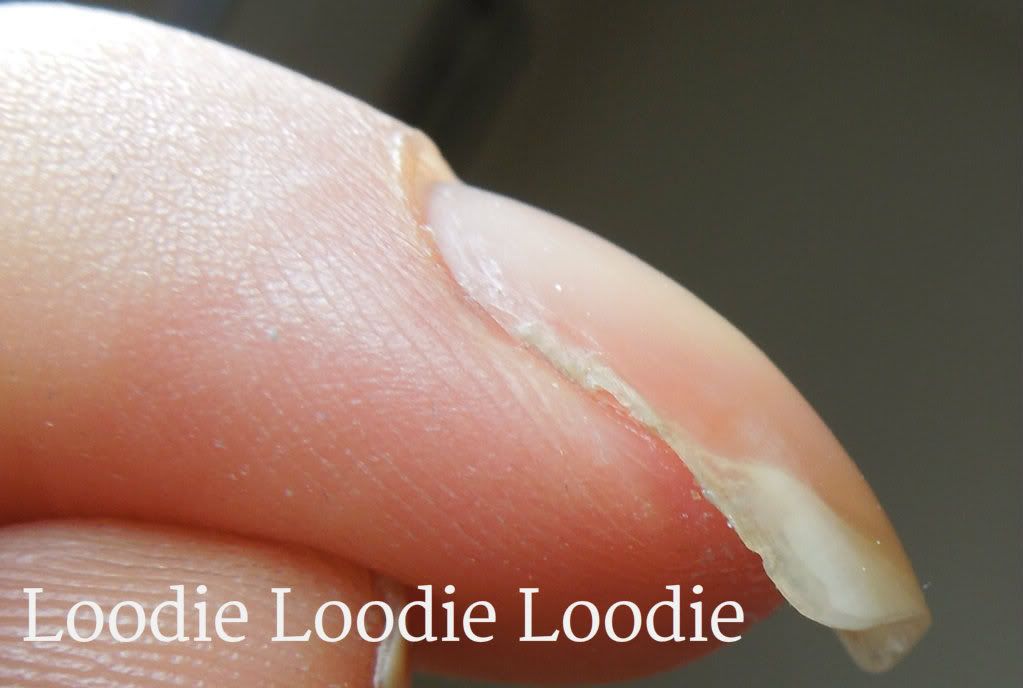
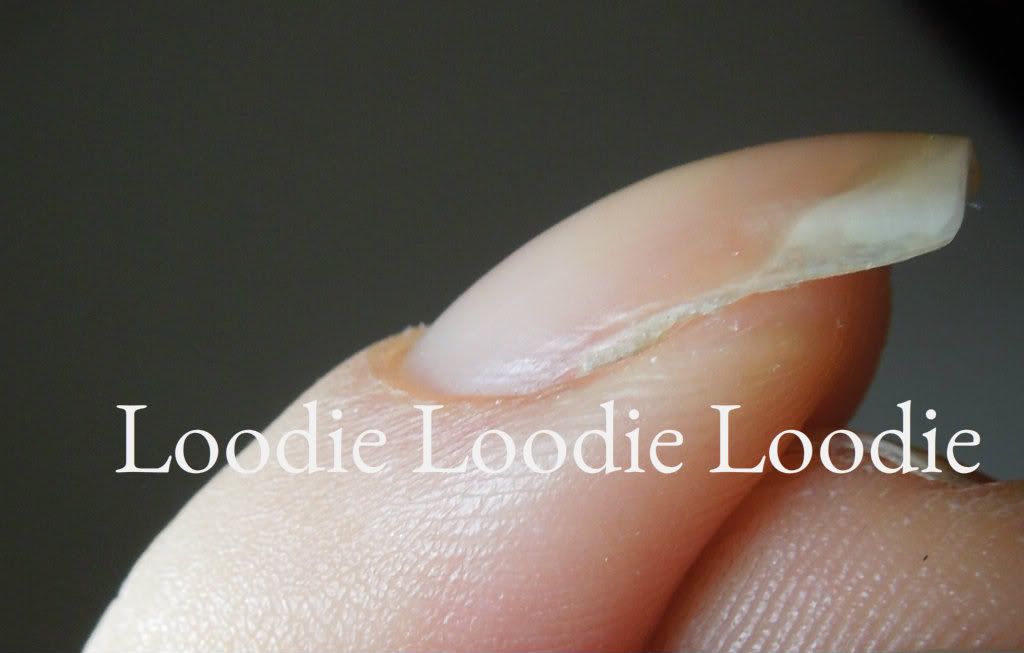
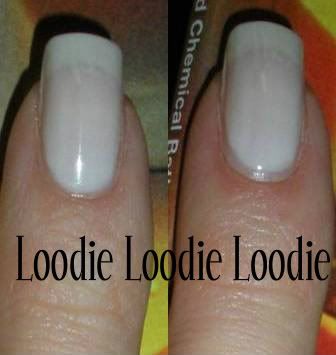
This little lady right here... Kat from Hooked on Polish started chatting me up on Twitter the other month (you can follow her too... click here.) We've been having a hilarious love affair every since. Like me, and many of you, she has to deal with a little wonky nail here and there. After my last post, "Straight and narrow", she showed me her wonk and decided to try the simple filing technique. She was happy with the results and I was ecstatic for her! She was kind enough to let me share her before and after pictures. AND WHO DOESN'T LIKE A GOOD BEFORE AND AFTER. Sorry for shouting, but I really am THAT excited.

Today, I will share with you her results.


Before: photo credit (from twitter)
Before


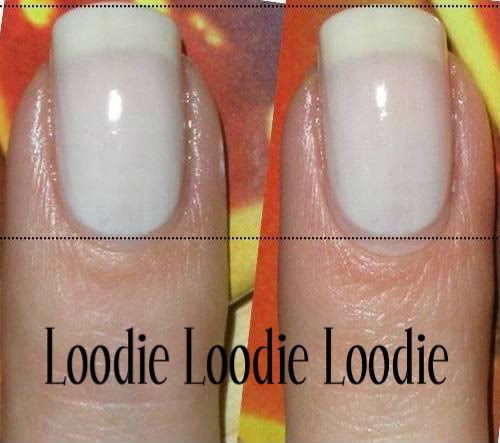
After: photo credit (from twitter)
 
After
It seems silly, but these minor little changes makes a difference when your wonk is getting you down. YAY!

Hugs and kisses to Kat for her testimonial. Thanks for letting me use your pictures! Now, if you will excuse us, we have to go hump. *inappropriate*

WARNING: please read the previous post and all relevant posts linked within and attempt all filing carefully and responsibly as messing with the nail side walls can be tricky.

Good Luck!

Monday, December 3, 2012

Straight and narrow

How lovely would it be if all of our nails grew evenly and straight?! This is the stuff of dreams! Well, maybe second to winning the lottery. If you weren't blessed (because I sure as hell wasn't), grab your favorite gentle nail file and join me in this tutorial! I recommend either a 220-320 grit strength for strong healthy nails or a 400-600 grit strength (or high quality crystal nail file) for weak problem nails. Here is a nail file post for reference.

I don't know about you, but my nails curve, wonk and do crazy things depending on factors such as water exposure, moisture content and whether they are polished or unpolished. I do pay special attention to filing to make them appear straight and narrow.

At this point, this filing technique is so automatic for me, it's hard to find a before picture. I would have to let my nails grow for quite a while and endure the fatness, crookedness and unevenness. And well, that is REALLY hard. The fact that I know they can look better with a few simple strokes of the file is just too much temptation to not do it all the time.

The look we are going for is very symmetrical. We are going to shoot for even nail beds, paying particular attention to the nail side wall to make it look nice and even...
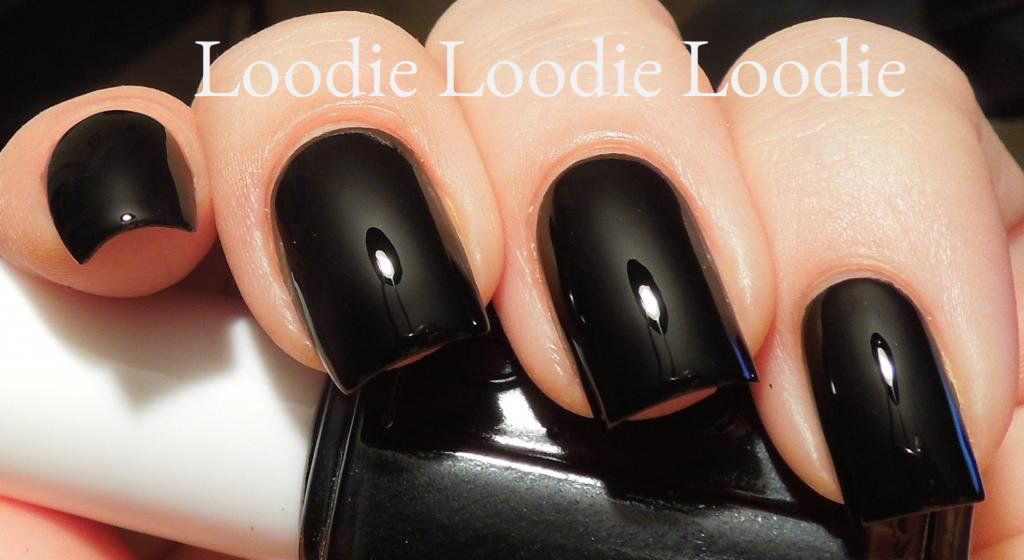
Essie - Licorice
There are several factors that do not allow my nails to look like this all the time naturally.
First... there is the wonk:
WONK

I have discussed how to improve a wonky curvy nail in this post. For me, keeping the nail hydrated and at a length below a certain point makes the wonk improve. One thing I did not mention in that post is how we can also manipulate the nail side walls with filing, to create a more even appearance.

If you take a look at your nail from the side you may see this..
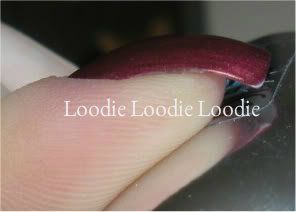
click to enlarge
click to enlarge

First, notice the curve. Some nails are worse than others. Second, notice the extra overhang at the tip of the nail (free edge) particularly more obvious in the second picture. I can't change that curve shape (my first concern); it is inherent, but I can play with the angles and eliminate the over hang (my second concern). If I file the nail side walls like this...

....suddenly the nail appears flatter and straighter...

I would advise being very careful while filing the nail side wall. I stressed that point in this and this post. Please read those posts first before attempting... don't fret, there are pictures!

This filing technique is really the key to getting my nails straight. Now, let's look at the c-curve of this nail.
Filing the sides (carefully!) allows me to straighten any imperfections in the c-curve. You may notice your nail c-curve is longer, heavier or curvier on the left vs. the right. Afterwords, my left and right side is not only balanced (I've included a white line that your eye can follow), but some of the c-curve is relaxed a bit. See if you can release/relax your c-curve by filing the sides off a bit. I think this helps trim off some of the weight. Your nail may appear more narrow.


A few small strokes of the nail file allows you to create a much straighter balanced nail. Using a gentle file and the correct technique, I strongly encourage you to play around with your nails to see what kind of shape and balance you can create.

And now for one of my favorite sexy polishes shown above....

Essie - Urban Express

*DEAD*


Monday, August 20, 2012

Straight Edged

I can't say I am very straight edged, but my nails are a different story. There is nothing that bothers me more then a jagged side wall. What is that, you say?! Two examples...


middle finger


Aside from not looking very attractive, a jagged side wall (middle finger) has a weakened nail structure. I mean just think about it, missing nail pieces! Also, the sharp edges have a tendency to get caught on things. Both increase the probability of a nail tear. That does not bring me happiness. 


pointer finger


This happens a lot on my pointer fingers too.
Shark


How does all of the jaggedness come about? Recently, my fingers got caught up with a shark. Actually, for whatever reason, the nail structure is just a bit softer there; it happens sporadically.

But seriously, how awesome is the Discovery building!? I get to see this everyday!


What's my solution to prevent inevitable sadness? File the side walls. WHAT?! I know, I know.  I told you never to do that. Correction! I told you to do it a certain way. See here.

To summarize:
precious side wall

To preserve nail integrity it is best to keep as much of the side wall intact as possible.


avoid filing like this

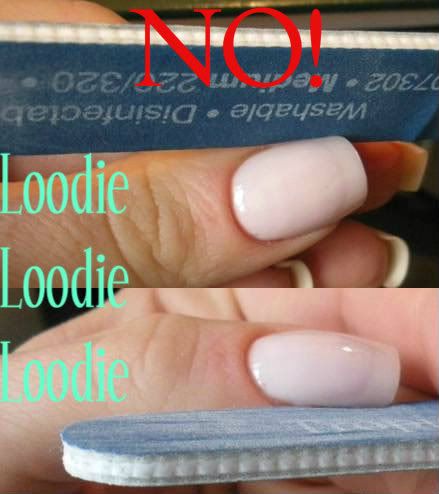
Avoid holding and filing like pictured here. This gives too much access to the entire side wall. Too much filing of the entire side wall compromises the nail structure, making the nail more likely to tear.


tear on the pointer finger


Then this might happen...
:(

In this situation my jagged edge was so far down, I couldn't even file it. I do have a solution ... nail fix here.


file the side wall like this!


This is a much safer way to file the side wall.  


So, let's see the "after" photos!
middle finger


Ahh, so smooth!


pointer finger


Catastrophe avoided!

Sunday, January 29, 2012

Eww ... gross ... I hate you.

WONK!
Not cute.  Do not adjust your screens.  This is not a broken nail.  Rather a really ugly curving to the nail.  I wish I could beat it out of me, but that simply doesn't work.  How is one supposed to deal??


As much as I want to walk around and constantly straighten it out against hard objects ... like this ... that is just unreasonable. 


Just in case I have not convinced you of its ugliness ...

<----- LOOK *barf*

What is worse than a wonky nail? ... Nothing comes to mind.


All is not lost.  Here is that same nail ... less ugly.

What the what?!?

How is this possible?  How can we get the wonk to relax?


There are a couple of steps you can take to remedy the situation, but keep in mind the end result is not permanent. DARN IT!   


The most effective solution is to use a combination of moisture (in the form of water) and oil/balm/waxy products together.  I have mentioned previously, long and constant exposure to water is not good for the nail layers.  I have several posts on "fat nails" and why it can weaken the nail plate layers and cause problems, i.e. splitting, peeling.  However, since there are times you simply cannot avoid water ... unless you're dirty ... you might as well use it to your advantage!  You can use unavoidable water exposure to help un-wonkify (<--O.O new word) your nail beds.  After your nails have been submersed in water, one good thing you can do for them is moisturize them with your favorite cuticle oil/balm/cream/lotion or wax containing product directly after the exposure.  Not only will this help seal in moisture, but it will also help keep the wonkiness at bay for a bit longer.  If you continue to add oil/balm/waxy products every few hours it will keep the nail less wonky.  I have found oil makes the results lasts longer than lotion.  Like I said, it's not permanent and takes effort to put cuticle oil on every couple of hours, but hey, it's either that or the weird wonk.

In summary: Constant moisture is like a Valium for the wonk.

Of course there is always that nubbinizing option ... but that makes me cry.

Do you know about the wonk, have the wonk?  How do you deal with the wonk?

Edit: Two other helpful posts on how to make a nail less wonky with filing can be found here and here.

Friday, June 17, 2011

Skid Marks

Don't you hate it when you take off polish only to discover your polish has been working on an art project on your nail bed.  Here is what my polish has been working for the last couple of days ....

A masterpiece no doubt, but my nail beds are never this pink/red.  My nail beds are naturally pretty grey.  My mom is always asking me if I'm ill LOL.  Um, no mom sheeeesh.

I guess if I'm wearing darker colors no big deal, but eventually I need to straighten this business out, because every time I take off polish I frighten myself a little bit.


A few more pictures if your interested ...

 ....


Now what?  How do you deal with the stain-age?  I have a very standard way of dealing with these kinds of stains ...
Buff that Motha Out!!


First I need to preface buffing:
Buffing is NOT for everyone AND like all wonderful things, must be done in moderation.  Occasional buffing can be done on generally healthy nails.  I buff because I am a good candidate.  First, my nails are not super thin and are fairly healthy.  Second, I don't use a rough file nor do I use it manically.  Everything in moderation is okay (except high fructose corn syryp lol)!  Third, I have ridges that only buffing can eliminate.  Polish looks way better when I get rid of them.  In my personal experience, ridge fillers are not as good as light buffing.  Ridge filler instead gives me more problems than solutions (bubbling, crap dry time, extra steps with each mani, etc).  Lastly, I have found light buffing is more effective vs. other chemical treatments.

With that said, if you have thin problematic nails you can avoid buffing altogether.

What I do and use:
I love my buffing blocks and this is the baby I used to fix my stain-age problem.  The grit strength is about 400.

If you are interested in my Nail File Series, that can be found here.


Here is the before and after picture of the buffing and as you can see the pinky is no longer stained.

The technique:
Lightly run the block vertically from cuticle to tip.

What is your method of choice for skid marks? :P

Wednesday, February 16, 2011

Do my nails look fat?

I posted previously that nails can and will absorb water ... this post is just a proof of concept.

That previous post can be found here and describes how a nail in such a state ought to be treated carefully (i.e. avoid filing, using your nails as tools, or polish application).

Now on to pictures!

Here is my nail in a normal dry state.


Here is the same nail after a long hot shower.

Indeed, it looks like she had a large dinner and has to unbutton her jeans.


That is all.


P.S. The fatness is most obvious when you have a pronounce C-curve for sure. If you're not sure what that is come visit here! *hugs to all <3

Friday, December 10, 2010

Do you want longer nail beds?

Okay, in my strange world, one of my favorite things to do, besides shoving my face, is pushing back my cuticles.  In today's post I am going to demonstrate why it's so gratifying.

When I first started caring for my nails, I didn't know how take care of my cuticles, paint very well or barely file, but one thing I did do, which completely (in my opinion) changed my nail beds, was push back and massage my cuticles.  I had very short wide nail beds that were pretty triangular in shape.  I wish I had a before picture. The best I can do is a scanned image from 5th grade, but it would be so blurry it would be pointless. So, just close your eyes and think hobbit fingers.

Alas, I do have pictures to show you. Maybe I can convince you of getting into the habit. It's addicting!


Here is a before and after shot of pushing back the cuticle area.  How can you not love gaining some nail bed??!!


I admit at this point my nail bed revelation is not as dramatic or permanent, but still useful. I will push back cuticles right before I paint them to get closer to the cuticle without flooding it.  Although I say this trick is not permanent per say it was at one point. Compared to what they looked like before I started doing this on a regular bases till now, I have seen a complete change in my nail shape and nail bed length. At this point this seems to be the maximum to where I can take the cuticle.


Here is a before and after of my pinky.

Massaging this area as you push them back will stimulate an important part of the nail where the nail grows out.  Massage stimulates more blood flow to the area and promotes healthy growth. Your nail tips and toes are the farthest away from your heart so the more you can help them out the better. It may even promote faster nail growth, but I have absolutely no scientific proof of this, I just like to believe it.


I massage and push my cuticles back a couple times a day. I know a bit obsessive. You don't need anything special and can do it pretty much any time. If you are new to this, I would suggesting being gentle since your cuticle area may be sensitive. The best time to push them back is after a shower. They are soft and pliable. You can use either just the pad of your finger or place a towel between the cuticle area and the pad of your massaging finger. The towel will create some friction to help push back the eponychium and may help remove some of the true cuticle. You can also do this with or without cuticle moisturizer through out the day. Again, I caution being gentle if you are new to pushing back cuticles. Massage the area in circular motions, C motions following the shape of your cuticle or up and down the nail shaft. Go WILD! Until you are comfortable with this skip the implements to avoid poking yourself unnecessarily or injuring the nail matrix. The more often you do this the less they will move each time and the more permanent the revealed nail bed will be.

Do you want the opposite of longer nail beds? Crazy right? Why would you want that? Find out why and how   in this post.