Showing posts with label Nail Fix. Show all posts

Monday, August 20, 2012

Straight Edged

I can't say I am very straight edged, but my nails are a different story. There is nothing that bothers me more then a jagged side wall. What is that, you say?! Two examples...


middle finger


Aside from not looking very attractive, a jagged side wall (middle finger) has a weakened nail structure. I mean just think about it, missing nail pieces! Also, the sharp edges have a tendency to get caught on things. Both increase the probability of a nail tear. That does not bring me happiness. 


pointer finger


This happens a lot on my pointer fingers too.
Shark


How does all of the jaggedness come about? Recently, my fingers got caught up with a shark. Actually, for whatever reason, the nail structure is just a bit softer there; it happens sporadically.

But seriously, how awesome is the Discovery building!? I get to see this everyday!


What's my solution to prevent inevitable sadness? File the side walls. WHAT?! I know, I know.  I told you never to do that. Correction! I told you to do it a certain way. See here.

To summarize:
precious side wall

To preserve nail integrity it is best to keep as much of the side wall intact as possible.


avoid filing like this

Avoid holding and filing like pictured here. This gives too much access to the entire side wall. Too much filing of the entire side wall compromises the nail structure, making the nail more likely to tear.


tear on the pointer finger


Then this might happen...
:(

In this situation my jagged edge was so far down, I couldn't even file it. I do have a solution ... nail fix here.


file the side wall like this!


This is a much safer way to file the side wall.  


So, let's see the "after" photos!
middle finger


Ahh, so smooth!


pointer finger


Catastrophe avoided!

Friday, November 4, 2011

Can I please have those 5 seconds back?

No joke, I break nails doing the stupidest things.  I have kept my arm flailing to a minimum lately and have gone unharmed for months.  The other day, however, I was so excited to buy nail polish that I flailed right into a shopping cart ... blammo! Please, can we turn back time?! A girl can dream.  In reality though, I saved the nail.  I have posted on this before, way back ... part I, II, III and IV, but this time I made a video!

Check them out ....

Intro ...


Part I


Part II


 Yay.  How do you fix your nail boo boo's?

Saturday, October 29, 2011

Doors, Drawers and Automobiles

Do you know what I hate?  Breaking nails.  Actually having the choice to take down nail length is a good feeling, otherwise cursing and wishing I could take back those 5 seconds takes over my whole being.

We can give all the moisturizing love we want to our nails, but if we don't modify simple everyday tasks, nail breaks will happen ... frequently.  Trust me, I am the master of breaking nails for no good reason.  Hopefully, this post will make you think twice about how you approach door handles, zippers, and countless other stupid tasks that have resulted in broken nails. And if you don't believe me ask any of these lovely ladies how they open a drawer ....
ANOTHER Bottle of Polish?!
Nail Bamboo
Nails Beautiqued
Manicure Addict
Acetone and Old Lacquer
Them Pretty Colors
My Simple Little Pleasures

Am I seriously telling you how to open a drawer ... YEP.

Let's consider the following situations in picture form:

Do you see this stupid red door?  I hate it.  It's red because it's evil like the devil.  Actually this is the door from this post.

This is the improper way of opening/closing the hinge.  As you may imagine, one slip and the thumb nail is a gonner.  This is exactly what happened in this previous post

Also look at this sexy polish here.
A better way to handle this situation is shown here.  Tuck in the thumb and use the side of your fingers to slide the hinge.


BUT! Then you still have to pull the door open or shut.  Don't use the hinge to do this either.  This should be done like so ....


Manipulate the door open/closed by grabbing a hold of it from the top of the stall. GENIUS!


I can't tell you how many times my hands have slipped with this drawer.  Instead of lightly gripping it like shown ...


... grip that baby firmly!  No slippage, guaranteed!


 Want to see more of this polish? Go here.

How about knobs?!

Not like this.


Like this!


Then there are those knobs with buttons for locks.  My thumb nails can't function around them.  I use my knuckle.


I'll probably have a bone growth there eventually ... better than a broken nail though.


Is there anything strange that you do to avoid breaking a nail?


P.S. The title of this post was inspired by the hilarious movie... Planes, Trains, and Automobiles.  John Candy is AWESOME.

Tuesday, July 5, 2011

Good God Loodie put your knives away

Can you believe a quesadilla was almost the death of my thumb!

Okay that's a little extreme.  That knife in the background was actually the near culprit. 

OH the horror.  I will spare you the immediate blood and gore, but HOLY CRAP.  OUCH.

The quesadilla was delicious though.


So I'm chopping jalapenos right.  Ya know, having a good time, thinking about how succulent the quesadilla will be.   Then BAM!

Can we just take a moment of silence please.

IT'S SO FAR DOWN!! 

Waaaaaaaa


NOT COOL.

Don't worry, there is a happy ending.

Lucky for me life is not like "Death Becomes Her"

Not only do nails grow, but thank goodness for Shellac.

I fix my nail boo boo's with soak of nail gels. 

You can find that tutorial here.


The end result with Shellac.

Protected ... and SHINY :D

This is actually a week later, so the cut has healed.  :)

Gosh this regrowth is gonna take awhile.


But in the mean time I spent my days complaining to Olivia who coincidentally had a traumatic paper cut.


Dude, two months later it finally grew out.


YAY!!

China Glaze - Nasty

Sorry for the large gap, this picture is from a wear test.

Saturday, June 25, 2011

Buff this mother out

Ugh, got a peeling problem?  Let's nip it in the bud ... without sacrificing nail length.

Here is a before shot of the peel. Click to enlarge.  You may not even be able to see this, but this is the best I could do in the evening.  I just couldn't wait till day time to fix it ... ya know how panic mode goes.

Here is a day time shot after buffing out the peel.  As you can see the peel is gone, but the buffing does create a weak area.  Polish will not adhere in this area as well and I will show proof of concept at the end.


Before the how to ...

First a disclaimer: 
Prevention is really key.  Your nails should not be peeling on a regular basis. If they are you need to evaluate either your health or your day to day nail activities.  Consider your moisture routine, filing techniques, do you use your nails as tools or inflict other physical trauma, and are you using the right treatment?

Before you run for the buffing block you should understand some people with very thin nails should just avoid it all together.  Buffing will only make your thin, weak nails worse.   Perhaps it would be best to take down the nail length instead.

As always, you need the right tools for the job. If you are NOT familiar with nail files and their corresponding grit strength you may want to check out ...
X-Files

A few other less relevant posts, but still helpful:
Taking down nail length
Shaping the free edge - Square
Shaping the free edge - Oval
Shaping the free edge - Squoval
Sealing the Nail Plate 

Now for the tutorial ... in video form! :D
Again ... buffing is not evil.  You just have to evaluate whether your nail is a good candidate and then be gentle.


http://www.youtube.com/user/loodieloodieloodie

Files used:
220/320 grit (blue)
400/600 grit (pink)
~320 yellow buffing block
~600/4000 grey/white

Proof of concept.  The buffed area has chipped first (and a very large chip at that !lol)

Revlon - Tropical Temptation

If you want to see more proof like this see my wear test for Sally Hansen Sweet Tulip

Friday, February 4, 2011

Shellac Problems and Questions

I thought I would publish a conversation with a reader who has been having problems with Shellac.  Perhaps this will be of help to everyone :)

If you missed the series on using Shellac to fix a nail break they can be found here:
Part I - Introduction to gel polish
Part II - Application
Part III - Removal
Video


Comment 1: 
So after seeing your first post about CND Shellac I went and purchased some for myself. I followed your steps and the CND steps to a t! Loved the results.. AT FIRST. Within a day, it all peeled right off!

Response 1:
hmmm ... First lets try to eliminate a few reasons why this may have happen.

How long did you cure the shellac for?
What UV light did you use?
Were your nails completely dry (and oil free)before application?
After you put on the shellac did you shower immediately after in hot water?


Comment 2: 
Well I checked to see what the Wattage was on the CND UV lamp and it was 36W, wouldn't it be the same then!? Plus the polish says only 10 seconds in the UV light. Anyway-- I did different numbers of layers on each nail some 2 some 3 depending on how thin or thick. I let the cure 2 minutes after each coat.
February 2, 2011 9:56 PM


Response 2:
Each gel product needs a specific amount of UV light intensity (output) to cure it in a specific amount of time. Although your UV light is 36W, which is the same as CND, wattage is related to how much power it uses, NOT to how much light it puts out (output). How much light intensity a UV light puts out (output) is related to the number of bulbs, their placement, and any mirror (or reflective elements) part of the lamp.

It seems that since you are not using the CND lamp (even if it is the same wattage) it does not have enough intensity to cure Shellac in the time stated by CND. The gel is not curing properly, even if it seems hard. Since my lamp is crappy and not CND's, I cure mine for way longer than what CND says. Furthermore, I put tin foil all around it to give more reflection.

Since you have product and a UV light, try to Shellac again, but this time cure 4 layers worth for 4 minutes each time. :)

BTW, I have a 6W light and it works the way I described (*4 min cure per coat), proof that wattage is not as relevant as intensity (output). Good luck!

Let me know what happens! <3


If you have any questions or problems let me know! :)

Wednesday, February 2, 2011

Nail Fix - Shellac Removal

Shellac removal is as easy as the foil method ... actually it's exactly the same!

This is Part III of the Shellac Nail fix series. Links for the other parts are at the bottom of the post.
Would you like to see a video of this process?!  Click here.  

Step1:


Get a cotton pad (or cotton ball or felt) only as big as your nail. This will decrease your exposure to acetone. Soak the pad really well with acetone. Place the pad on top of your nail, making sure it covers the entire nail bed. Place a piece of foil on top of that. It should look like the sandwich pictured to the left.


Step 2:


Start folding the foil around the acetone laced cotton pad that is on top of your finger nail.


Not sure all these pictures are necessary, but what eve's.


Squeeze the foil at the base of the finger to prevent leakage or evaporation of the acetone. Make sure the pad is held taut on the nail.


Step 3:


Sit and wait for X amount of minutes. Most soak off's, including CND Shellac, come off in 5 min, but can be as high as 10 min.

If for example you were very impatient and took your finger out early it may look like this. You can see some of the gel has clearly dissolved, while most of it is still there.


Do NOT pick it off! Just re-foil this baby. Shellac leaves absolutely no damage, unless you decide to pry things off which is a bad idea with any enhancement.


Step 4:


It should look like this. All of the gel will lift off or flake off. You should be able to take a second acetone soaked pad and wipe off the flakes. CND says you can take a orange stick and get rid of the flakes as well, but you shouldn't have to buff or pry anything off.


If you missed the other parts of the Nail Fix Series, here they are:
Part I - Nail Fix
Part II - Nail Fix - Shellac Nail Prep and Application
Part IV - Shellac problems and questions
Video: My face talking to your face. :D

Tuesday, January 25, 2011

Nail Fix - Shellac prep and application

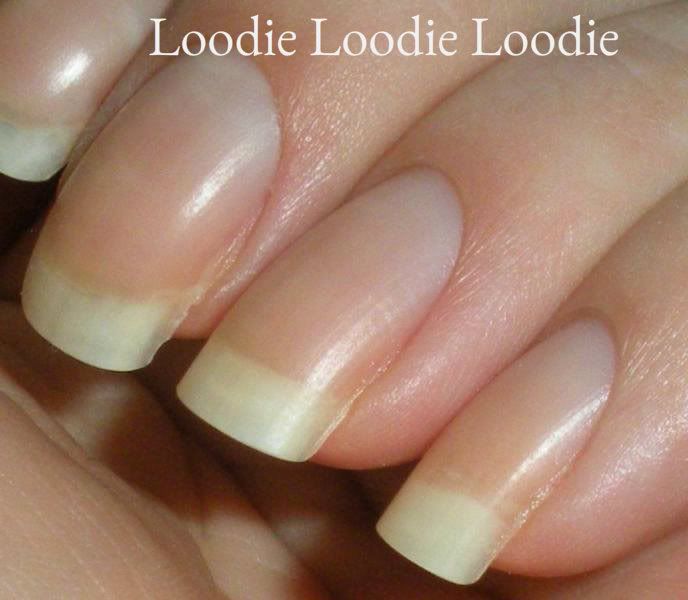
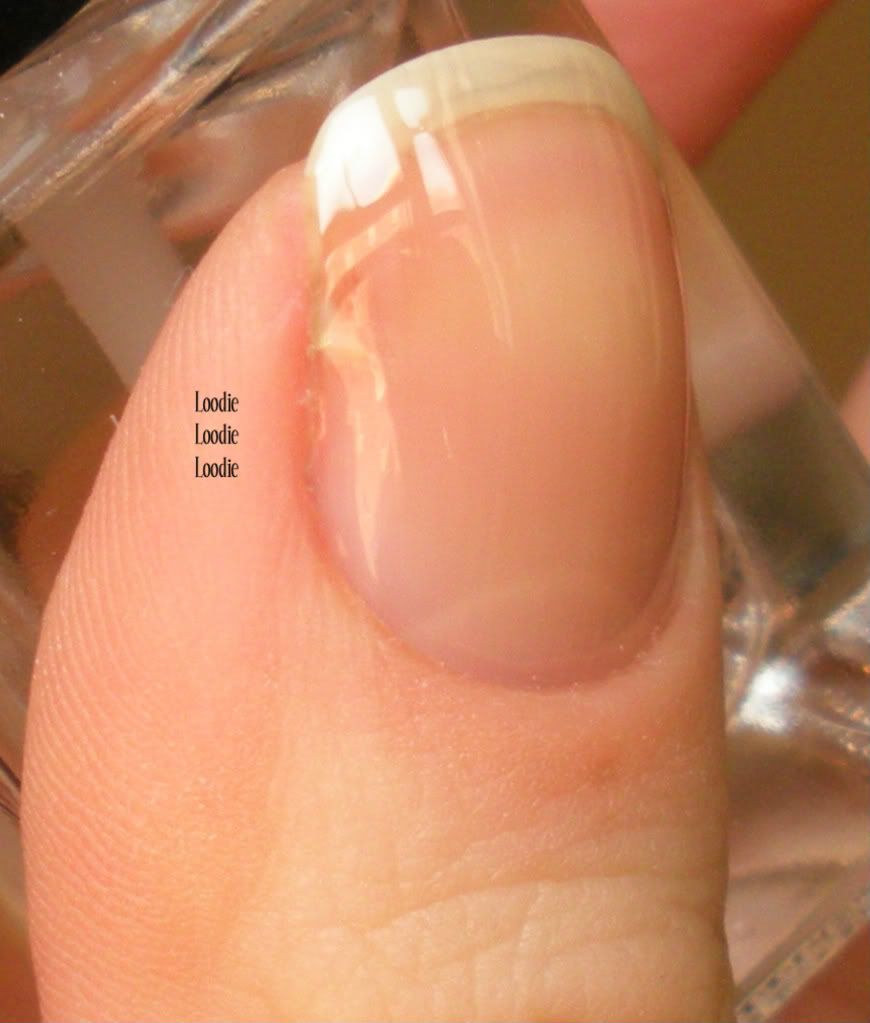
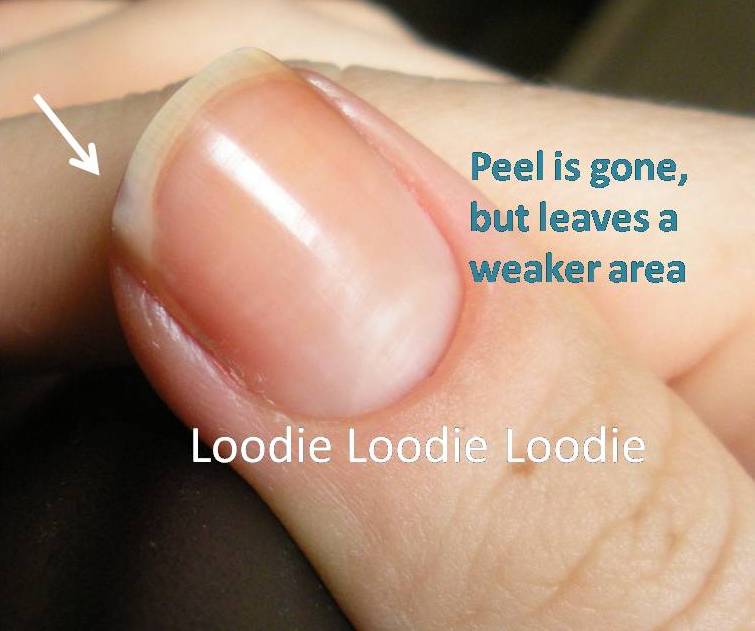
In this post I will show you proper nail prep and application of Shellac for a nail crack or tear. I have to stress this nail fix is not for peeling. If you have peeling you must buff out the peel first, otherwise the shellac will peel off, and what would be the point right? *note to self, must do a "fix a peel post"

This is Part II of the Nail Fix with Shellac series.
Part I of this post can be found here. Scroll to the bottom of the post for the rest of the series :)
Would you like to see a video of this process?!  Click here

First we must prep the nail:

1. The true cuticle (dead skin cells or ptygerium that can grow on the nail plate) must be pushed back or removed. If you put shellac on top of it, it will lift at the cuticle. I showed an example of this problem in my Sally Hansen Sweet Tulip Performance Test.  Although a proper post is due on how to remove cuticle, for all intents and purposes, either use a cuticle remover to remove it or oil to soften and push back this skin. The post (with video!) about using a cuticle remover can be found here.
 
2. Make sure the nail is dry. Your nail should not have visited water for at least an hour before this method of fixing. If you apply shellac to a nail that has slight moisture, once the nail goes back to its dry curvature, the shellac can lift.


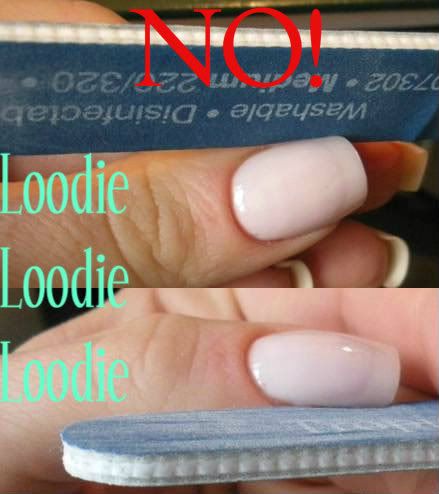
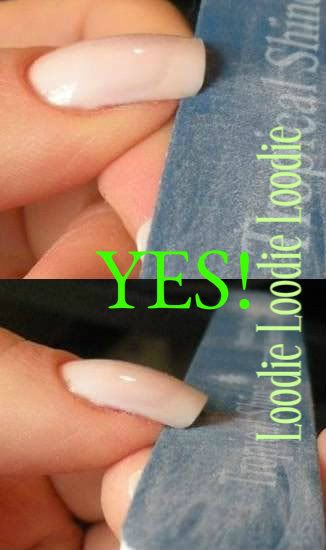
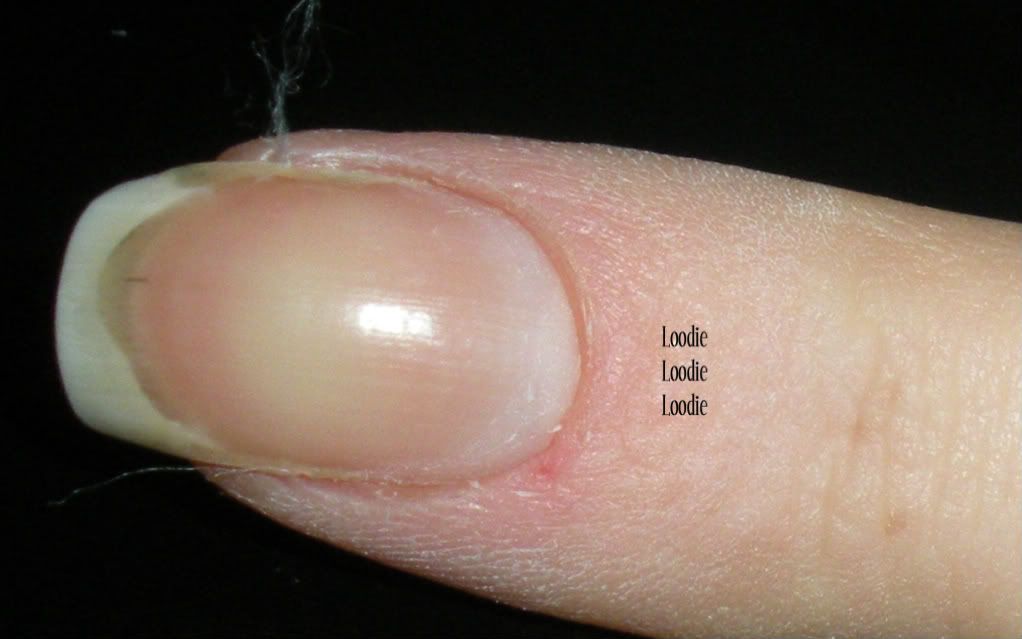
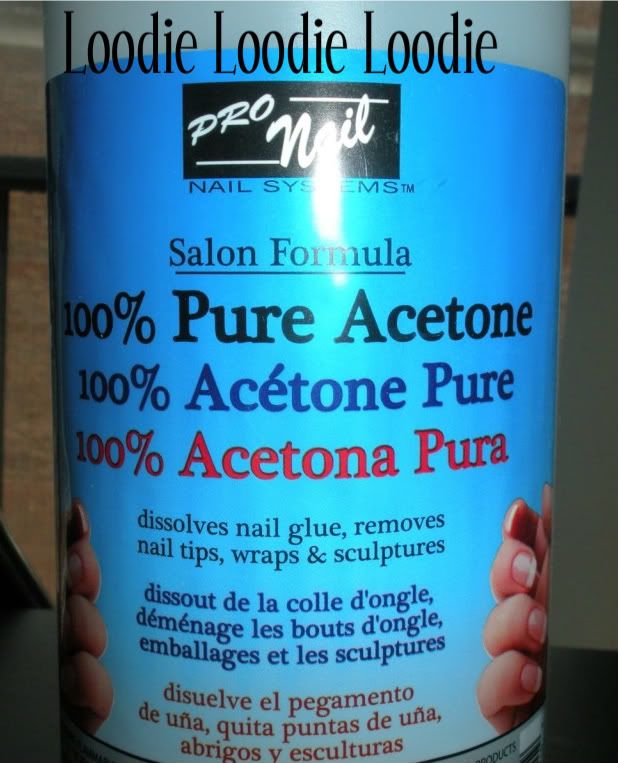
3. Once you are convinced your nail is dry make sure it is clean and free of dirt and oil. Wipe the nail with pure acetone thoroughly, both on top and under the tip.


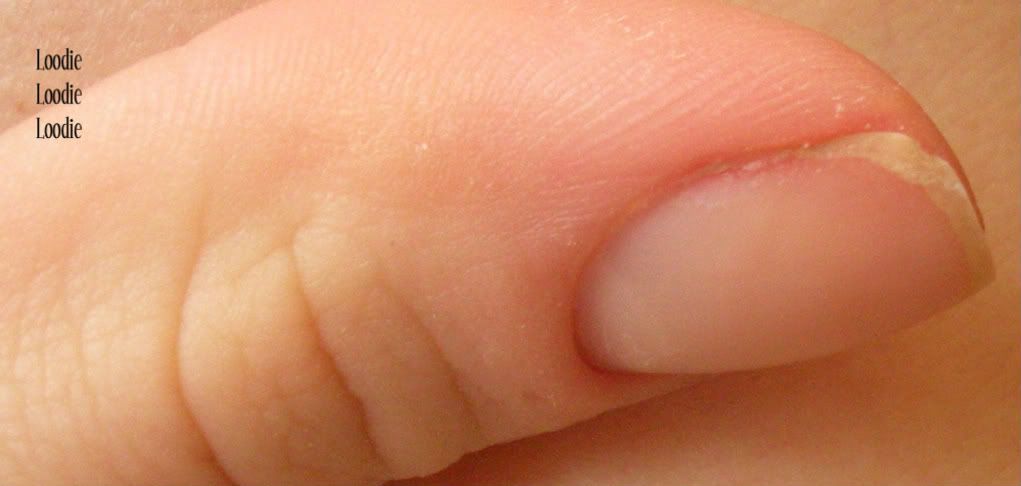
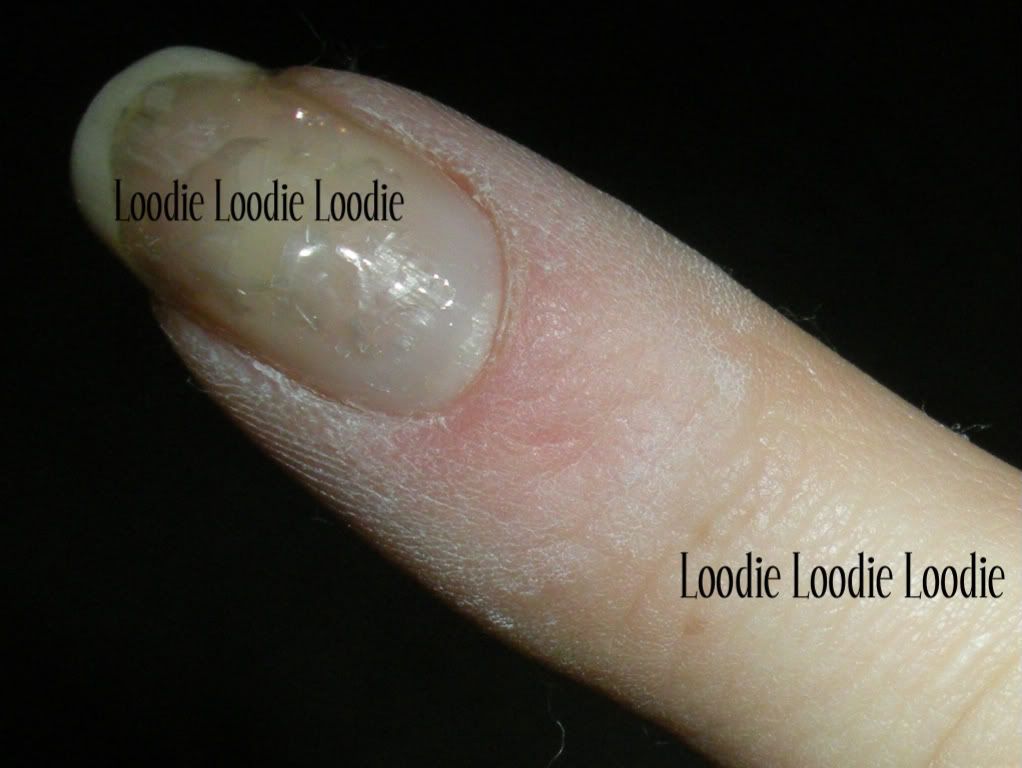
4. Remove any fuzzies.
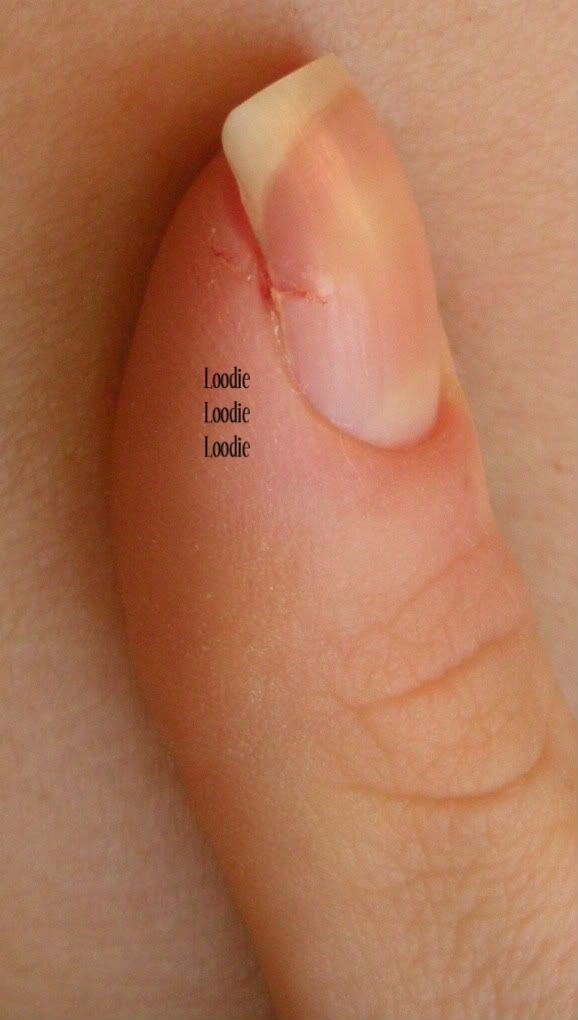
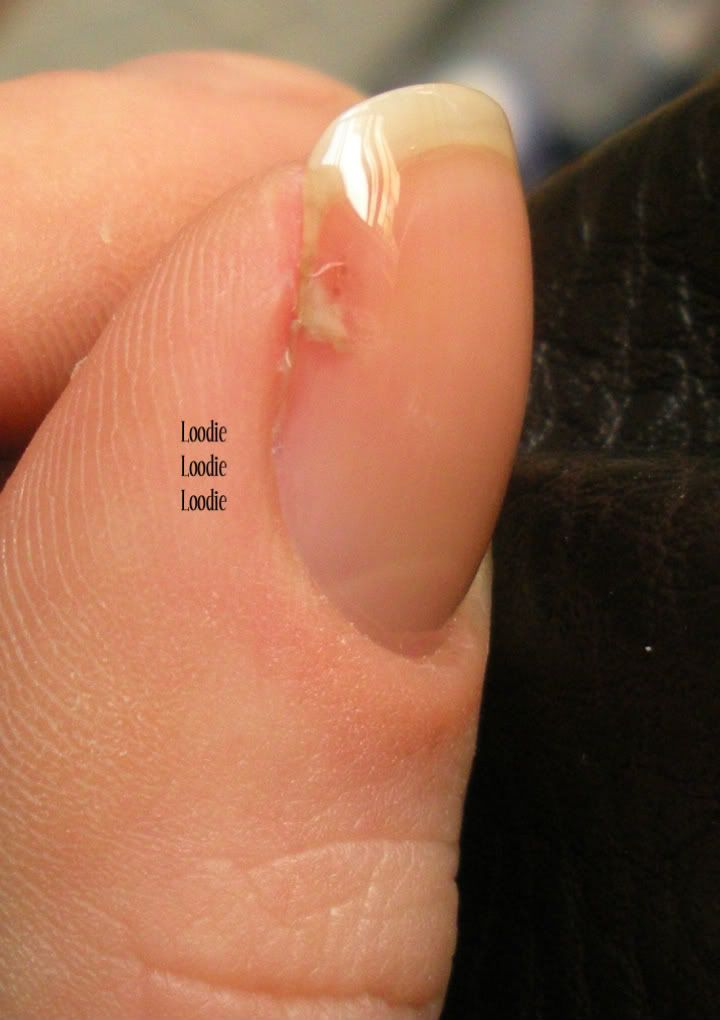
 awww, for my ouchie


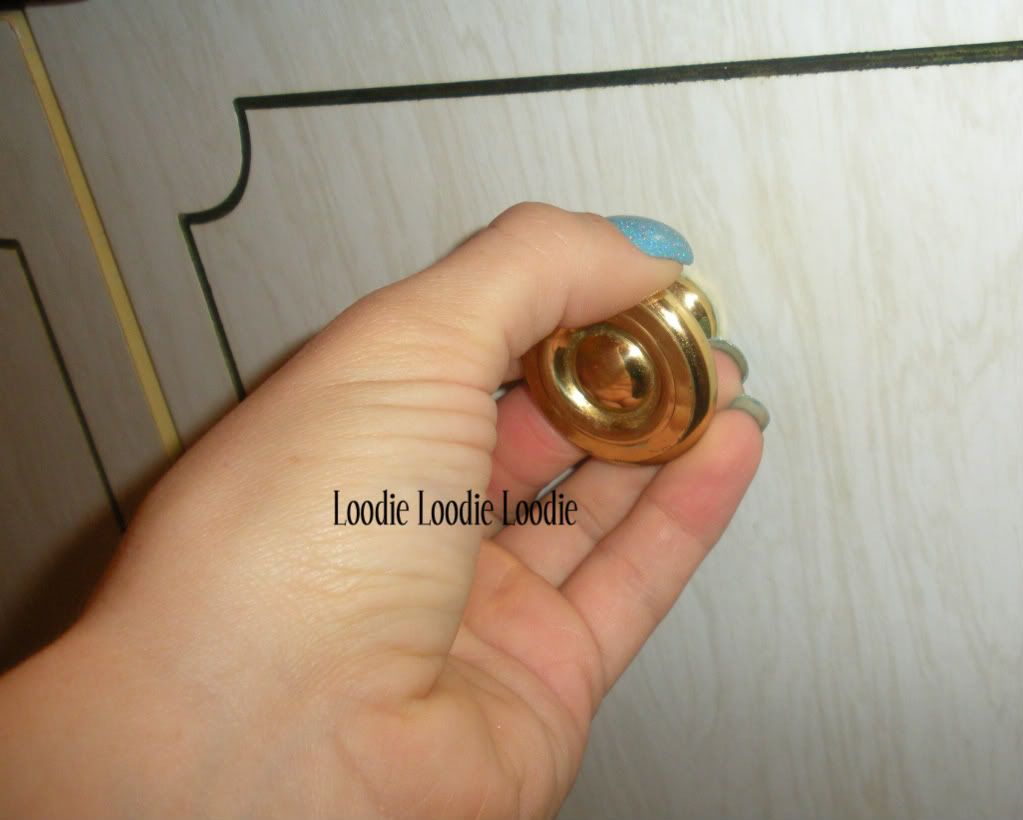
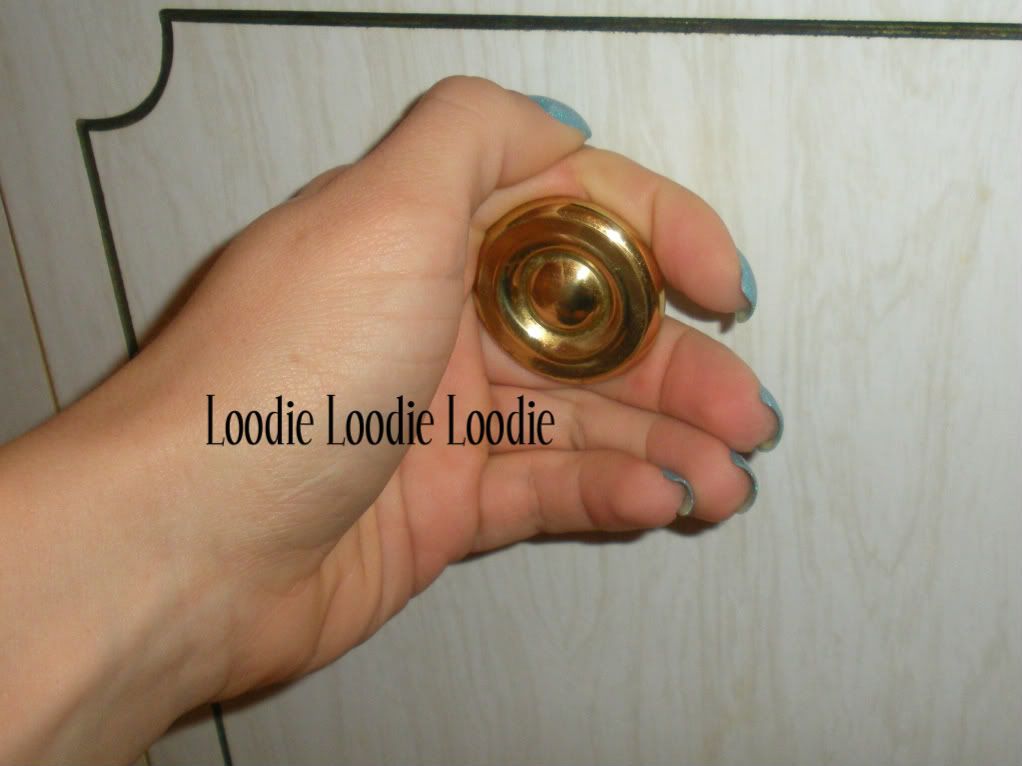
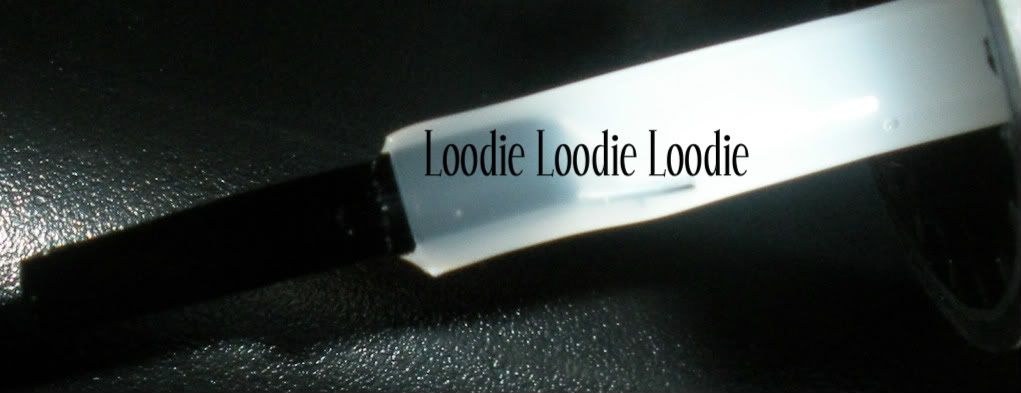
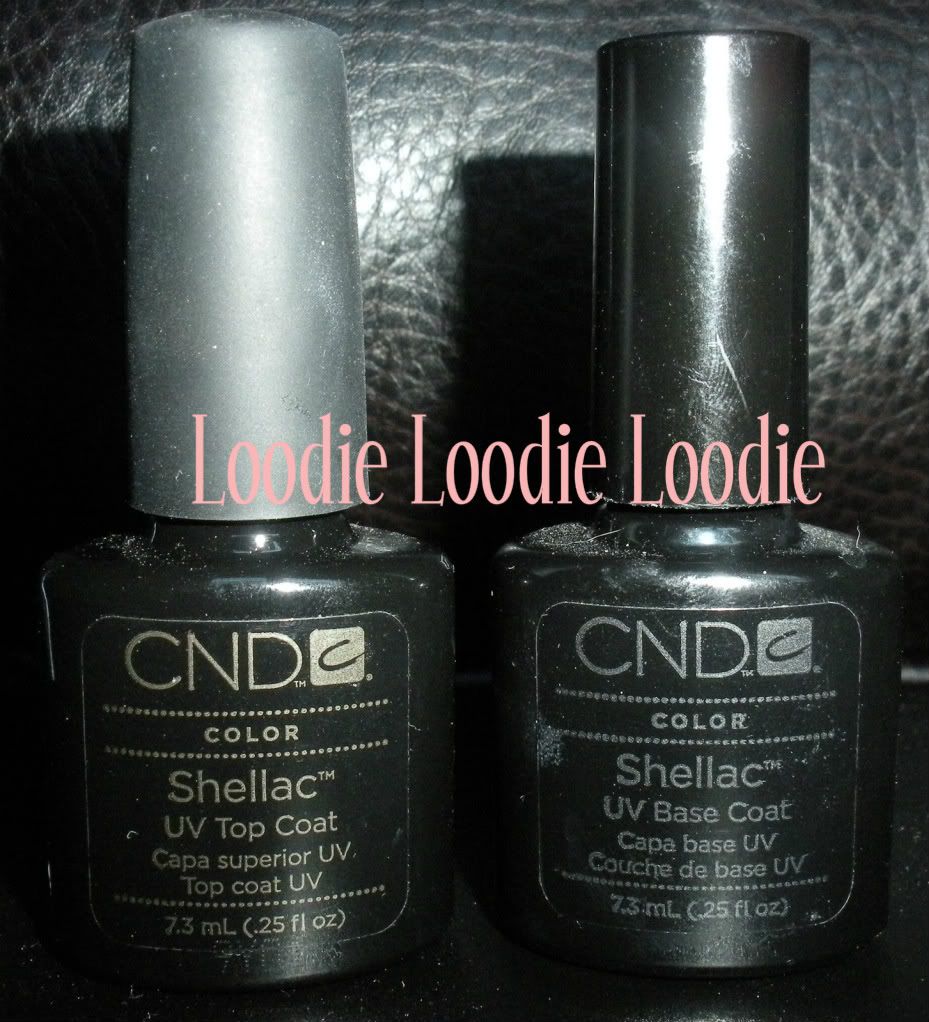
5. In this example I will only use Shellac top coat because the Shellac base coat I received had a brush that looked like the picture below.  BUT keep in mind using the base coat does make the Shellac last longer than top coat alone.


Ignore the color. I tried switching brushes from another bottle, but apparently there was some hardening of the Shellac and it bent that brush as well. Although I used the base several times with the wonky brush, I find that the product works just as well with just the top coat. I think the most important part of using Shellac to fix a nail is the amount of coats combined with proper curing times. So, a proper working brush is a must and makes this process a breeze.


It should look like this brush.


The official process for Shellac is:
a. base coat ... cure 20 sec.
b. color coat ... cure 2 min.
c. color coat ... cure 2 min.
d. top coat ... cure 2 min.

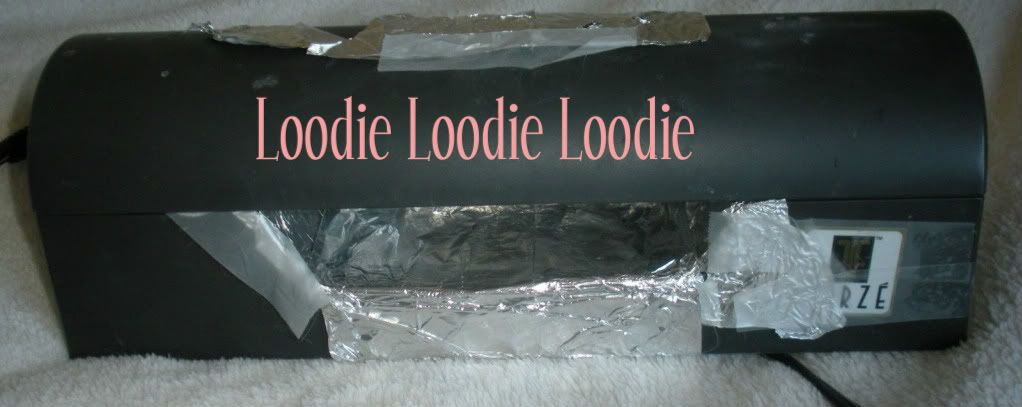
However, I do 4 coats of either base/top with modified curing times because my lamp is super awesome :) lol

Depending on the UV lamp, curing times should be adjusted so the shellac cures properly.  

The following works great for me:


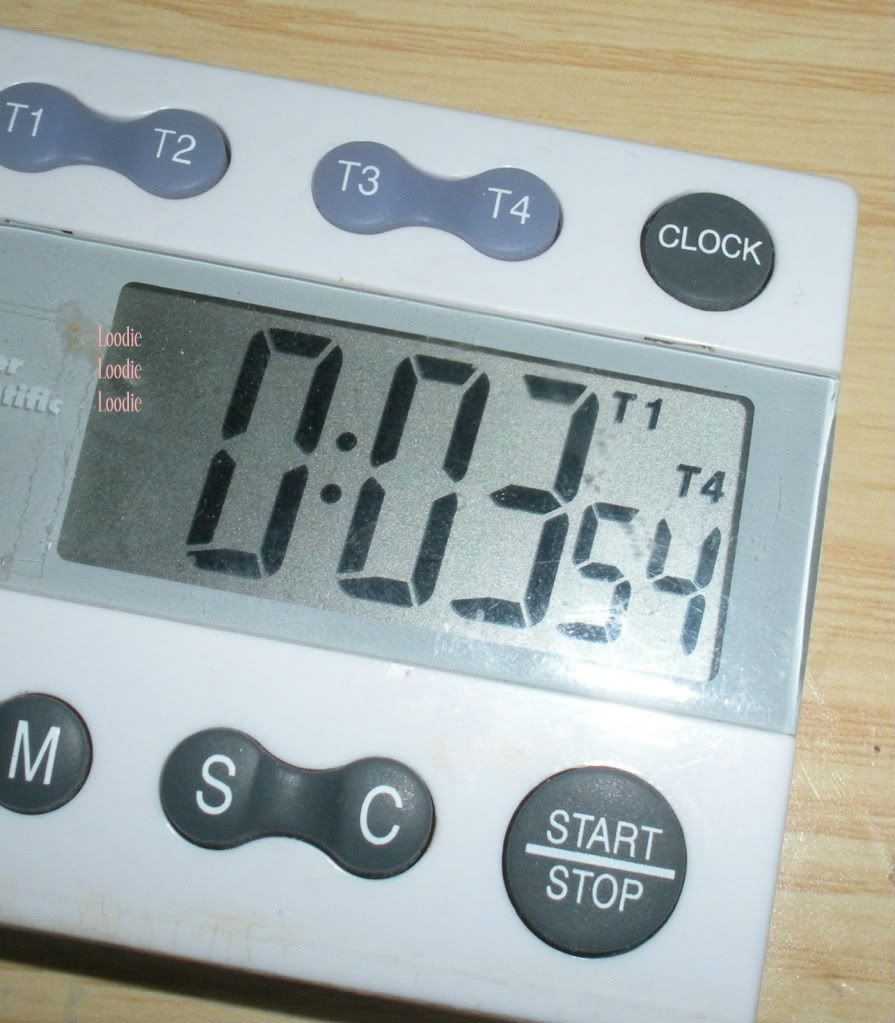
a. One thin coat of Shellac base coat (lasts longer) or Shellac top coat. Make sure to avoid the cuticle area and side walls or the Shellac will lift.  I also wrap the tip to prevent lifting at the tip.


Cure 4 min.

Then apply a thin coat of the top coat. 
Cure 4 min.

I repeat this process 1-2 more times using thin coats of more topcoat.  I cure 4 minutes after each coat.


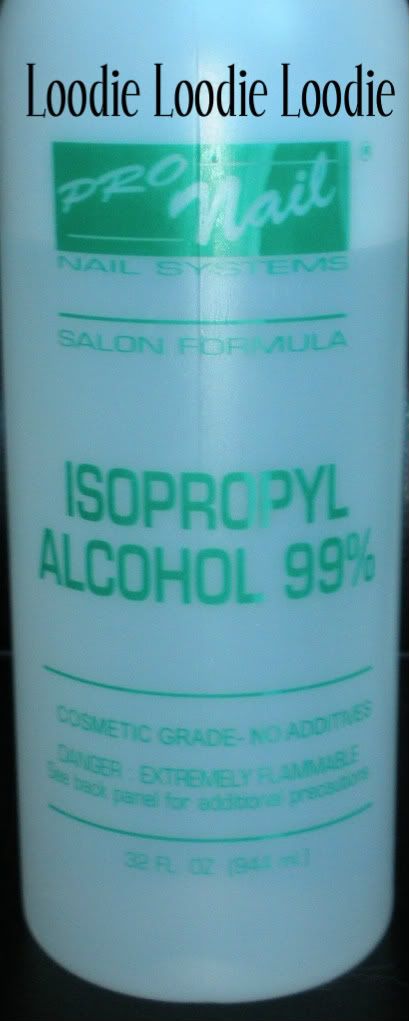
6. The last step after your 4th coat and cure is to swipe the nail with 99% isopropyl alcohol to remove the "tacky" inhibition layer.  Like, I mentioned before 70% will not work as well because it's diluted with water and this does not play nice with Shellac.

Result:


yay to self leveling!


yay shiny!


Except that the others are not shiny.
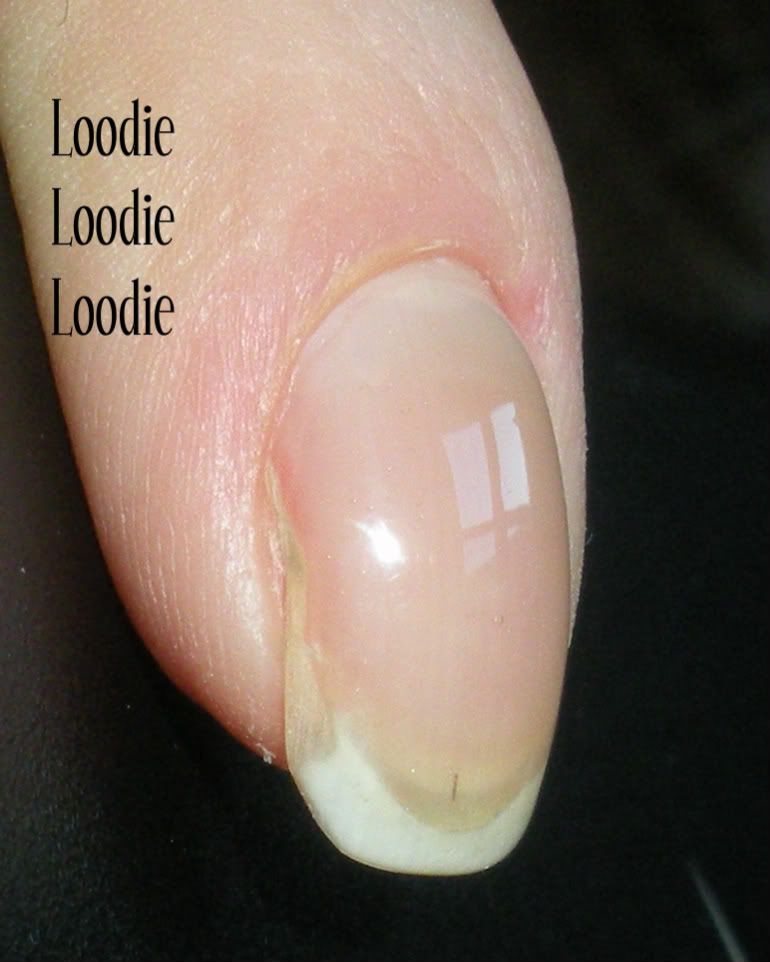
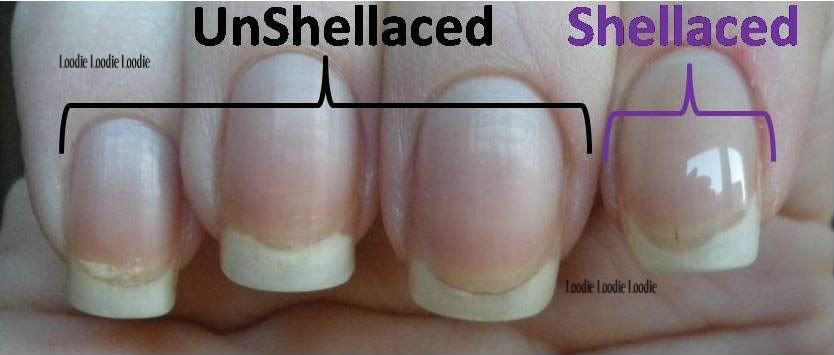
The pinkie, ring and middle are not Shellaced, while the index is. You can see the index finger looks pretty natural in comparison to the others. Pardon the ouchie and naked nails.


On the left is an unShellaced middle finger, on the right that same Shellaced index. From the profile picture you can see that one of the nice things about Shellac is that it doesn't make the nail look all big, thick and fake looking.


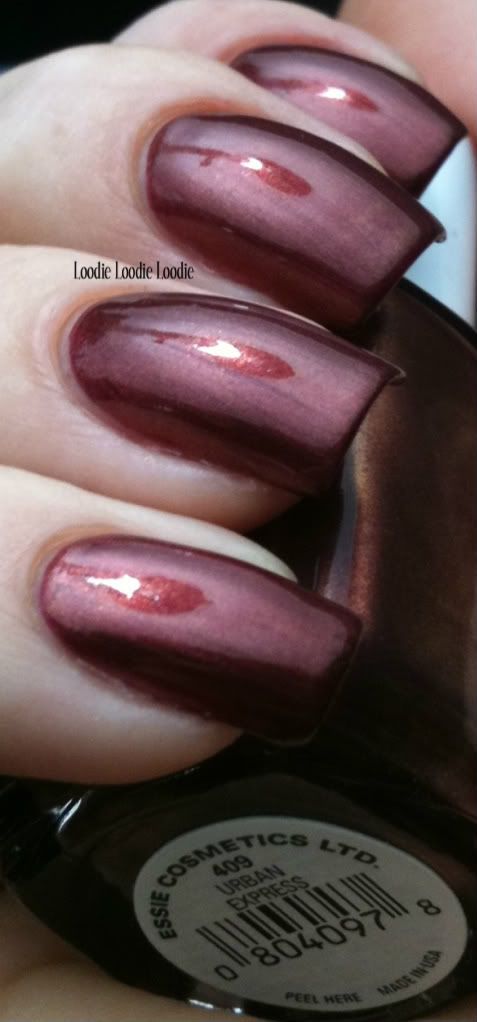
After the Shellac is all cured you can put regular polish on top and do a mani like normal.
Essie - Demure Vixen 3 coats.
The pinky, ring, and middle fingers are unShellaced while the index is Shellaced. I like how natural it looks.


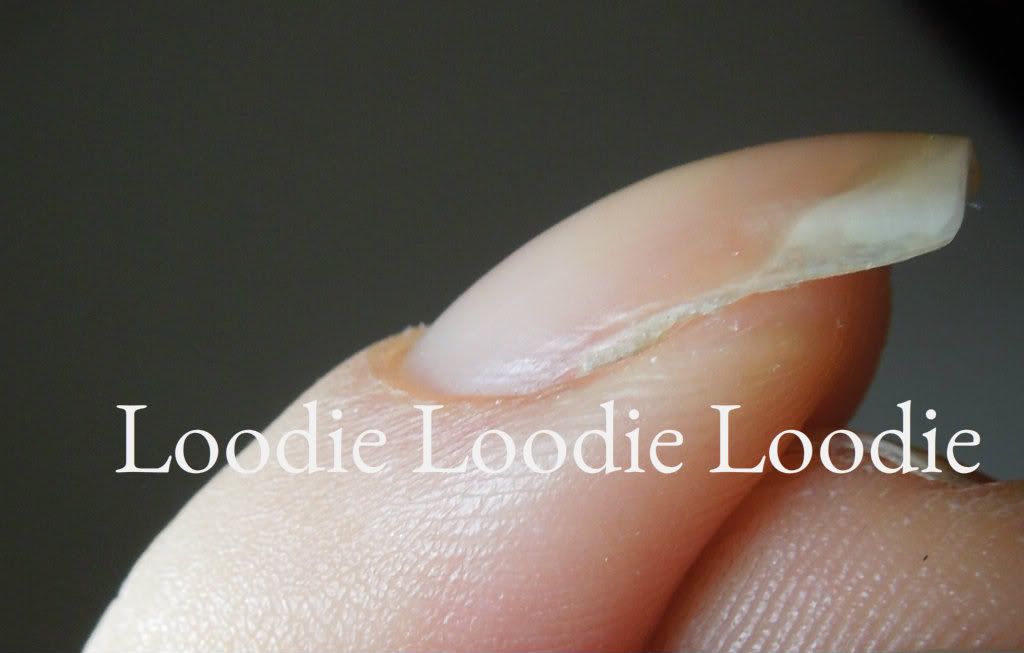
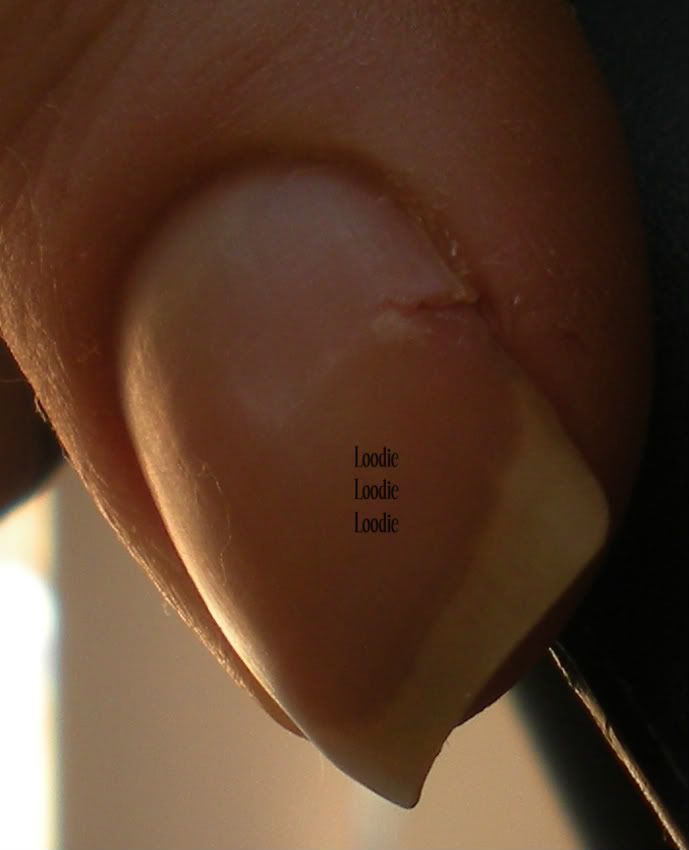
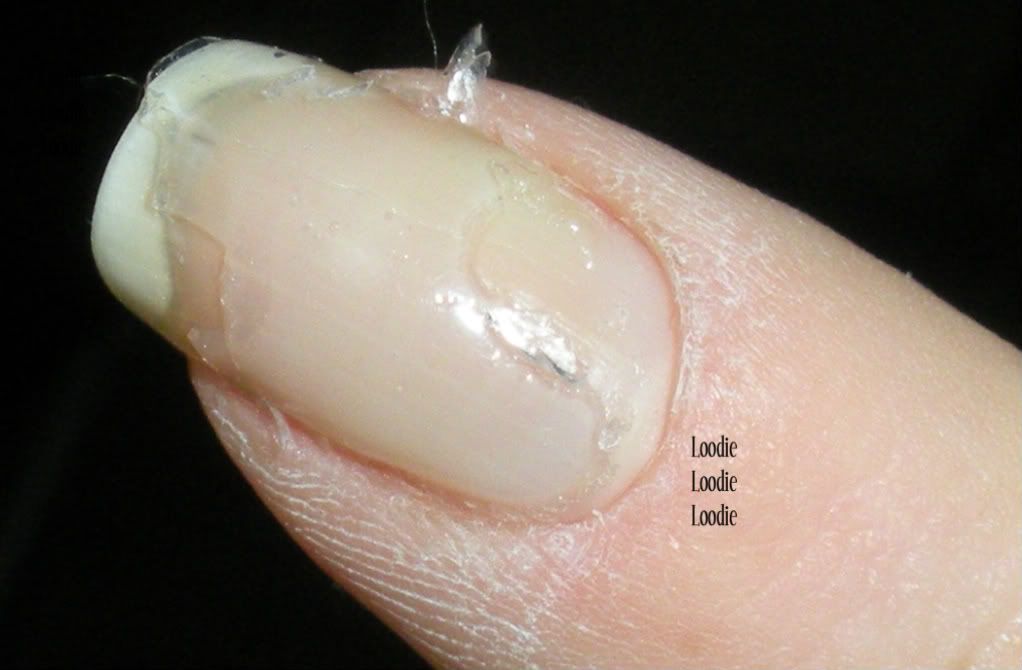
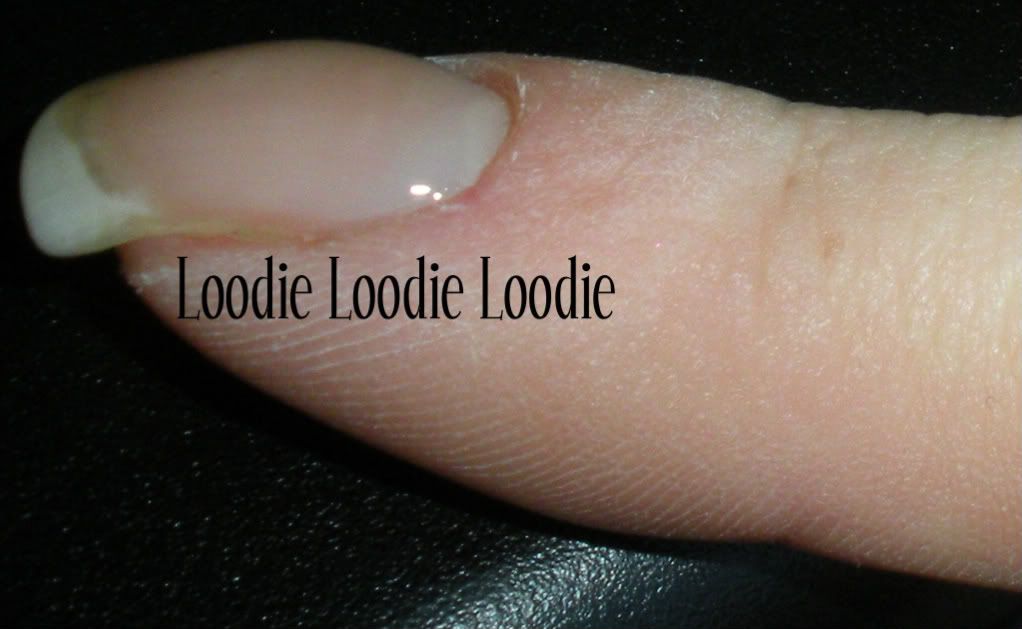
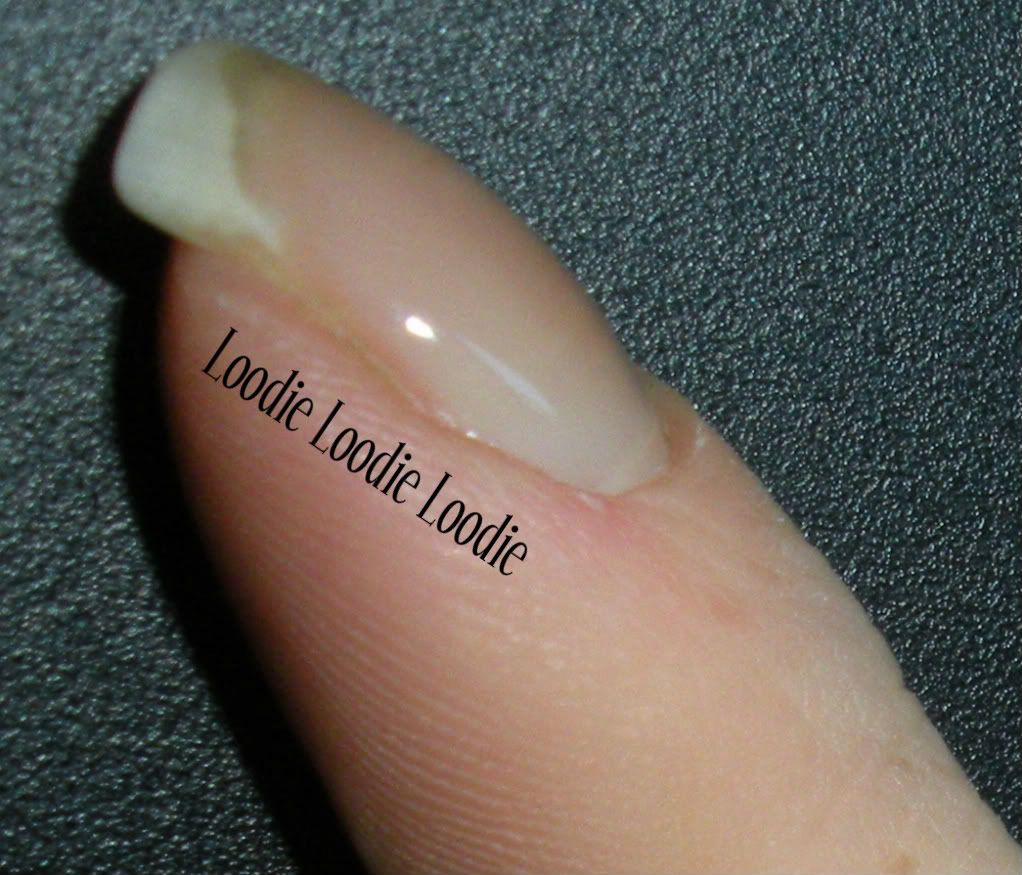
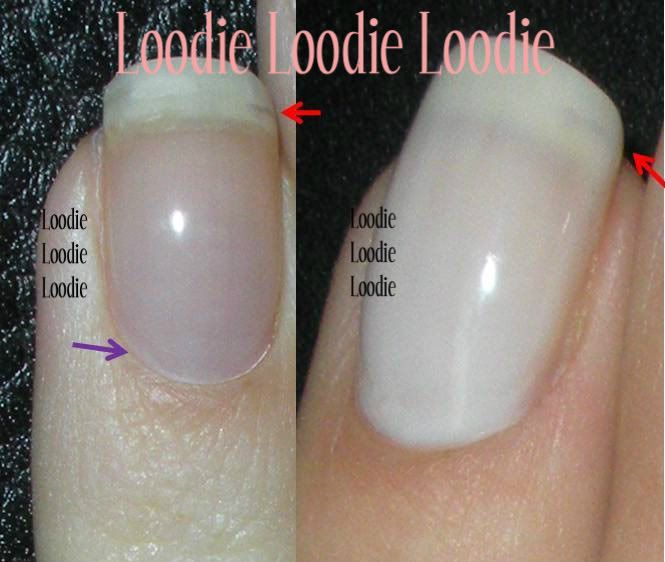
Here is a fix I did on a nail that broke way down past the free edge and eventually grew out. If you click on the pic you may be able to see the crack (red arrows) and regrowth (purple arrow).


As a general rule of thumb avoid acetone the day (or even day after) you do this fix because the Shellac may start disintegrating much easier. However, after that, I have not had too much problem with brief acetone contact for polish change in the days following and can last 1-2 weeks no problem with two or three polish changes.

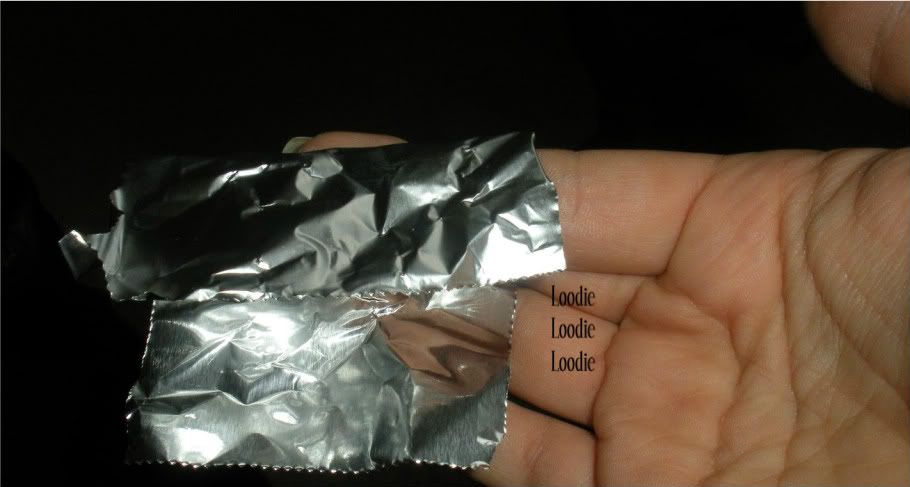
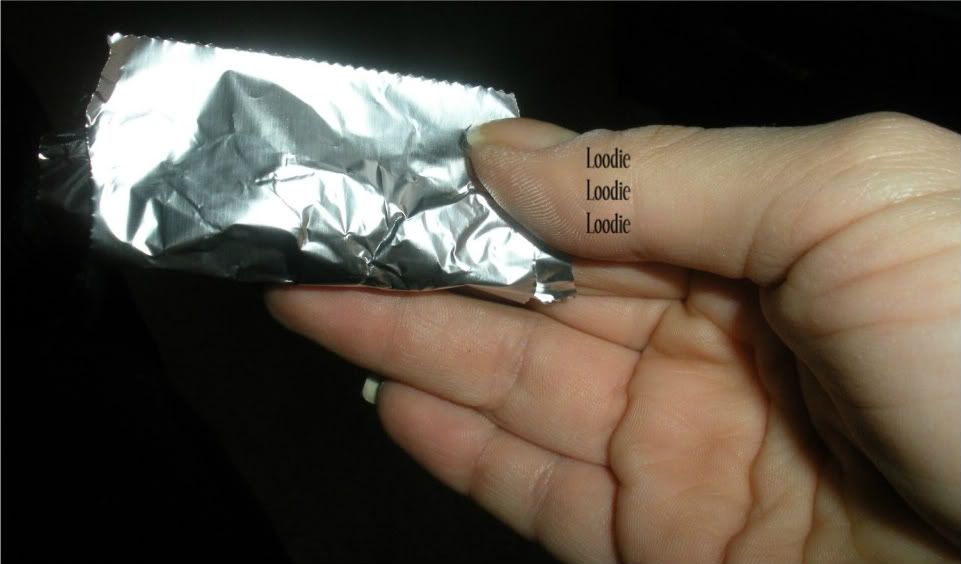
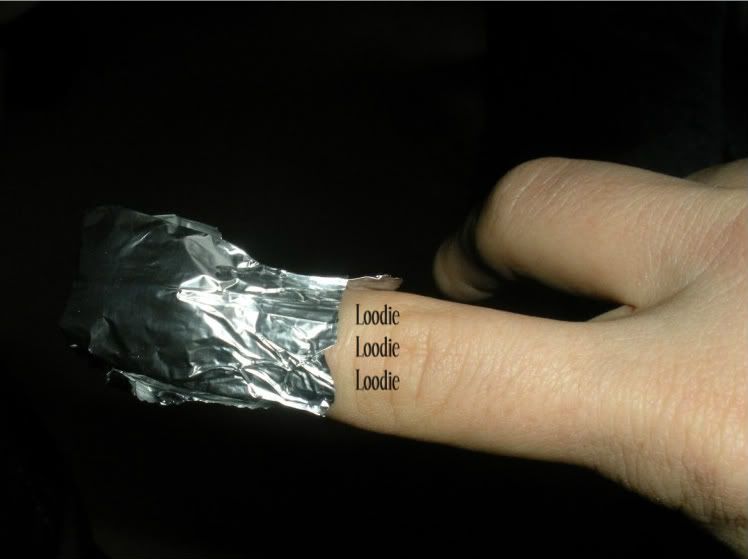
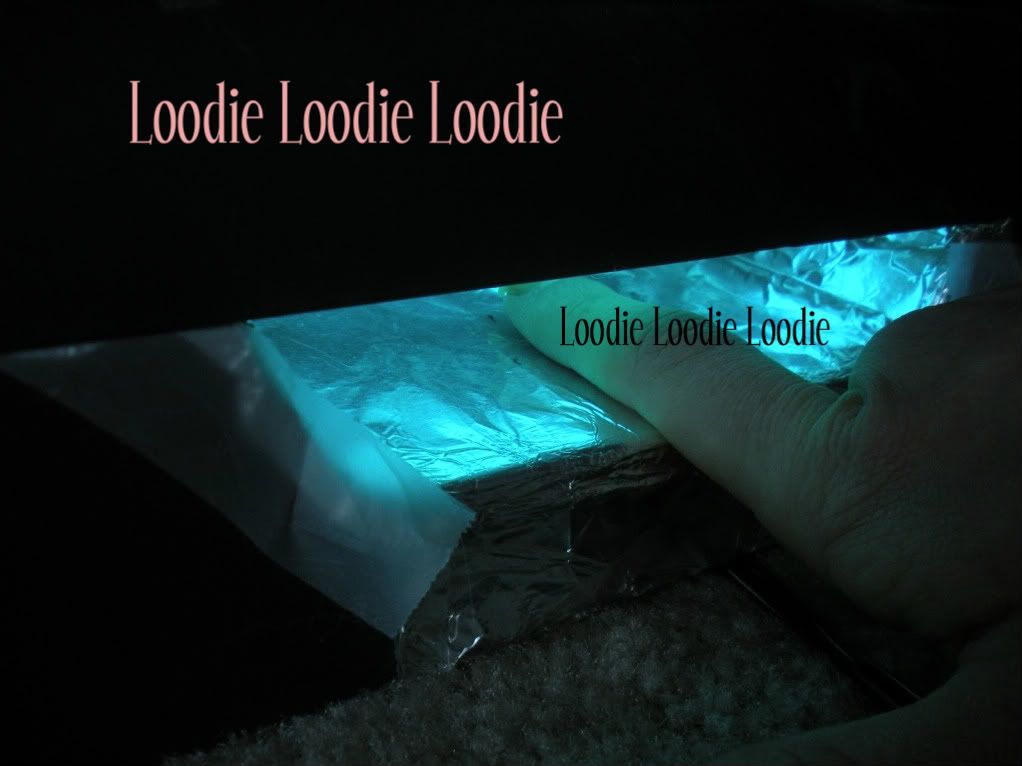
Since the foil method is used to remove Shellac glitters may not be a good polish choice.

Would you like to see a video of this process?!  Click here
Part III - Removal of Shellac
Part IV - Problems and Question for Shellac

Saturday, January 22, 2011

Nail Fix

Great, now what?! There are several options for nail breaks depending on how severe your nail break happens to be. A few options include, the tea bag trick and Orly Nail Rescue.  However, my preferred solution does not include either.  I don't like anything that involves nail glue because I find it actually makes my nail brittle and the nail has a tendency to break completely off. I usually try to avoid taking down length because it's traumatizing (and sometimes you just can't go down any lower), so for nearly all cracks or tears I prefer GEL POLISHES.  Yes, in bold letters to tell you how awesome they are for this job. If you're not familiar with soak off gel polishes think Axxium (OPI), Shellac (CND), Gelish (Harmony), Gelac (IBD), Gelz (Ez Flow), etc.

Advantages:
1. No filing of the nail plate is required before application ... although meticulous nail prep is!
2. Most gel polishes are self leveling so no filing is required after application. The result is a more natural looking nail.
3. Gel polishes provide superior strength to traditional polish.
4. Gel polishes provide more "give" than normal gels and will not crack like nail glue fixes.
5. Gel polishes will last with polish changes if non-acetone remover is used or if contact with acetone is brief. However, if you prefer to change polish everyday, this technique may not be for you.

Disadvantages:
1. There may be a small learning curve and definitely necessary "equipment", but nothing too extravagant and definitely well worth it.
2. If you prefer to change polish everyday, this technique may not be for you since the extra exposure to removers will affect product longevity.
 
So what do we need and what do we do?

The goodies:


1. A gel polish.  For this example I am showing CND's Shellac. I think it is by far the most well know out there at the moment.  However, CND was not the first to come out with this fantastic type of product, but their marketing was extraordinary and that's why it's much more well known  to non-nail fanatics as well. All you really need is either a base or a top or both. Actually, a light color like Negligee will also work. Using the base however will make the mani last. Other companies have just a base. I have a soak of gel polish "base" by a company called Nouveau Nail and its just as fabulous. Many gel polishes come in a bottle with a brush (like normal polish) while others come in a pot and you will have to provide the brush. I prefer the former because it's much more intuitive to work with, but in general applying these products is as easy as painting your nails ... period.


2. UV light. This is a very crapparoo lamp that I have had since 2003, but hey it works. I got this lamp free with a gel system I bought back in the day.  It was a pretty nice gel and currently collecting dust in the closet. In general, most companies want you to use a specific lamp made especially for their soak off gel because it has the correct wattage and light intensity to cure their product properly in x amount of minutes, but ya know what, no thanks. They are expensive and I will keep in mind that their product may not work 100% without it. The main concern is that the product may not cure properly.  As an example, CND's specific light for Shellac has a higher wattage and light intensity and as you can see from the picture I finagled my old light with tin foil for more intense reflection and I tried to decrease the surface area the light had to travel. Ewww, I know .... it looks .... gross bad ass. Basically, I just let the gel "cure" longer and have not had a problem.


3. 99% isopropyl alcohol.  70% (rubbing alcohol) will not work as well to remove the inhibition layer at the very end of this process, so find the good stuff.


 4. Timer!


5. 100% Acetone 
Stick to 100% acetone, other additives might inhibit proper adhesion of the gel polish.


 6. A nail to be fixed. First a little explanation. When my husband saw this pic he said "ewww, whats wrong with your nail." First, I almost cried, then wanted to punch him in the gut. Alas, karma stepped in and a millisecond after that statement he dropped the remote on his foot. Ha ha!. Okay, but really there is nothing wrong with my nail per say. My nail has always been somewhat see through at the side there (on both pointers), but as such it's a little weak there. If you look carefully (click on the pic) you will see there is actually a small  tear. Now the fixing this nail needs is almost non-existent, but I really wanted to share this tutorial.


Here is Part II of the Nail Fix Series: Shellac Nail Prep and Application
Would you like to see these posts in VIDEO?!  Click here.