This is Part II of the Nail Fix with Shellac series.
Part I of this post can be found here. Scroll to the bottom of the post for the rest of the series :)
Would you like to see a video of this process?! Click here.
First we must prep the nail:
1. The true cuticle (dead skin cells or ptygerium that can grow on the nail plate) must be pushed back or removed. If you put shellac on top of it, it will lift at the cuticle. I showed an example of this problem in my Sally Hansen Sweet Tulip Performance Test. Although a proper post is due on how to remove cuticle, for all intents and purposes, either use a cuticle remover to remove it or oil to soften and push back this skin. The post (with video!) about using a cuticle remover can be found here.
2. Make sure the nail is dry. Your nail should not have visited water for at least an hour before this method of fixing. If you apply shellac to a nail that has slight moisture, once the nail goes back to its dry curvature, the shellac can lift.
 3. Once you are convinced your nail is dry make sure it is clean and free of dirt and oil. Wipe the nail with pure acetone thoroughly, both on top and under the tip.
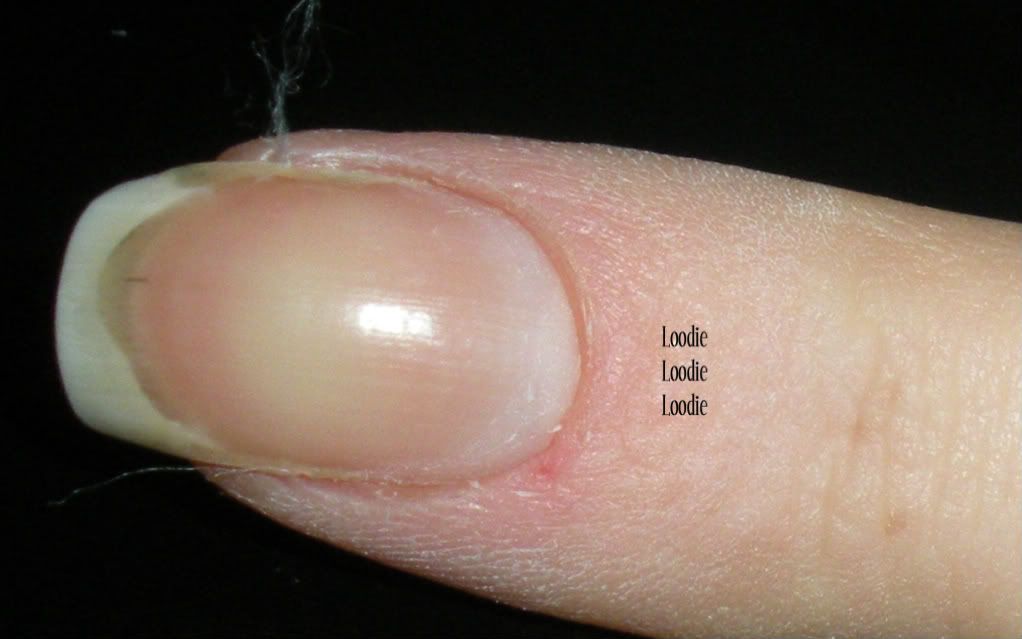
4. Remove any fuzzies.
awww, for my ouchie
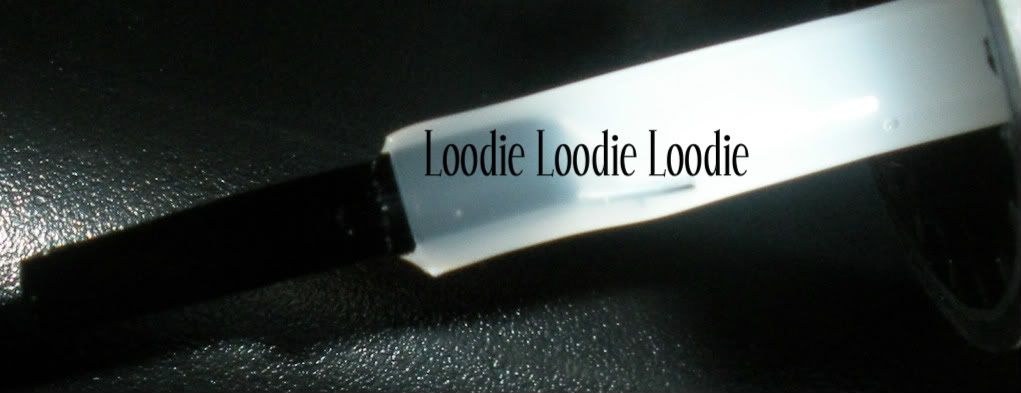
5. In this example I will only use Shellac top coat because the Shellac base coat I received had a brush that looked like the picture below. BUT keep in mind using the base coat does make the Shellac last longer than top coat alone.

Ignore the color. I tried switching brushes from another bottle, but apparently there was some hardening of the Shellac and it bent that brush as well. Although I used the base several times with the wonky brush, I find that the product works just as well with just the top coat. I think the most important part of using Shellac to fix a nail is the amount of coats combined with proper curing times. So, a proper working brush is a must and makes this process a breeze.
It should look like this brush.
The official process for Shellac is:
a. base coat ... cure 20 sec.
b. color coat ... cure 2 min.
c. color coat ... cure 2 min.
d. top coat ... cure 2 min.
However, I do 4 coats of either base/top with modified curing times because my lamp is super awesome :) lol
Depending on the UV lamp, curing times should be adjusted so the shellac cures properly.
The following works great for me:
a. One thin coat of Shellac base coat (lasts longer) or Shellac top coat. Make sure to avoid the cuticle area and side walls or the Shellac will lift. I also wrap the tip to prevent lifting at the tip.
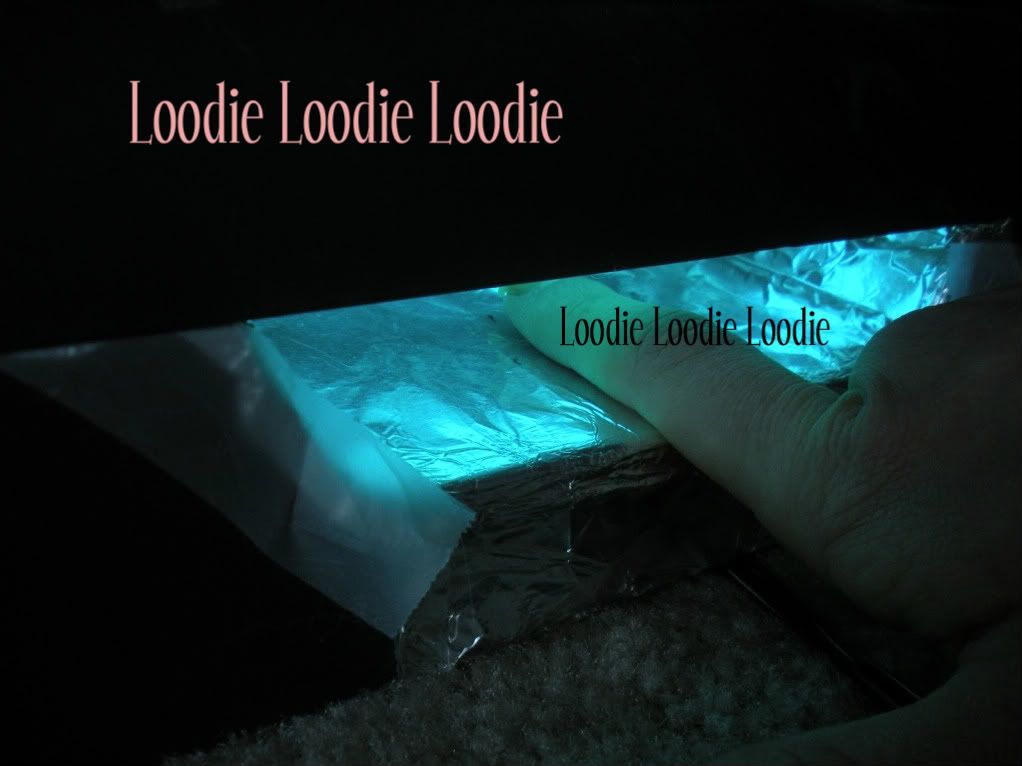
Cure 4 min.
Then apply a thin coat of the top coat.
Cure 4 min.
I repeat this process 1-2 more times using thin coats of more topcoat. I cure 4 minutes after each coat.
6. The last step after your 4th coat and cure is to swipe the nail with 99% isopropyl alcohol to remove the "tacky" inhibition layer. Like, I mentioned before 70% will not work as well because it's diluted with water and this does not play nice with Shellac.
Result:
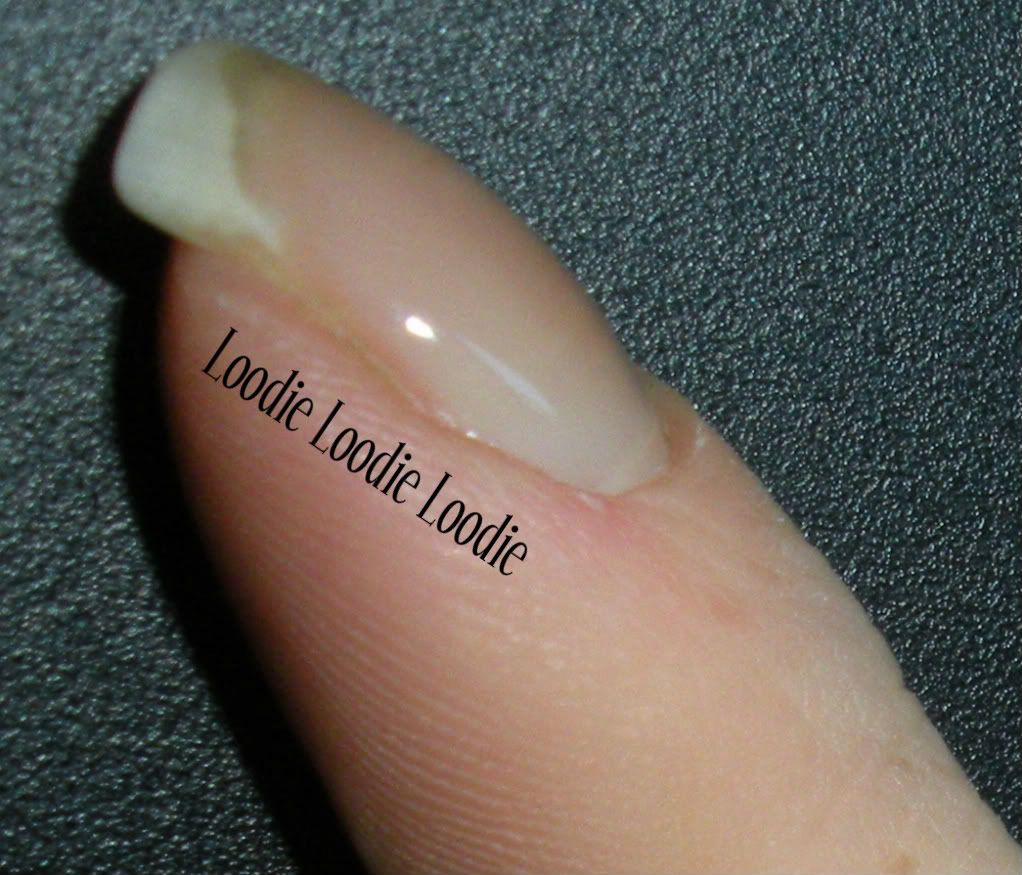
yay to self leveling!
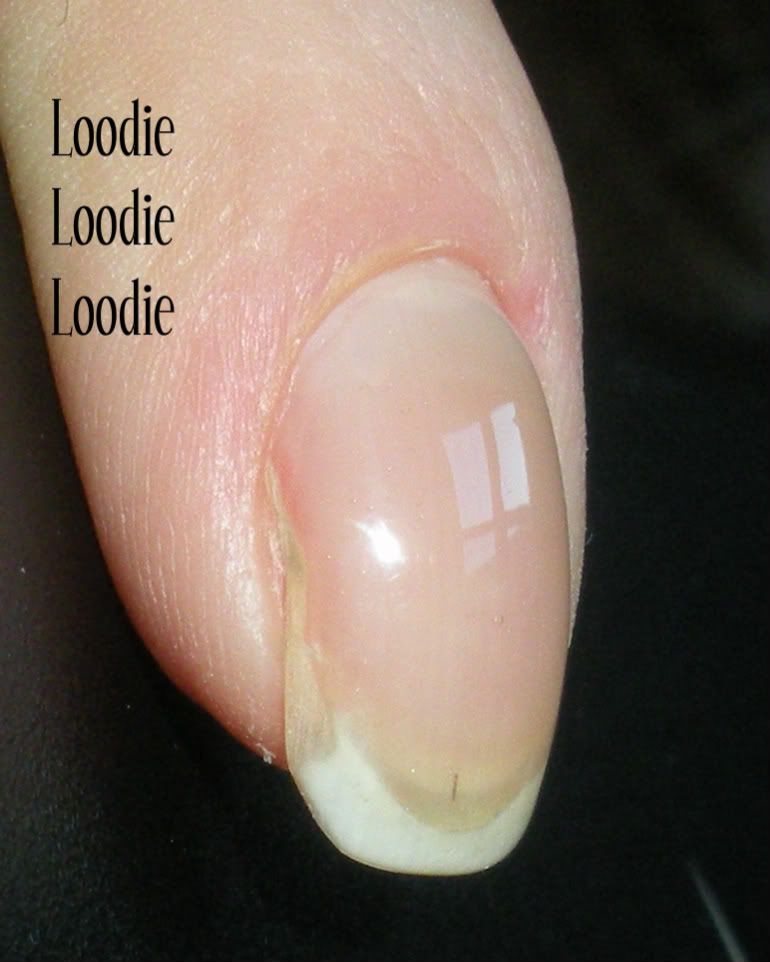
yay shiny!
Except that the others are not shiny.
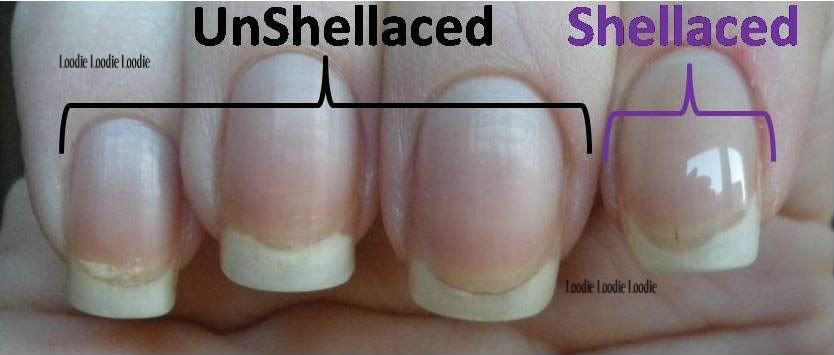
The pinkie, ring and middle are not Shellaced, while the index is. You can see the index finger looks pretty natural in comparison to the others. Pardon the ouchie and naked nails.

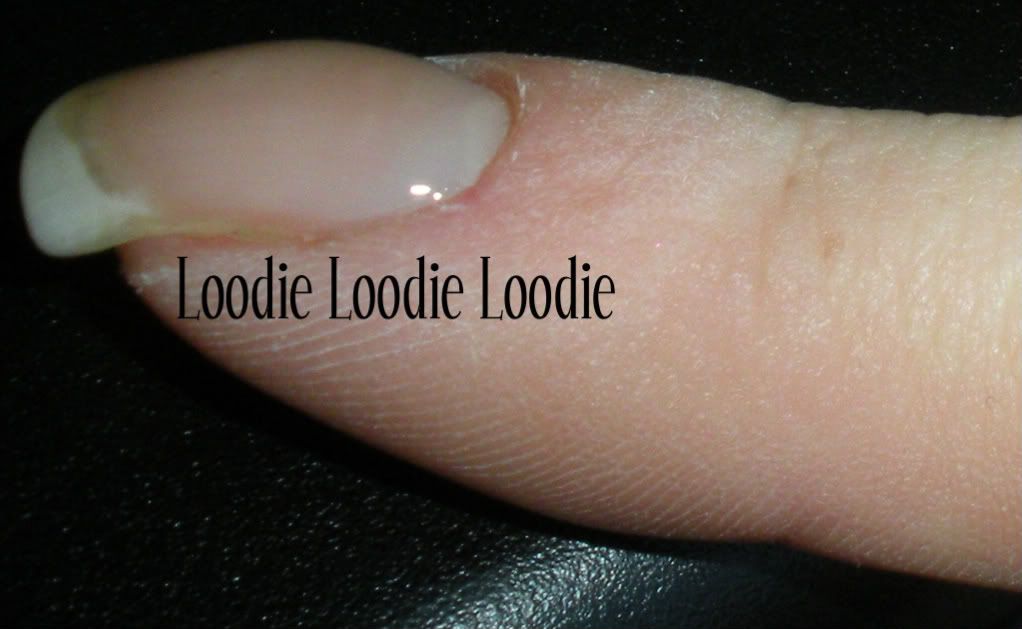
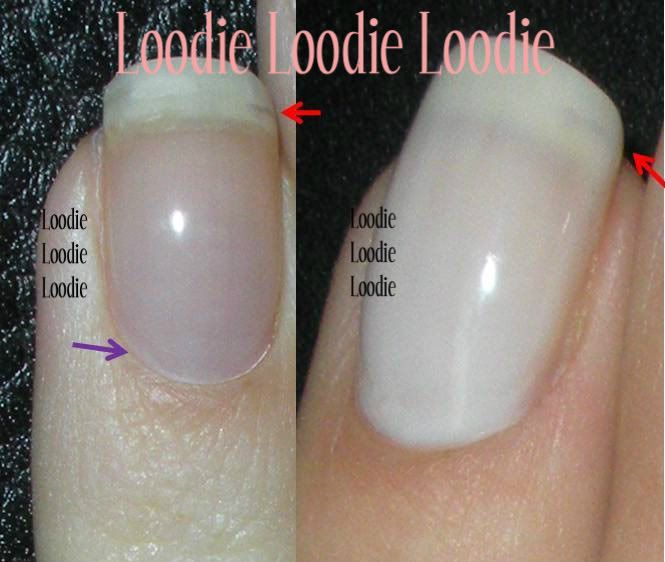
On the left is an unShellaced middle finger, on the right that same Shellaced index. From the profile picture you can see that one of the nice things about Shellac is that it doesn't make the nail look all big, thick and fake looking.

After the Shellac is all cured you can put regular polish on top and do a mani like normal.
Essie - Demure Vixen 3 coats.
The pinky, ring, and middle fingers are unShellaced while the index is Shellaced. I like how natural it looks.
Here is a fix I did on a nail that broke way down past the free edge and eventually grew out. If you click on the pic you may be able to see the crack (red arrows) and regrowth (purple arrow).
As a general rule of thumb avoid acetone the day (or even day after) you do this fix because the Shellac may start disintegrating much easier. However, after that, I have not had too much problem with brief acetone contact for polish change in the days following and can last 1-2 weeks no problem with two or three polish changes.
Since the foil method is used to remove Shellac glitters may not be a good polish choice.
Would you like to see a video of this process?! Click here.
Part III - Removal of Shellac
Part IV - Problems and Question for Shellac
Your lamp is indeed super awesome! I am so glad I found your blog. I was under the assumption that traditional polish didn't play well with Shellac. I was told that it "slips" off. What are you using as a top coat?
ReplyDeleteGreat blog by the way!
Hi Jamila! yay, I'm glad you found me too!
ReplyDeleteTraditional polish doesn't play well when you use combo's of base/color/top of both kinds. This mean a traditional base followed by shellac color would not work and would indeed slip. BUT in my post I used all shellac on a clean nail (all Shellac top to be exact). Then after all the coats were cured I polished the nails with traditional polish. The only problem that you could possibly run into is using acetone during polish changes, but like I mention, brief contact is okay for polish removal (after a day or so) and should not remove shellac. You would need to sit and hold acetone on the shellac for 5 minutes to remove it.
Great tutorial! Too bad you have to have an uv lamp for this to work, I don't think I want to bother getting one right now. I have bought Orly nail rescue kit, have you tried it?
ReplyDeletewould love a post on repairing peels!
ReplyDelete@Solveig Thanks! :) I totally agree the UV lamp can be a hassle, but it's totally worth my time and money. I have never used Orly Nail Rescue, but I am not a big fan of using nail glue to fix nail breaks even if there is acrylic powder involved. Like I mention in the first post I feel like it makes my nail brittle and more likely to break. Shellac is more flexible and I don't feel like I have to baby my nail. Furthermore, pictures of fixes using the Orly method look very bulky and unnatural to me, but I am sure that's user problem and I don't fault the product. Since Shellac is self-leveling there is no buffing or filing necessary after application. I think the fix look much more natural. To each his own ... :)
ReplyDelete@nikole I am definitely working on it! :)
All this time I thought you had perfect nails! Now I know you shellac. I need to get meself a UV lamp and shellac, my nails peel way too much.
ReplyDeleteExact my thoughts. Have you tried shellac?
DeleteI can't believe how healthy & shiny they are. I also thought you were blessed with immaculate nails.
ReplyDelete@Olivia and Taylor What do you mean, my nails are naturally perfect?! lol Actually, I am really good at ramming my hands into doors, drawers and automobiles, so nail fixes are a must!. I don't do all my nails just for cracks and tears. For example, the picture with Essie polish, only the index finger is done. Otherwise, I prefer just polish.
ReplyDeleteOoh, I'm glad you posted this. I have a uv lamp so this is something I may have to invest in. I'll definitely be looking out for the removal too.
ReplyDeletehaha don't worry I'd kill to have my natural nails look like yours! It's just impressive how nice of a "backing" the shellac is.
ReplyDeletefo' sho' :)
ReplyDeleteOMG how did I miss this post!! What a great idea to us shellac for a repair. I don't like glue, acryclic either for repairs. I just rather cut all my nails back.
ReplyDeleteI have to give shellac a try and get me a UV lamp. I do have my license. Thank you so much for sharing :)
What an awesome post, the result is so subtle and shiny!
ReplyDeleteHave you ever used fiberglass or silk with the shellac? I have a client who crashed her nail and a chunk was missing....natural nail still present on either side of the missing chunk. I used fiberglass/shellac top coat and it "filled" in the part that was missing. Weeks later, so far so good!
ReplyDelete@Lisa - I have never tried either with shellac, but that is good to know!
ReplyDeleteHi ladies, great posts. FYI the color Tutti Frutti by CND has an OPI almost identical regular polish match which is Cha Ching Cherry. It's great for a quick color touchup when you don't have time to fix the shellac.
ReplyDeleteHi After five days after shellac nails they start coming off. The whole nail at once what am I doing wrong!
ReplyDelete@anonymous - perhaps your nail plate was not free of dirt and oil. Pay special attention to nail preparation before application. Also, try curing longer. after each layer.
ReplyDeleteWhere do you get 99% alcohol? Haven't been able to find it?
ReplyDelete@Alison - I bought it online because I too could not find it in the store.
ReplyDeletedo you think you could use something other than alcohol to finish? jsut because im on holiday in three days and ive waited for ages for all my bits and bobs to come and dont have time to wait for it be delievered if i worder online :/
ReplyDeleteDo you have any beauty supply places near you? They may sell products for gel nails called 'cleanse' or something similar. These are usually 99% isopropyl alcohol. Check the ingredient list.
DeleteAnother thing you can try is walk into a salon and ask if they will sell you some.
You could try 70%, but I can almost gaurantee you won't like the result. It will not be shiny.
Is that cnd shellac or another type? Cnd is so expensive I want to know if there's another brand out there that is cheaper
ReplyDeleteRelatively inexpensive SOG lamps are now available from Ulta (Red Carpet Manicure) and Sally's (Gelish). They are LED and do not cure Shellac. But both of these products have great base and top coats and will work really well.
ReplyDeleteI found 99% isopropyl alcohol at Safeway in the pharmacy section! Just an FYI for those of you who have a Safeway or Von's near you! :)
ReplyDeleteLove this idea! How long does your regular polish last on the shellac base? Will it chip?
ReplyDeleteThis comment has been removed by the author.
ReplyDelete