When I was asked to review Lime Crime's Les Desserts d'Antoinette Nail Polish Collection I was hesitant as they are all pastels. I thought, oh great, seven chalky difficult to apply polishes here I come!
The first thing I notice with these polishes were the names. I loved them all.
'Milky Way'
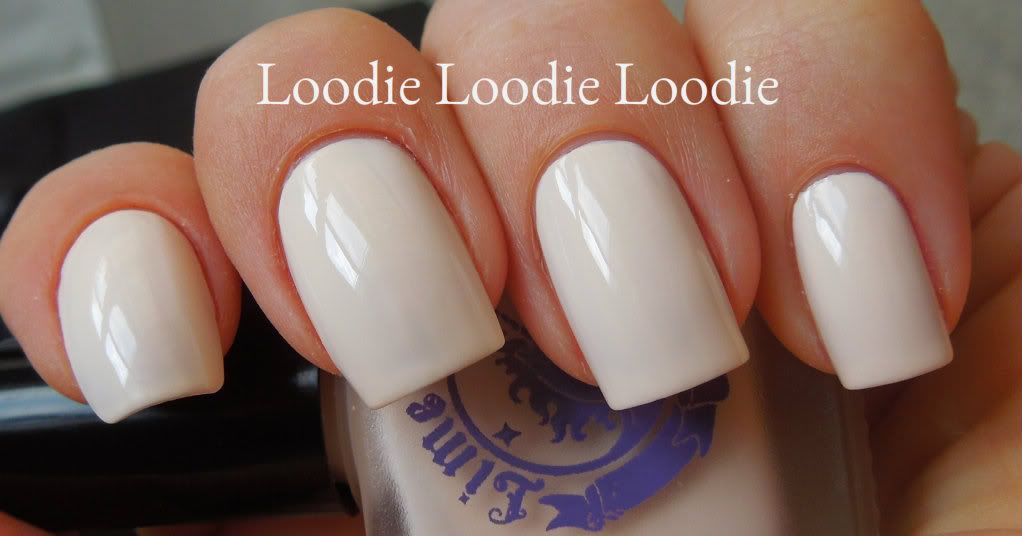
Is it surprising I chose to wear this one first? I love sheer whites so this was the next best thing. It ended up flawless in two coats! It leans slightly beige pink.
Even the first coat was pretty amazing. Quickly, I began to realize these were not your average pastels.
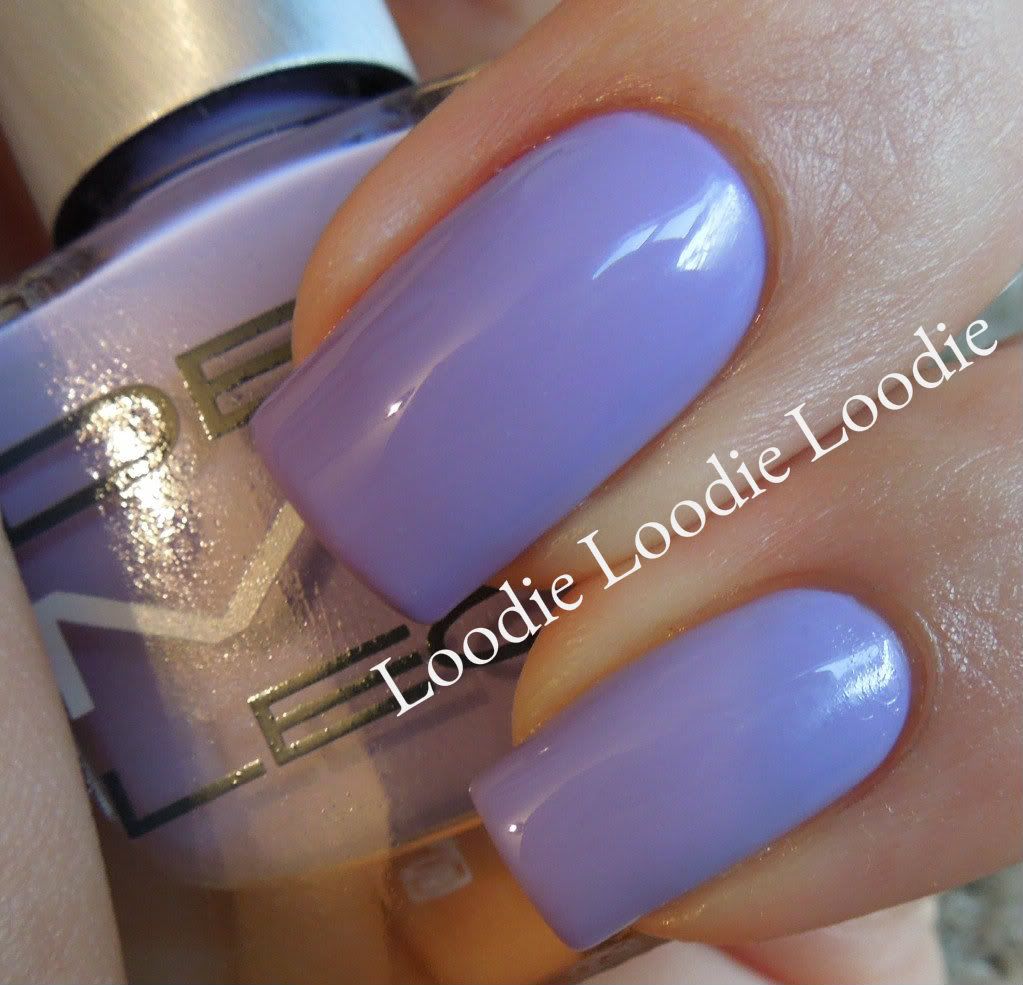
'Lavendairy'
Standard bright lavender lilac pastel.
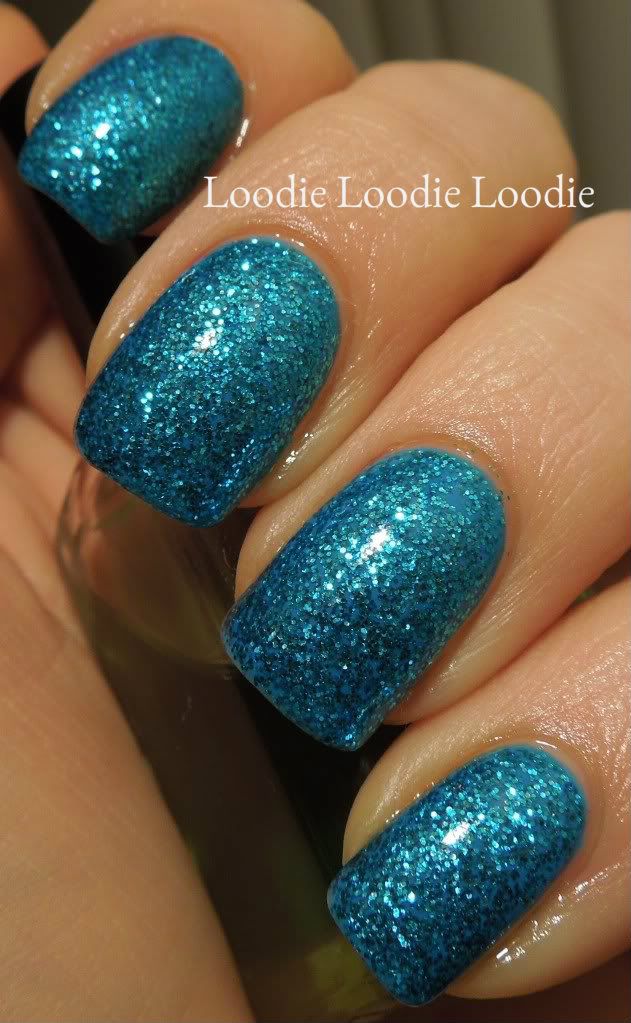
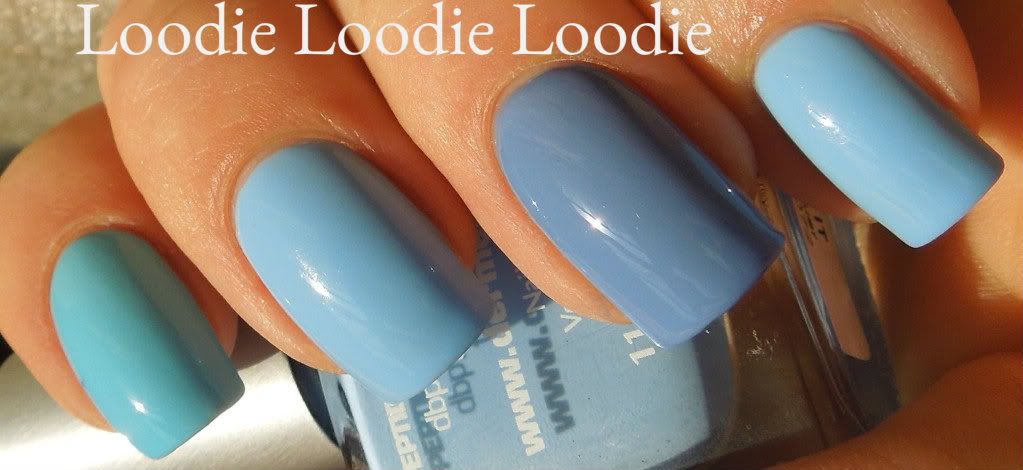
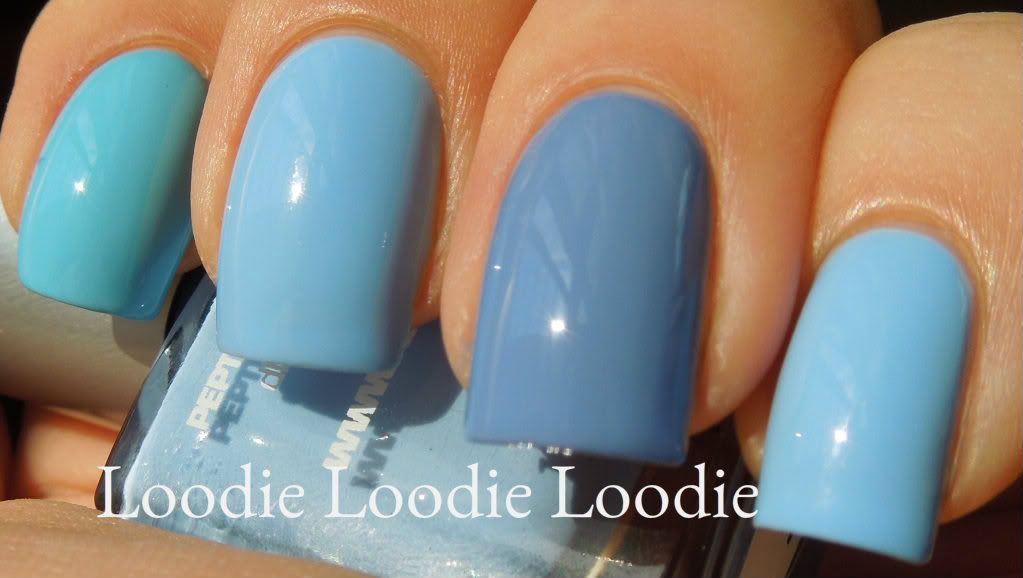
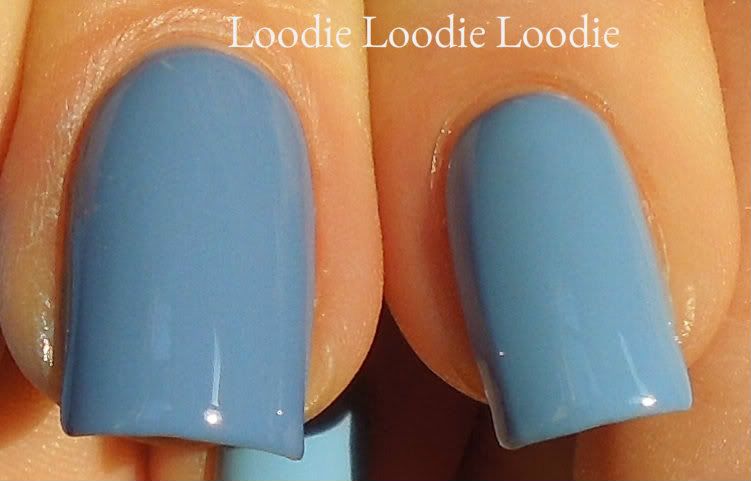
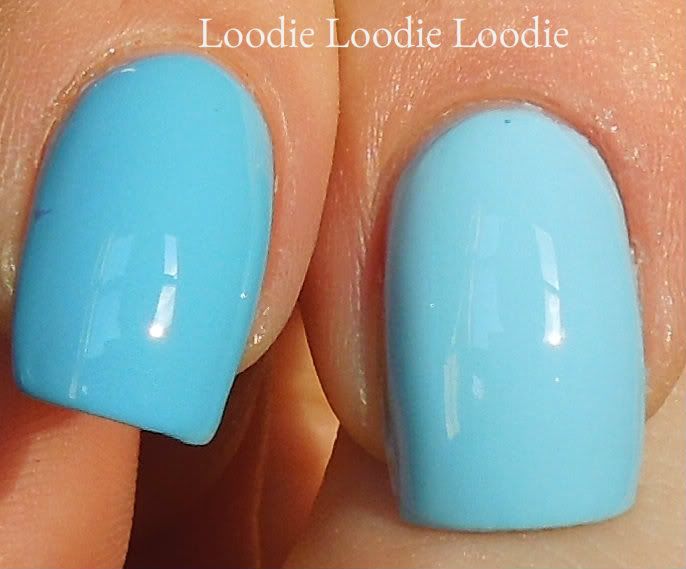
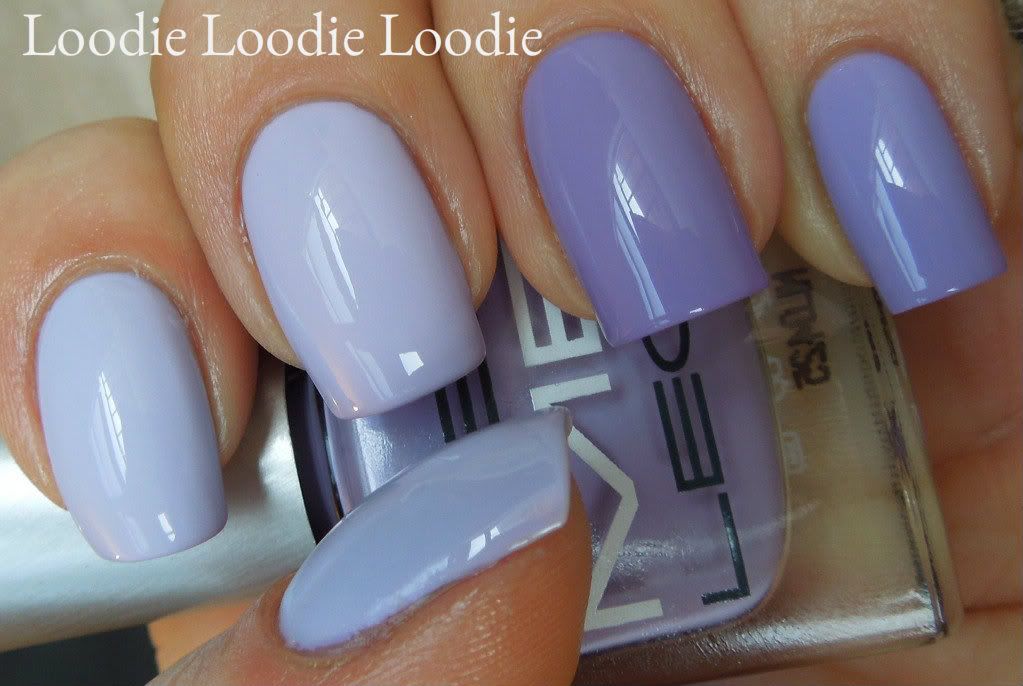
'Once In A Blue Mousse'
Oh man, I really loved this one. It reminded me very much of those Tiffany's like colors. See here.
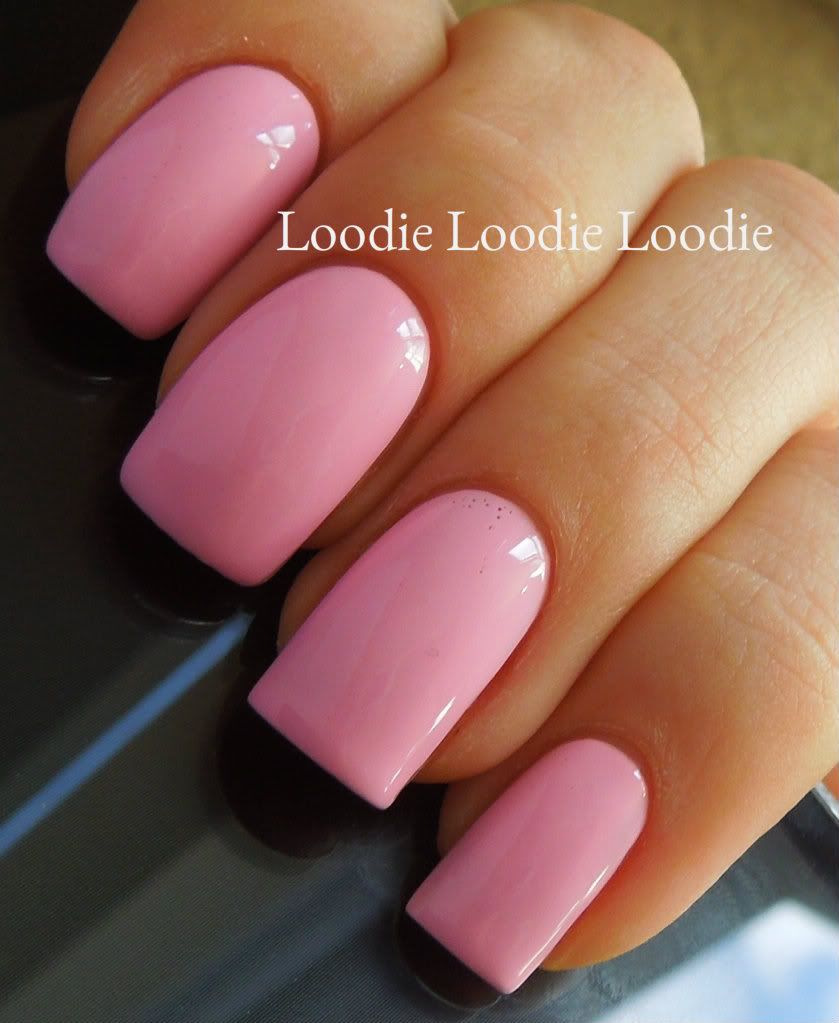
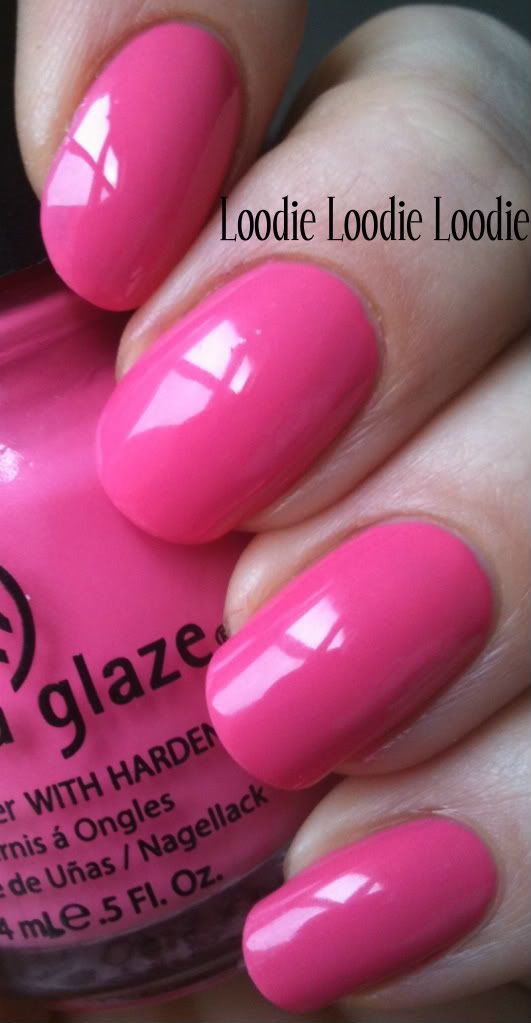
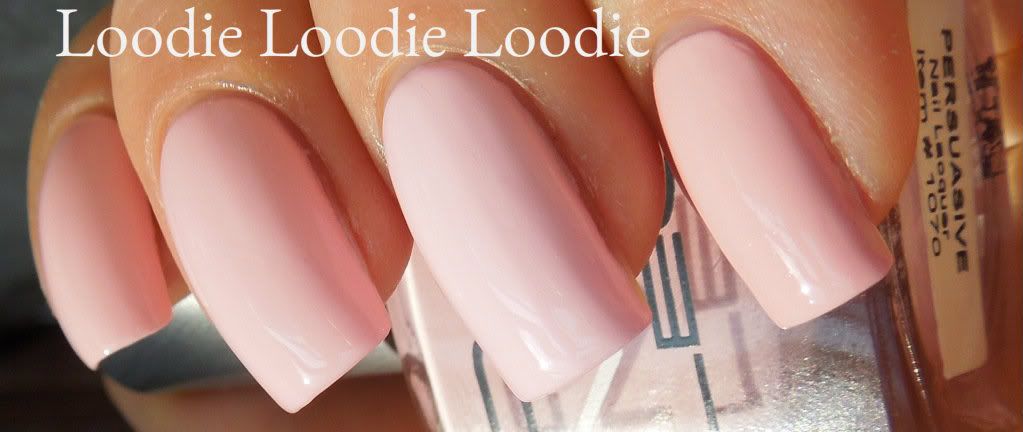
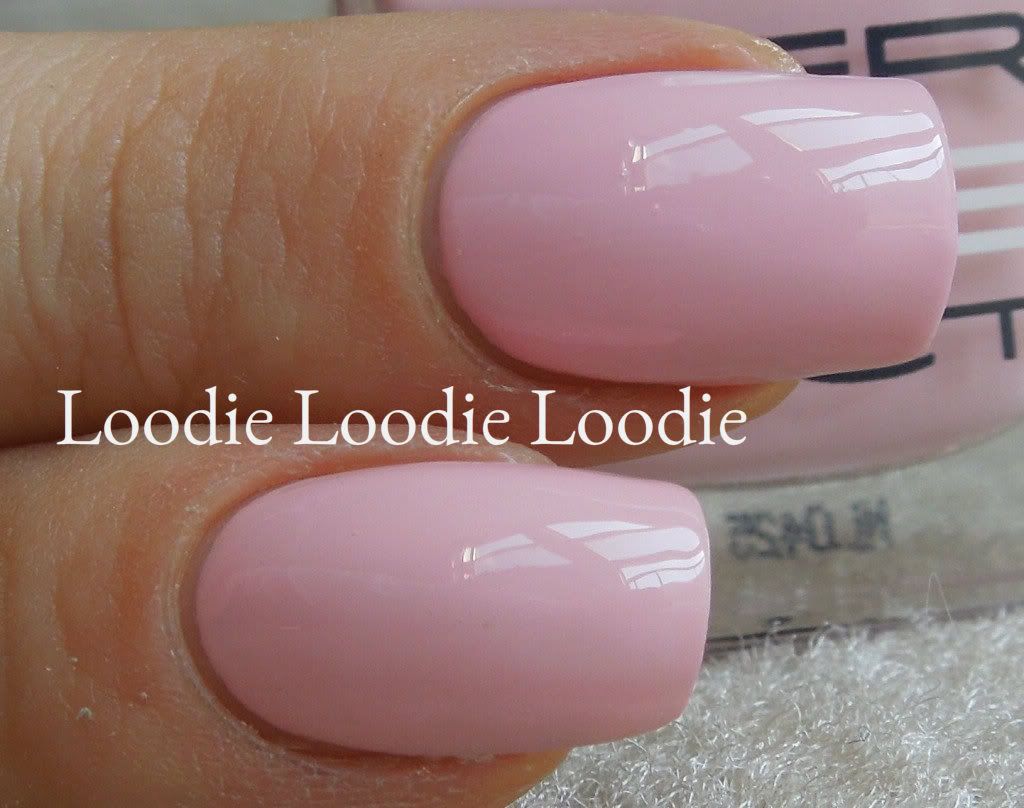
'Parfait Day'
This pink is not quite as bright/neon in real life. Also, do you see the bubbling on my ring finger? That is an application issue; more on that later...
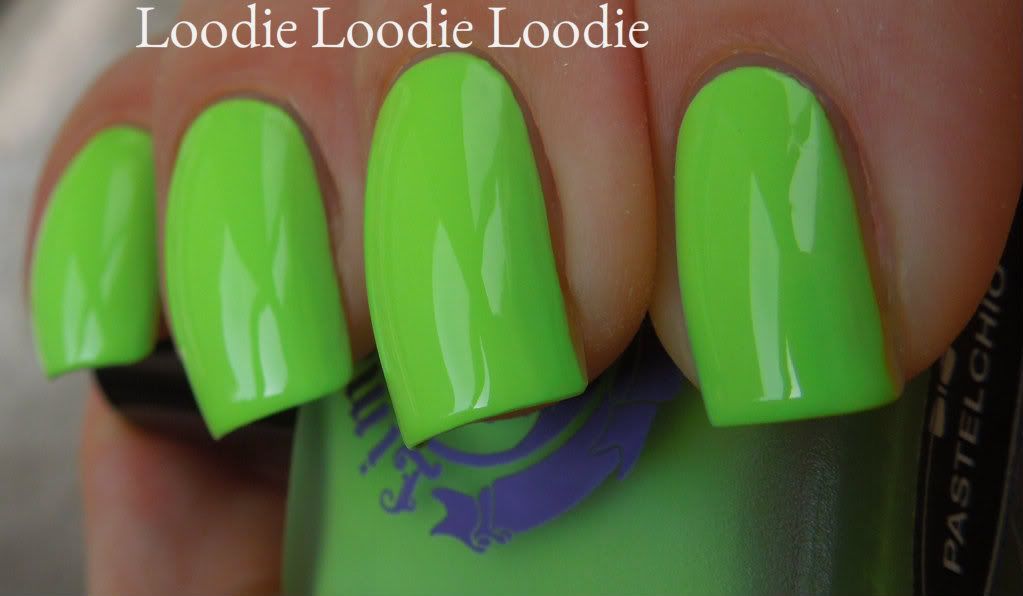
'Pastelchio' <---tee heee!
Woah MAMA! You like green? You like it LOUD!? Well this is your kind of green pastel then. This picture is in the shade too!
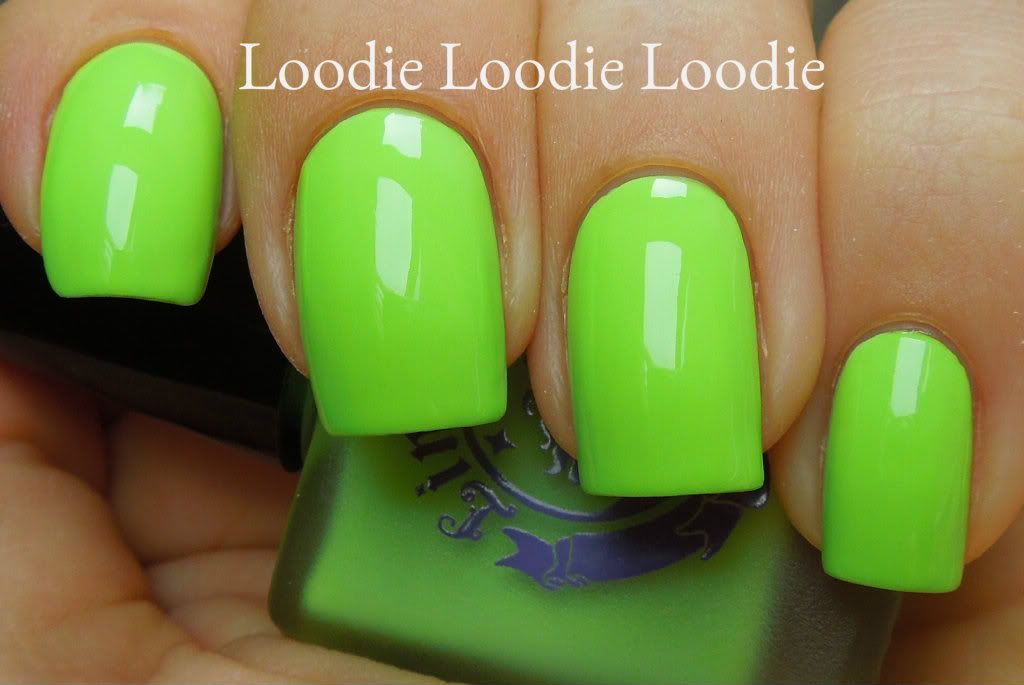
I was definitely self conscious wearing this bad boy.
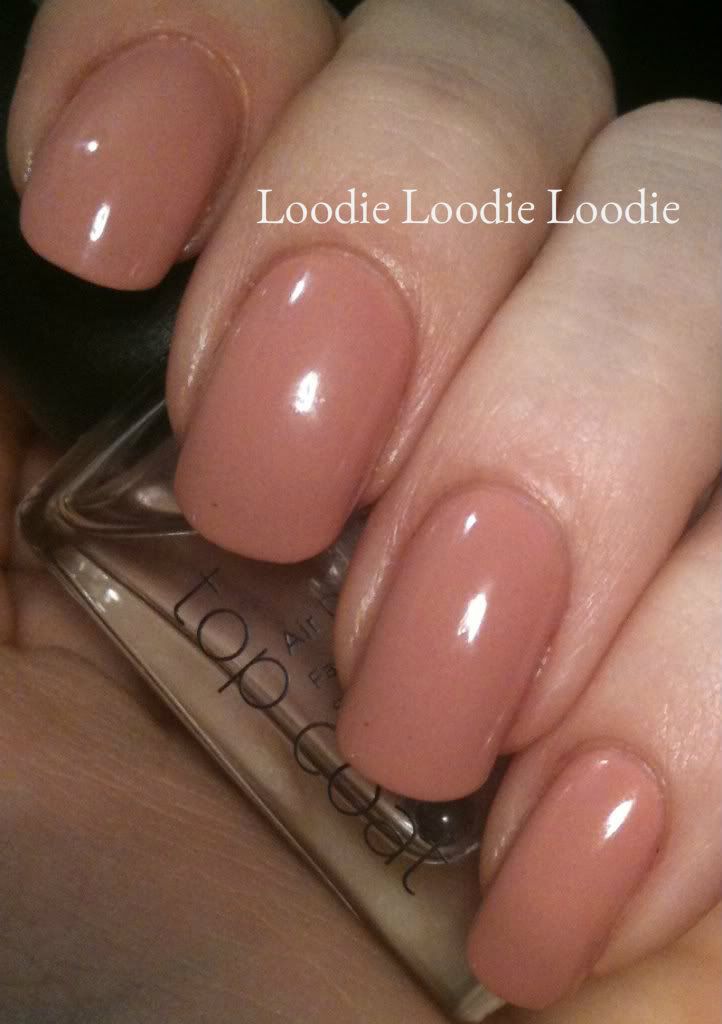
'Peaches <3 Cream'
Seriously, that's the name. Someone asked what I was wearing. I had to pause and think of what to say...
"Peaches heart symbol Cream?!"
Somehow that doesn't quite have a ring to it. I substituted "and" for <3
This might be my first orange... I can't complain.
'Crema De Lemon'
As my sister says, if you want to wear yellow on your nails, why don't you just not wear basecoat for a while? How true. But when you can't wait for those dark colors to do their magic on your nail beds, this one will do the trick!
Actually, last time I wore yellow I was scared/scared so I left this guy for the very end because I thought I wouldn't like it. I was dead wrong.
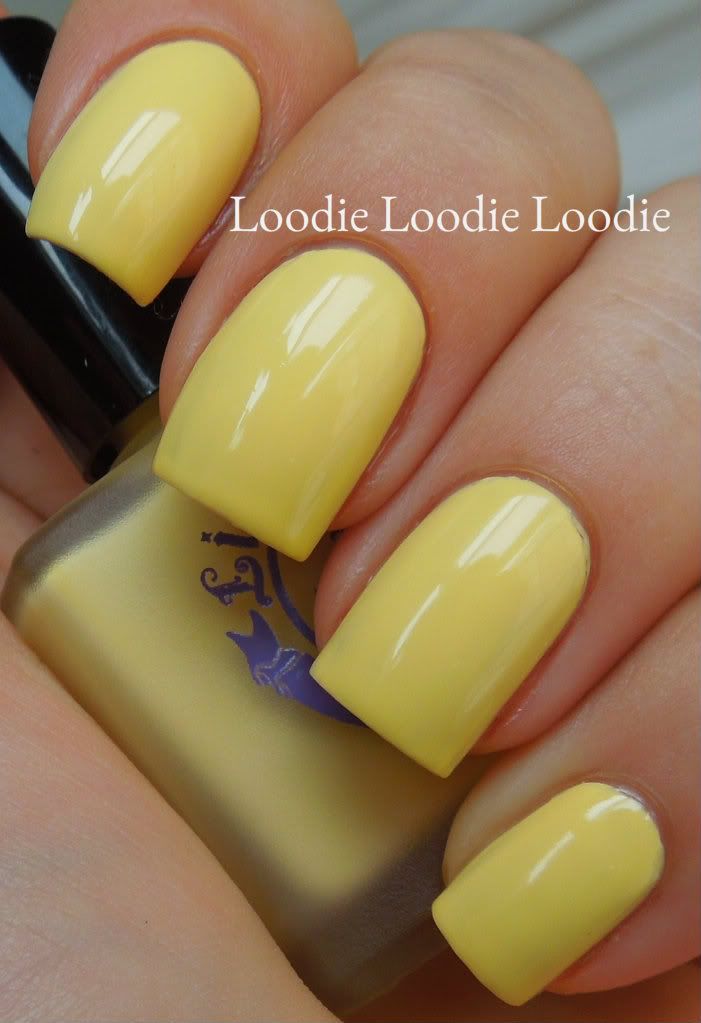
What a nice yellow! It ended up being one of my favorites.
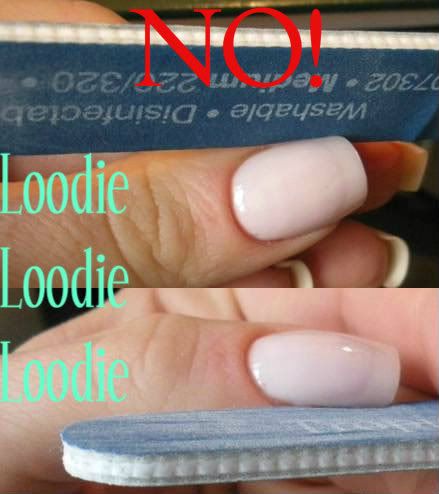
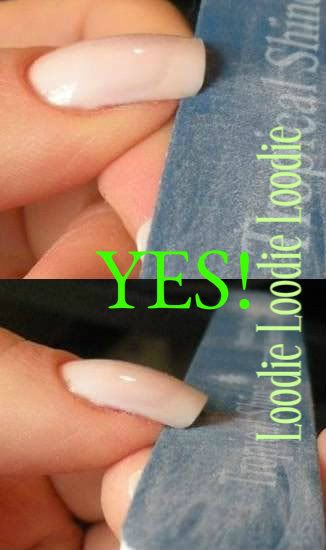
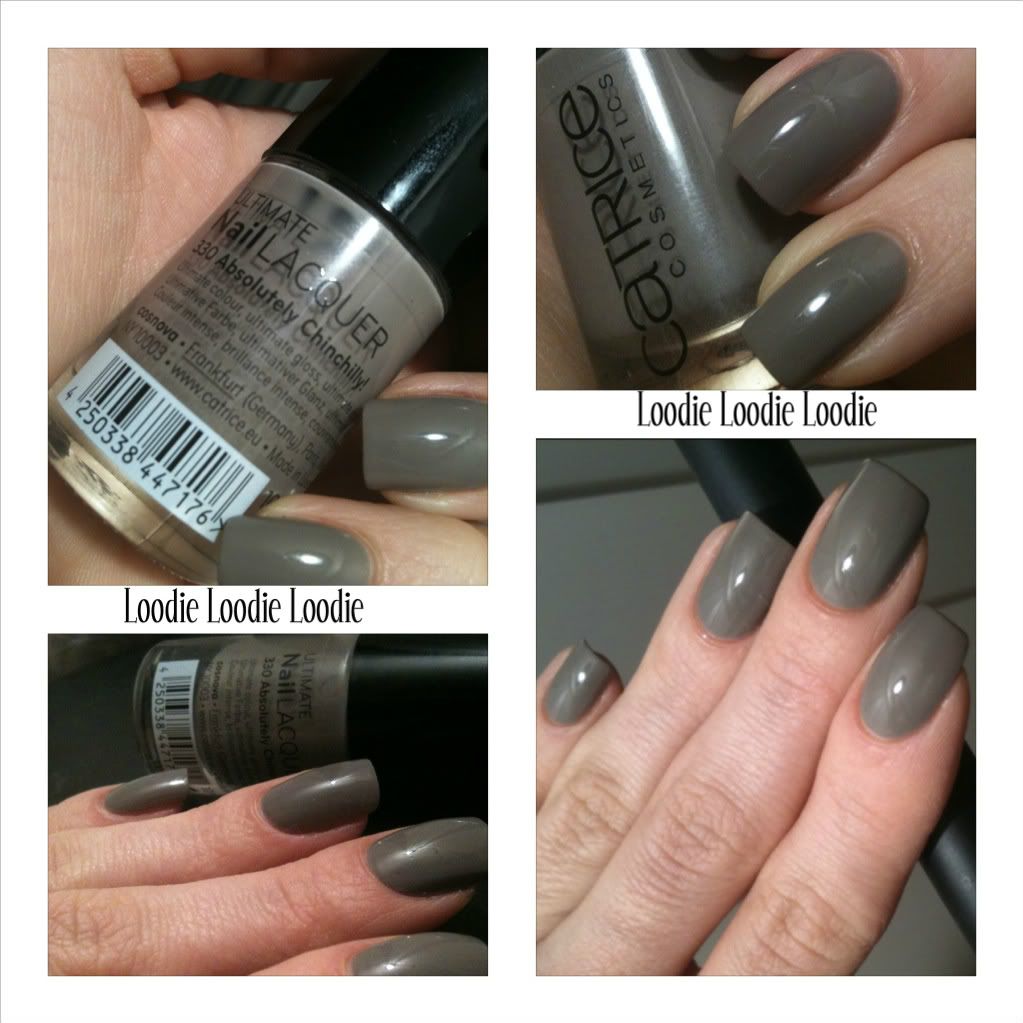
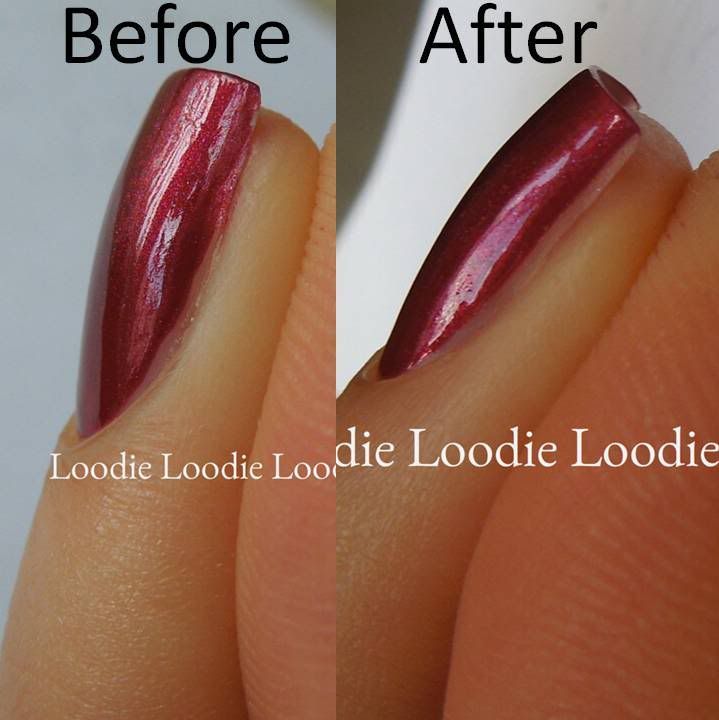
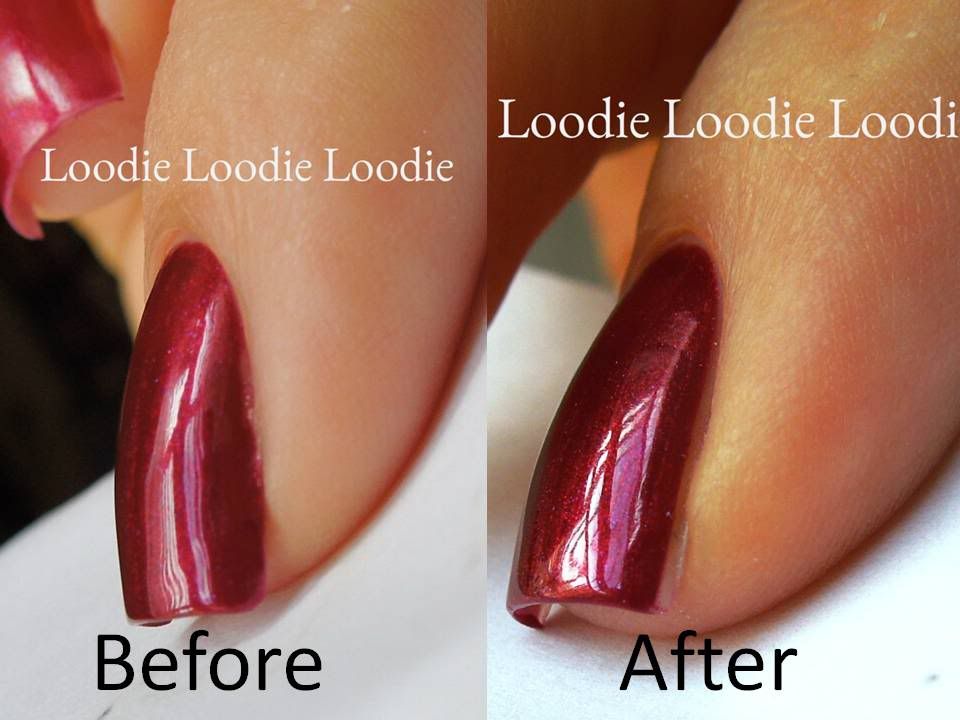
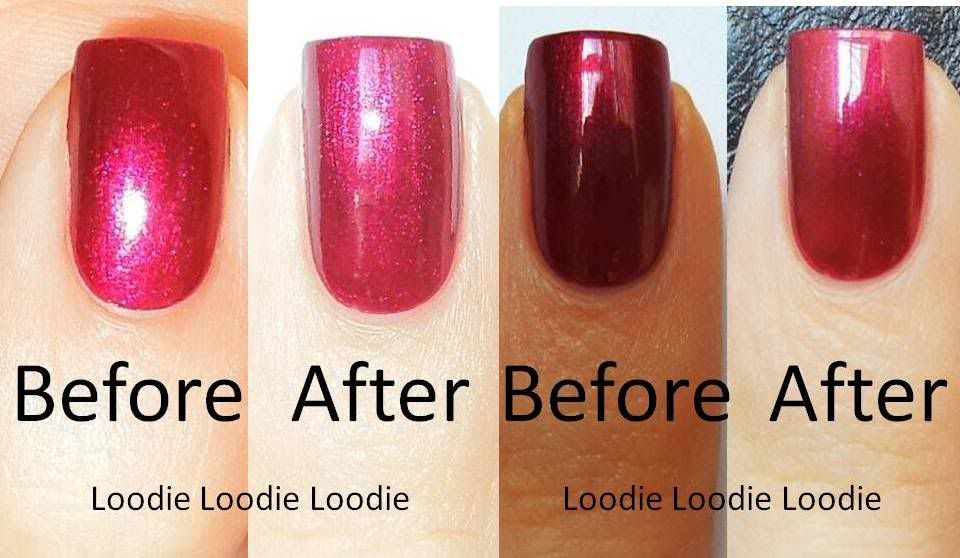
I thought this collection would come with your run of the mill pastel formula; I am happy to say this was not the case. The formula on all of these was a dense creme. If you are not careful, the
two coats it would normally take to make it opaque will give you
bubbles (at least that is what happened to me). Therefore, I opted for 3
super thin coats most of the time. My only other caution with these is, wear two coats of basecoat or you nails may stain, at least mine did.
These were sent for review.
They are 9 ml/0.3 oz
$5.99 each or $39.00 for all 7
On a superfluous note: The packaging is really cute and their site is so wonderfully whimsical!
Nails, Life, and more nails. Not so much a nail polish obsession, but more of a nail care obsession.
Nail Hardeners and Treatments
Thursday, September 13, 2012
Pastels done right
Wednesday, August 29, 2012
Stroking the bottle
Sometimes a polish just doesn't quite pan out. It looks AMAZING in the bottle and then you put it on only to discover the sadness. The magic is still IN the bottle... stuck to the walls. The most recent victim of this tragic scenario was Pure Ice - Purple Reign.
Looks fine right? Sort of?!
But I want this magic! Why won't it translate to the nail?!

If the light hits it just right, I definitely get some sparkle, but nowhere near the magnificent display I see stuck to the bottle wall.
Don't get me wrong. It's a great polish. Actually, so great I wore it two times in a row ... well maybe that was because it chipped so easily it needed reapplication. Also, I just hadn't come to terms with the inevitable.
At the end of the day, this is one of those polishes I will pick up, stroke, and marvel at the beauty in the bottle. I will be glad I have it, but secretly hope it would do more with its life.
EDIT: OMG! Olivia went there... check out her comment below and then watch the video.
That's exactly how it will go, hahahaha.
Looks fine right? Sort of?!
But I want this magic! Why won't it translate to the nail?!
If the light hits it just right, I definitely get some sparkle, but nowhere near the magnificent display I see stuck to the bottle wall.
Don't get me wrong. It's a great polish. Actually, so great I wore it two times in a row ... well maybe that was because it chipped so easily it needed reapplication. Also, I just hadn't come to terms with the inevitable.
At the end of the day, this is one of those polishes I will pick up, stroke, and marvel at the beauty in the bottle. I will be glad I have it, but secretly hope it would do more with its life.
EDIT: OMG! Olivia went there... check out her comment below and then watch the video.
That's exactly how it will go, hahahaha.
Monday, August 20, 2012
Straight Edged
I can't say I am very straight edged, but my nails are a different story. There is nothing that bothers me more then a jagged side wall. What is that, you say?! Two examples...
| middle finger |
Aside from not looking very attractive, a jagged side wall (middle finger) has a weakened nail structure. I mean just think about it, missing nail pieces! Also, the sharp edges have a tendency to get caught on things. Both increase the probability of a nail tear. That does not bring me happiness.
| pointer finger |
This happens a lot on my pointer fingers too.
| Shark |
How does all of the jaggedness come about? Recently, my fingers got caught up with a shark. Actually, for whatever reason, the nail structure is just a bit softer there; it happens sporadically.
But seriously, how awesome is the Discovery building!? I get to see this everyday!
What's my solution to prevent inevitable sadness? File the side walls. WHAT?! I know, I know. I told you never to do that. Correction! I told you to do it a certain way. See here.
To summarize:
| precious side wall |
To preserve nail integrity it is best to keep as much of the side wall intact as possible.
| avoid filing like this |
Avoid holding and filing like pictured here. This gives too much access to the entire side wall. Too much filing of the entire side wall compromises the nail structure, making the nail more likely to tear.
| tear on the pointer finger |
Then this might happen...
:(
In this situation my jagged edge was so far down, I couldn't even file it. I do have a solution ... nail fix here.
| file the side wall like this! |
This is a much safer way to file the side wall.
So, let's see the "after" photos!
| middle finger |
Ahh, so smooth!
| pointer finger |
Catastrophe avoided!
Labels:
Before and After,
How to,
Nail Fix,
Naked Nails,
Ready Set File,
Tutorial
Tuesday, July 31, 2012
Nail P0rn
Hey dudes. I'm going on vacay with the fam. It might be quiet for about 2 weeks. I'll leave you with nail porn...
KleanColor - Midnight Queen
One of my absolute faves.
It is mainly blue, but has small pieces of purple. It's magical.
Color Craze -Treasure Island
(BCC556)
This is a fine blue and green glitter. It takes 3-4 coats, but it's so worth it.
A generous gift from the lovely and beautiful Emily from Green Eyes Pink Nails
Catrice - Absolutely Chinchilly
Revlon - Scandalous
aka Facets of Fuchsia
KleanColor - Puppy Love
My nails look awfully plump here. Do. Not. Like.
China Glaze - High Maintenance
Like sex.
Oh yea, check my ovals!
Not gonna lie, I bought this for the name.
Essie - Poppie Cock
However, it should be called Poopie Cock, no?
Finger Polish Mania, do you approve ?
China Glaze - Sugar High
Sugar High can look pink or peach depending on the light. You can see more of it's range in the video below...
Essie - Mucho Dinero
They look better oval when they're longer.
Want to make your nails oval? Read the post here, or watch the video below...
YouTube Channel: http://www.youtube.com/user/loodieloodieloodie
Labels:
Black,
Blue,
Brown,
China Glaze,
Color Craze,
Essie,
Glitter,
KleanColor,
Nude,
Oval,
Pink,
Red,
Revlon,
Squoval,
Video's,
YouTube
Friday, July 20, 2012
Thinner nails in 10 minutes or less!
Could your nails stand to loose a few? Do you have extra saddle bags that seem permanent and unruly. Well now, your nails can appear thinner with a few simple steps!
In a few previous posts, I have shown you just how chubby your nails can get when they consume copious amounts of water. Look here, here and here. But what if after shrinkage (i.e. tightening of your C-curve) they still seem to bulge and look obese? Or what if your triangle shaped nail is making you feel down and out?
No fear! Here is a techniques you can use when painting your nails to make them appear thinner.
First a little rollie pollie finger okay?
Click on any of these pictures to make them larger.
One coat of China Glaze - Vertical Rush
This nail is fully dried thus the C-curve has done all it can do to make the nail appear thinner. The bulge is permanent. Note that, it may look like I have polish on my skin at the sides of the nail bed, but I assure you I don't (pictures below).
What to do?
If you are proficient at painting your nails, you can skip further down, otherwise....
Grab a fine cosmetic brush and acetone.
Here are a few examples:
The brushes with the black ferrules and white handles are no name brands, while the black handled silver ferrule brush is a Swissco brand, and the white handle silver ferrule brush is by ELF.
Also grab a small piece of paper towel to wipe off excess acetone and polish.

Here is a shot of one of the sides.
1. Dip your brush in acetone.
2. Get rid of excess acetone from the brush by lightly touching the brush against the paper towel
3. Run the brush along the nail side walls making a clean line.
4. Wipe off the polish on the paper towel.
5. Repeat steps 1. - 4. until you are happy with the lines.
You can take off more or less. It seems on this side I took off a bit less polish.
If you are a proficient nail painter, just avoid painting the entire nail; leave a clean line at the side walls.
Here are a few before and after shots, head on. Depending on your own nail shape you may see only a subtle difference. The flatter your nail (less pronounced C-curve) the greater the affect you will see.
Here is a schematic for different nail shapes:
Each nail bed shape can appear thinner. Since no filing of the side wall is necessary, you can maintain the integrity and strength of the nail bed.
Although this is a very effective technique, I am sometimes bothered that a portion of my nail bed is not covered with polish. It will look good far away or head on, yet when I bring them close to my face and see them from the side, I have a raging desire to fill in the gap. I struggle with them looking fat vs. thin.
Do you ever use this technique when painting your nails?
In a few previous posts, I have shown you just how chubby your nails can get when they consume copious amounts of water. Look here, here and here. But what if after shrinkage (i.e. tightening of your C-curve) they still seem to bulge and look obese? Or what if your triangle shaped nail is making you feel down and out?
No fear! Here is a techniques you can use when painting your nails to make them appear thinner.
First a little rollie pollie finger okay?
Click on any of these pictures to make them larger.
One coat of China Glaze - Vertical Rush
This nail is fully dried thus the C-curve has done all it can do to make the nail appear thinner. The bulge is permanent. Note that, it may look like I have polish on my skin at the sides of the nail bed, but I assure you I don't (pictures below).
What to do?
If you are proficient at painting your nails, you can skip further down, otherwise....
Grab a fine cosmetic brush and acetone.
Here are a few examples:
The brushes with the black ferrules and white handles are no name brands, while the black handled silver ferrule brush is a Swissco brand, and the white handle silver ferrule brush is by ELF.
Also grab a small piece of paper towel to wipe off excess acetone and polish.
Here is a shot of one of the sides.
1. Dip your brush in acetone.
2. Get rid of excess acetone from the brush by lightly touching the brush against the paper towel
3. Run the brush along the nail side walls making a clean line.
4. Wipe off the polish on the paper towel.
5. Repeat steps 1. - 4. until you are happy with the lines.
You can take off more or less. It seems on this side I took off a bit less polish.
If you are a proficient nail painter, just avoid painting the entire nail; leave a clean line at the side walls.
Here are a few before and after shots, head on. Depending on your own nail shape you may see only a subtle difference. The flatter your nail (less pronounced C-curve) the greater the affect you will see.
Here is a schematic for different nail shapes:
Each nail bed shape can appear thinner. Since no filing of the side wall is necessary, you can maintain the integrity and strength of the nail bed.
Although this is a very effective technique, I am sometimes bothered that a portion of my nail bed is not covered with polish. It will look good far away or head on, yet when I bring them close to my face and see them from the side, I have a raging desire to fill in the gap. I struggle with them looking fat vs. thin.
Do you ever use this technique when painting your nails?
Friday, July 13, 2012
Out of context
If you have a blog then you know about the feature in blogger which allows you to see the phrases people type into their search bars that happen to route them to your blog. If not, let me just tell you, this feature really is the highlight of my day sometimes. I'll catch some off the wall keywords that seem way out of context, but upon closer inspection I do have relevant posts. I have linked the keywords. Also, to really stay in context, I'll show you one seriously radical duochrome.
1. "6 ways to fight a crack whore" ...... um, I didn't know I wrote a manual on this topic. Perhaps it can be a chapter in my dissertation!?
2. "Fat woman peeling oranges" ..... hold up! Is this a club? Are they looking for new members or a spokesperson?
3. "Your fucking with the wrong bitch" ..... weird. This happens to be my personal motto, bad grammar included because it's more bad ass this way.
4. "Baby in a jar with formalin" .... WTF? I actually gasped at this one.
5. "How to shave your vag" .... lololol... I may have to make this a future post. I owe it to the people.
I hope you got as many giggles out of these keyword searches as I did. One thing is clear, I have an uncanny ability to use seriously inappropriate words for a nail blog.
Isn't CQ - Idyllic (544) beautiful?
1. "6 ways to fight a crack whore" ...... um, I didn't know I wrote a manual on this topic. Perhaps it can be a chapter in my dissertation!?
| CQ - Idyllic (544) |
2. "Fat woman peeling oranges" ..... hold up! Is this a club? Are they looking for new members or a spokesperson?
3. "Your fucking with the wrong bitch" ..... weird. This happens to be my personal motto, bad grammar included because it's more bad ass this way.
4. "Baby in a jar with formalin" .... WTF? I actually gasped at this one.
5. "How to shave your vag" .... lololol... I may have to make this a future post. I owe it to the people.
I hope you got as many giggles out of these keyword searches as I did. One thing is clear, I have an uncanny ability to use seriously inappropriate words for a nail blog.
Isn't CQ - Idyllic (544) beautiful?
Labels:
CQ,
Duochrome,
Keyword Search,
Shimmer
Friday, July 6, 2012
Dermelect Color Comparison
In my last post, I showed you three of the six new color nail
treatments from Dermelect. Today, I'll show you comparisons to similar
colors I own.
Comparison to Dermelect - Above It
Pointer -
China Glaze - Bahamian Escape
Middle, Pinky -
Dermelect 'Above It'
Ring -
China Glaze - Secret Peri-winkle
Clearly China Glaze - Secret Periwinkle is the odd man out. (Ring finger)
As a side note, China Glaze - Secret Periwinkle has more in common with Essie - Lapis of Luxury.
Left -
China Glaze - Secret Periwinkle
Right -
Essie - Lapis of Luxury.

More clear from this picture, Above It is not a complete dupe of Bahamian Escape, but they are very close.
As a side note, China Glaze - Bahamian Escape is similar to Color Club - Factory Girl. Factory Girl is brighter.
Left -
China Glaze - Bahamian Escape
Right -
Color Club - Factory Girl
Comparison to Dermelect - Luxurious
Thumb -
Revlon - Gum Drop (Smelly Polish!)
Pointer -
Essie - Lilacism
Middle -
OPI - Rumple's Wiggin'
Ring -
OPI - Do You Lilac It? (more here)
Pinky -
Dermelect- Luxurious
OPI - Do You Lilac It? looks like a dupe for Dermelect - Luxurious
Top -
OPI - Do You Lilac It? (more here)
Bottom -
Dermelect- Luxurious
Comparison to Dermelect - Persuasive
Pointer, Ring -
Color Club - Vintage Couture
Middle, Pinky -
Dermelect - Persuasive
I think here you can tell Dermelect is only slightly more peach and muted, but not by much.
Overall, these two are difficult to distinguish in certain lighting situations. Like I mentioned in the last post, Persuasive is a bit of a chameleon.
Top -
Dermelect - Persuasive
Bottom -
Color Club - Vintage Couture
It's nice to have choices! :D
*The Dermelect polishes were sent for review*
Comparison to Dermelect - Above It
China Glaze - Bahamian Escape
Middle, Pinky -
Dermelect 'Above It'
Ring -
China Glaze - Secret Peri-winkle
Clearly China Glaze - Secret Periwinkle is the odd man out. (Ring finger)
As a side note, China Glaze - Secret Periwinkle has more in common with Essie - Lapis of Luxury.
Left -
China Glaze - Secret Periwinkle
Right -
Essie - Lapis of Luxury.
More clear from this picture, Above It is not a complete dupe of Bahamian Escape, but they are very close.
As a side note, China Glaze - Bahamian Escape is similar to Color Club - Factory Girl. Factory Girl is brighter.
Left -
China Glaze - Bahamian Escape
Right -
Color Club - Factory Girl
Comparison to Dermelect - Luxurious
Thumb -
Revlon - Gum Drop (Smelly Polish!)
Pointer -
Essie - Lilacism
Middle -
OPI - Rumple's Wiggin'
Ring -
OPI - Do You Lilac It? (more here)
Pinky -
Dermelect- Luxurious
OPI - Do You Lilac It? looks like a dupe for Dermelect - Luxurious
Top -
OPI - Do You Lilac It? (more here)
Bottom -
Dermelect- Luxurious
Comparison to Dermelect - Persuasive
Pointer, Ring -
Color Club - Vintage Couture
Middle, Pinky -
Dermelect - Persuasive
I think here you can tell Dermelect is only slightly more peach and muted, but not by much.
Overall, these two are difficult to distinguish in certain lighting situations. Like I mentioned in the last post, Persuasive is a bit of a chameleon.
Top -
Dermelect - Persuasive
Bottom -
Color Club - Vintage Couture
It's nice to have choices! :D
*The Dermelect polishes were sent for review*
Labels:
Blue,
China Glaze,
Color Club,
Comparison,
Cream,
Dermelect,
Essie,
OPI,
Peach,
Pink,
Purple,
Revlon
Subscribe to:
Posts (Atom)