I'm going to take a one post break from the nail fix series to show OPI's Bubble Bath.
I put on a base coat thinking I might want to do a proper "wear test", but we'll see if my attention span doesn't get the best of me.
Base coat: CND Toughen Up
Other hand:
Can you guess which nail has a Shellac fix??
OPI Bubble Bath:
OPI Bubble Bath
2 coats in natural light. This color evens out the nail bed, but basically looks like nothing.
Application was great. It wasn't streaky at all. The polish levels really well as it dries.
2 coats vs. 3 coats
Flash
2 coats
Flash
3 coats
With flash you can start to see the milkyness, but in reality it's still a sheer light pink.
Final Mani:
Base: CND Toughen UP
Color: 3 coats Bubble Bath
Top: Seche Vite
Flash: It's almost reminiscent of a sheer white when flash is involved, but in real light it is not. See next picture for a dose of reality.
Fluorescent light:
This is much closer to reality. Sheer pink with only hints of milkyness. This polish color is like a veil for natural nails. It blurs things and makes it look flawless.
Since I get absolutely NO light in my apartment this is as good as it gets.
* runs to takes Vit. D supplement.
Nails, Life, and more nails. Not so much a nail polish obsession, but more of a nail care obsession.
Nail Hardeners and Treatments
Sunday, January 30, 2011
OPI Bubble Bath
Labels:
CND,
Naked Nails,
OPI,
Seche Vite,
Sheer
Tuesday, January 25, 2011
Nail Fix - Shellac prep and application
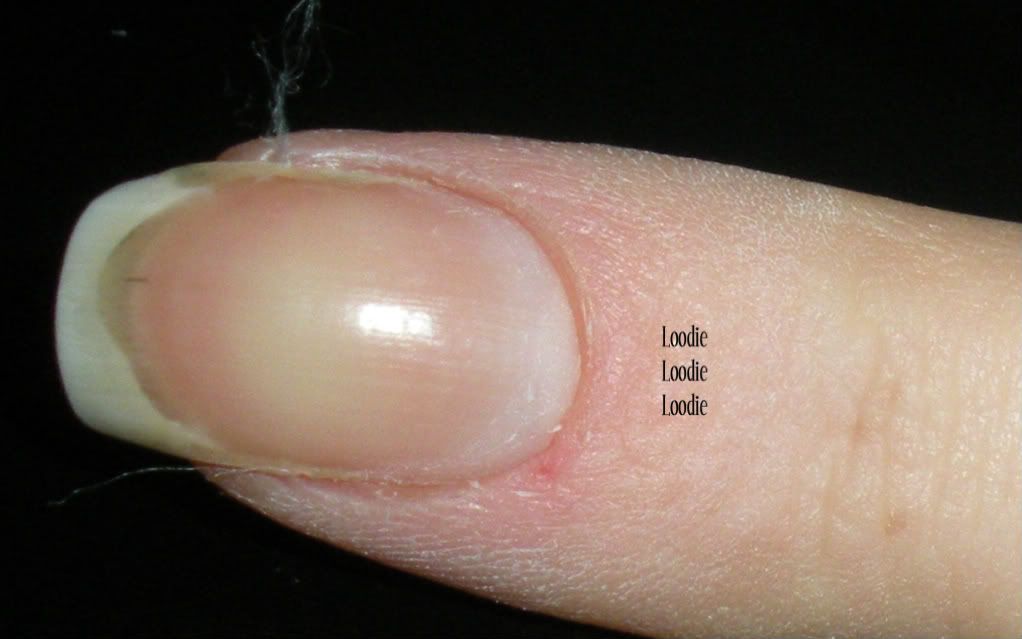
In this post I will show you proper nail prep and application of Shellac for a nail crack or tear. I have to stress this nail fix is not for peeling. If you have peeling you must buff out the peel first, otherwise the shellac will peel off, and what would be the point right? *note to self, must do a "fix a peel post"
This is Part II of the Nail Fix with Shellac series.
Part I of this post can be found here. Scroll to the bottom of the post for the rest of the series :)
Would you like to see a video of this process?! Click here.
First we must prep the nail:
1. The true cuticle (dead skin cells or ptygerium that can grow on the nail plate) must be pushed back or removed. If you put shellac on top of it, it will lift at the cuticle. I showed an example of this problem in my Sally Hansen Sweet Tulip Performance Test. Although a proper post is due on how to remove cuticle, for all intents and purposes, either use a cuticle remover to remove it or oil to soften and push back this skin. The post (with video!) about using a cuticle remover can be found here.
2. Make sure the nail is dry. Your nail should not have visited water for at least an hour before this method of fixing. If you apply shellac to a nail that has slight moisture, once the nail goes back to its dry curvature, the shellac can lift.
 3. Once you are convinced your nail is dry make sure it is clean and free of dirt and oil. Wipe the nail with pure acetone thoroughly, both on top and under the tip.
4. Remove any fuzzies.
awww, for my ouchie
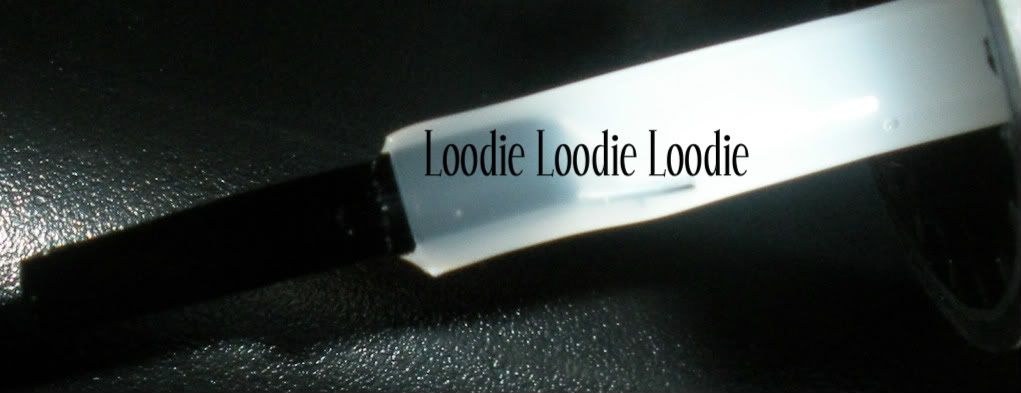
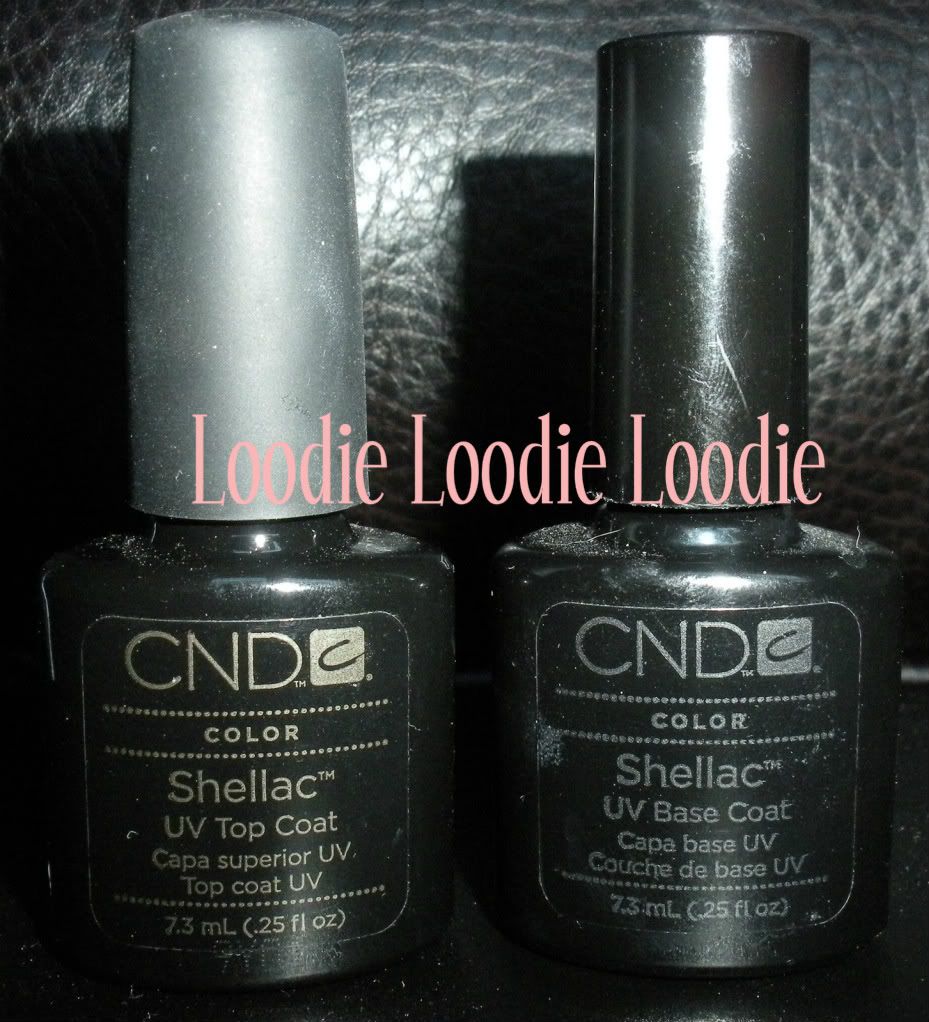
5. In this example I will only use Shellac top coat because the Shellac base coat I received had a brush that looked like the picture below. BUT keep in mind using the base coat does make the Shellac last longer than top coat alone.
Ignore the color. I tried switching brushes from another bottle, but apparently there was some hardening of the Shellac and it bent that brush as well. Although I used the base several times with the wonky brush, I find that the product works just as well with just the top coat. I think the most important part of using Shellac to fix a nail is the amount of coats combined with proper curing times. So, a proper working brush is a must and makes this process a breeze.
It should look like this brush.
The official process for Shellac is:
a. base coat ... cure 20 sec.
b. color coat ... cure 2 min.
c. color coat ... cure 2 min.
d. top coat ... cure 2 min.
However, I do 4 coats of either base/top with modified curing times because my lamp is super awesome :) lol
Depending on the UV lamp, curing times should be adjusted so the shellac cures properly.
The following works great for me:
a. One thin coat of Shellac base coat (lasts longer) or Shellac top coat. Make sure to avoid the cuticle area and side walls or the Shellac will lift. I also wrap the tip to prevent lifting at the tip.
Cure 4 min.
Then apply a thin coat of the top coat.
Cure 4 min.
I repeat this process 1-2 more times using thin coats of more topcoat. I cure 4 minutes after each coat.
6. The last step after your 4th coat and cure is to swipe the nail with 99% isopropyl alcohol to remove the "tacky" inhibition layer. Like, I mentioned before 70% will not work as well because it's diluted with water and this does not play nice with Shellac.
Result:
yay to self leveling!
yay shiny!
Except that the others are not shiny.
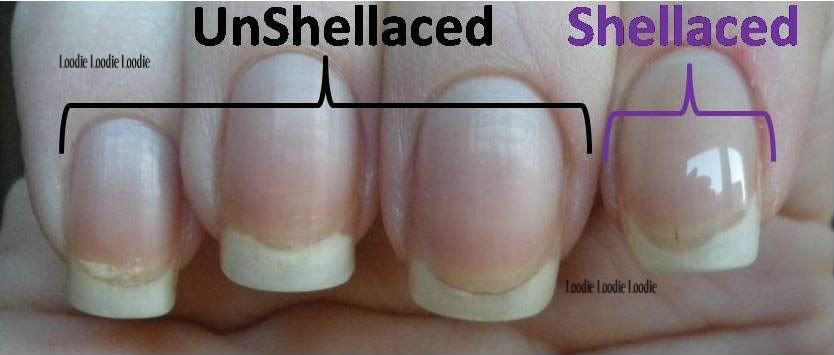
The pinkie, ring and middle are not Shellaced, while the index is. You can see the index finger looks pretty natural in comparison to the others. Pardon the ouchie and naked nails.
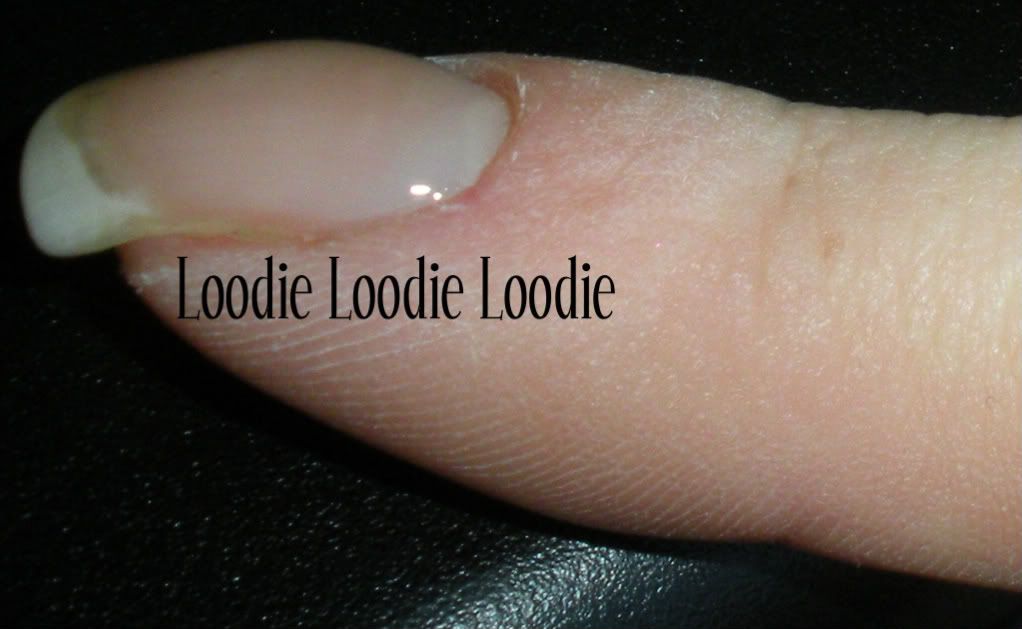
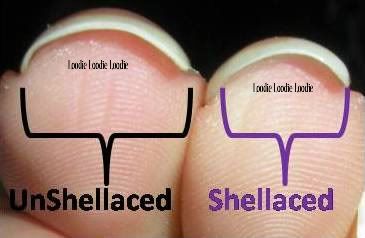
On the left is an unShellaced middle finger, on the right that same Shellaced index. From the profile picture you can see that one of the nice things about Shellac is that it doesn't make the nail look all big, thick and fake looking.
After the Shellac is all cured you can put regular polish on top and do a mani like normal.
Essie - Demure Vixen 3 coats.
The pinky, ring, and middle fingers are unShellaced while the index is Shellaced. I like how natural it looks.
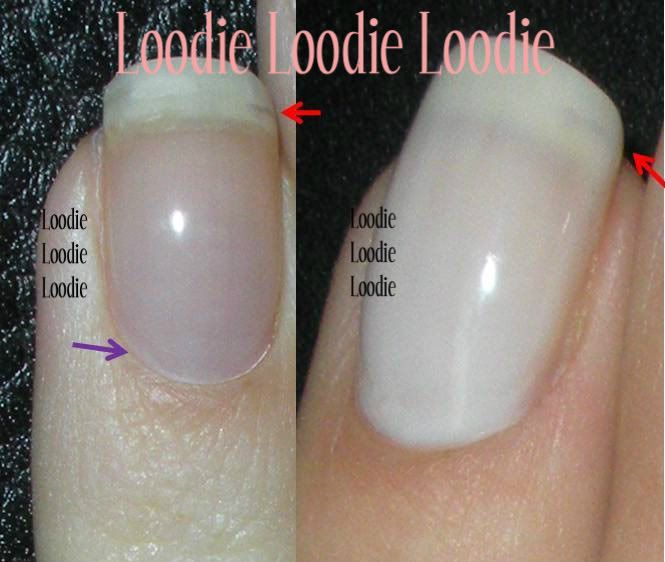
Here is a fix I did on a nail that broke way down past the free edge and eventually grew out. If you click on the pic you may be able to see the crack (red arrows) and regrowth (purple arrow).
As a general rule of thumb avoid acetone the day (or even day after) you do this fix because the Shellac may start disintegrating much easier. However, after that, I have not had too much problem with brief acetone contact for polish change in the days following and can last 1-2 weeks no problem with two or three polish changes.
Since the foil method is used to remove Shellac glitters may not be a good polish choice.
Would you like to see a video of this process?! Click here.
Part III - Removal of Shellac
Part IV - Problems and Question for Shellac
This is Part II of the Nail Fix with Shellac series.
Part I of this post can be found here. Scroll to the bottom of the post for the rest of the series :)
Would you like to see a video of this process?! Click here.
First we must prep the nail:
1. The true cuticle (dead skin cells or ptygerium that can grow on the nail plate) must be pushed back or removed. If you put shellac on top of it, it will lift at the cuticle. I showed an example of this problem in my Sally Hansen Sweet Tulip Performance Test. Although a proper post is due on how to remove cuticle, for all intents and purposes, either use a cuticle remover to remove it or oil to soften and push back this skin. The post (with video!) about using a cuticle remover can be found here.
2. Make sure the nail is dry. Your nail should not have visited water for at least an hour before this method of fixing. If you apply shellac to a nail that has slight moisture, once the nail goes back to its dry curvature, the shellac can lift.
 3. Once you are convinced your nail is dry make sure it is clean and free of dirt and oil. Wipe the nail with pure acetone thoroughly, both on top and under the tip.
4. Remove any fuzzies.
awww, for my ouchie
5. In this example I will only use Shellac top coat because the Shellac base coat I received had a brush that looked like the picture below. BUT keep in mind using the base coat does make the Shellac last longer than top coat alone.
Ignore the color. I tried switching brushes from another bottle, but apparently there was some hardening of the Shellac and it bent that brush as well. Although I used the base several times with the wonky brush, I find that the product works just as well with just the top coat. I think the most important part of using Shellac to fix a nail is the amount of coats combined with proper curing times. So, a proper working brush is a must and makes this process a breeze.
It should look like this brush.
The official process for Shellac is:
a. base coat ... cure 20 sec.
b. color coat ... cure 2 min.
c. color coat ... cure 2 min.
d. top coat ... cure 2 min.
However, I do 4 coats of either base/top with modified curing times because my lamp is super awesome :) lol
Depending on the UV lamp, curing times should be adjusted so the shellac cures properly.
The following works great for me:
a. One thin coat of Shellac base coat (lasts longer) or Shellac top coat. Make sure to avoid the cuticle area and side walls or the Shellac will lift. I also wrap the tip to prevent lifting at the tip.
Cure 4 min.
Then apply a thin coat of the top coat.
Cure 4 min.
I repeat this process 1-2 more times using thin coats of more topcoat. I cure 4 minutes after each coat.
6. The last step after your 4th coat and cure is to swipe the nail with 99% isopropyl alcohol to remove the "tacky" inhibition layer. Like, I mentioned before 70% will not work as well because it's diluted with water and this does not play nice with Shellac.
Result:
yay to self leveling!
yay shiny!
Except that the others are not shiny.
The pinkie, ring and middle are not Shellaced, while the index is. You can see the index finger looks pretty natural in comparison to the others. Pardon the ouchie and naked nails.
On the left is an unShellaced middle finger, on the right that same Shellaced index. From the profile picture you can see that one of the nice things about Shellac is that it doesn't make the nail look all big, thick and fake looking.
After the Shellac is all cured you can put regular polish on top and do a mani like normal.
Essie - Demure Vixen 3 coats.
The pinky, ring, and middle fingers are unShellaced while the index is Shellaced. I like how natural it looks.
Here is a fix I did on a nail that broke way down past the free edge and eventually grew out. If you click on the pic you may be able to see the crack (red arrows) and regrowth (purple arrow).
As a general rule of thumb avoid acetone the day (or even day after) you do this fix because the Shellac may start disintegrating much easier. However, after that, I have not had too much problem with brief acetone contact for polish change in the days following and can last 1-2 weeks no problem with two or three polish changes.
Since the foil method is used to remove Shellac glitters may not be a good polish choice.
Would you like to see a video of this process?! Click here.
Part III - Removal of Shellac
Part IV - Problems and Question for Shellac
Labels:
CND,
Eponychium,
Essie,
How to,
Nail Brake,
Nail Fix,
Naked Nails,
Repair,
Shellac,
Soak off Gel,
True Cuticle,
Tutorial
Saturday, January 22, 2011
Nail Fix
Great, now what?! There are several options for nail breaks depending on how severe your nail break happens to be. A few options include, the tea bag trick and Orly Nail Rescue. However, my preferred solution does not include either. I don't like anything that involves nail glue because I find it actually makes my nail brittle and the nail has a tendency to break completely off. I usually try to avoid taking down length because it's traumatizing (and sometimes you just can't go down any lower), so for nearly all cracks or tears I prefer GEL POLISHES. Yes, in bold letters to tell you how awesome they are for this job. If you're not familiar with soak off gel polishes think Axxium (OPI), Shellac (CND), Gelish (Harmony), Gelac (IBD), Gelz (Ez Flow), etc.
Advantages:
1. No filing of the nail plate is required before application ... although meticulous nail prep is!
2. Most gel polishes are self leveling so no filing is required after application. The result is a more natural looking nail.
3. Gel polishes provide superior strength to traditional polish.
4. Gel polishes provide more "give" than normal gels and will not crack like nail glue fixes.
5. Gel polishes will last with polish changes if non-acetone remover is used or if contact with acetone is brief. However, if you prefer to change polish everyday, this technique may not be for you.
Disadvantages:
1. There may be a small learning curve and definitely necessary "equipment", but nothing too extravagant and definitely well worth it.
2. If you prefer to change polish everyday, this technique may not be for you since the extra exposure to removers will affect product longevity.
So what do we need and what do we do?
The goodies:
1. A gel polish. For this example I am showing CND's Shellac. I think it is by far the most well know out there at the moment. However, CND was not the first to come out with this fantastic type of product, but their marketing was extraordinary and that's why it's much more well known to non-nail fanatics as well. All you really need is either a base or a top or both. Actually, a light color like Negligee will also work. Using the base however will make the mani last. Other companies have just a base. I have a soak of gel polish "base" by a company called Nouveau Nail and its just as fabulous. Many gel polishes come in a bottle with a brush (like normal polish) while others come in a pot and you will have to provide the brush. I prefer the former because it's much more intuitive to work with, but in general applying these products is as easy as painting your nails ... period.
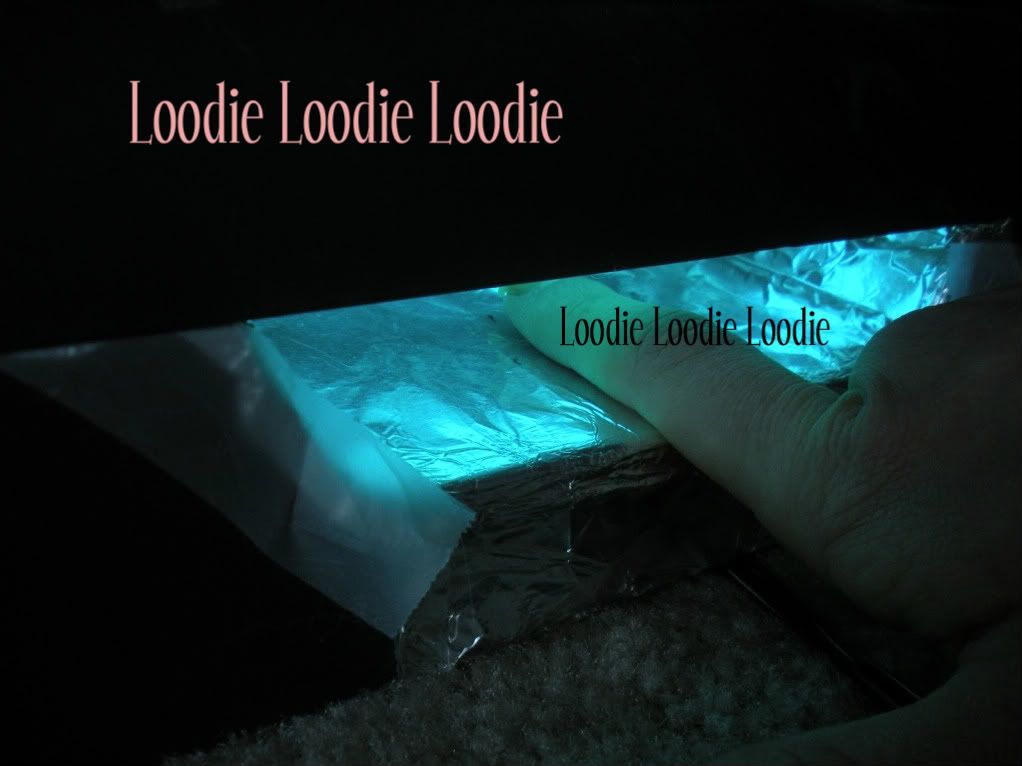
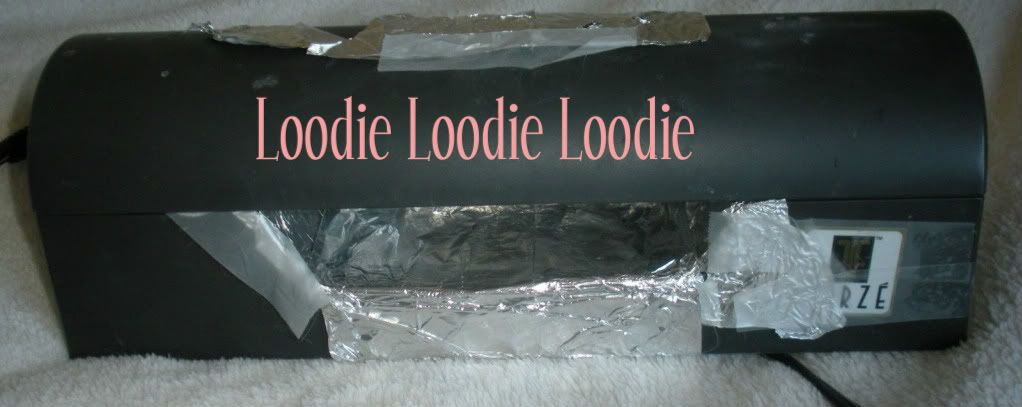
2. UV light. This is a very crapparoo lamp that I have had since 2003, but hey it works. I got this lamp free with a gel system I bought back in the day. It was a pretty nice gel and currently collecting dust in the closet. In general, most companies want you to use a specific lamp made especially for their soak off gel because it has the correct wattage and light intensity to cure their product properly in x amount of minutes, but ya know what, no thanks. They are expensive and I will keep in mind that their product may not work 100% without it. The main concern is that the product may not cure properly. As an example, CND's specific light for Shellac has a higher wattage and light intensity and as you can see from the picture I finagled my old light with tin foil for more intense reflection and I tried to decrease the surface area the light had to travel. Ewww, I know .... it looks ....gross bad ass. Basically, I just let the gel "cure" longer and have not had a problem.
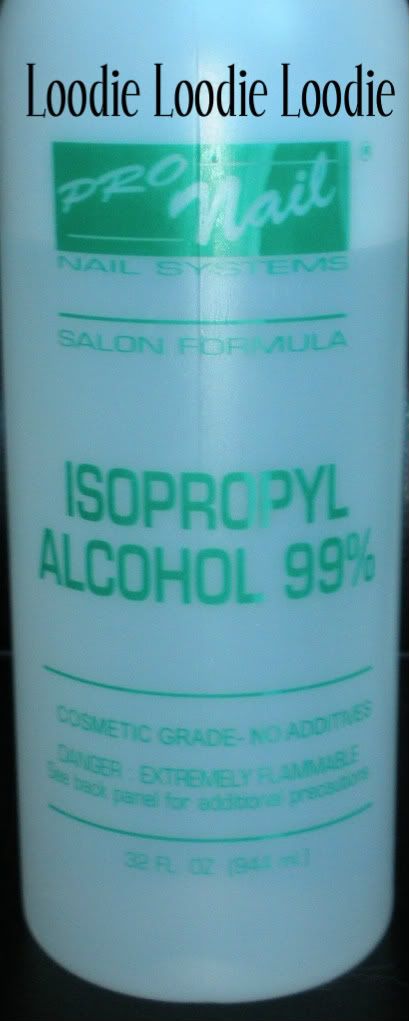
3. 99% isopropyl alcohol. 70% (rubbing alcohol) will not work as well to remove the inhibition layer at the very end of this process, so find the good stuff.
4. Timer!
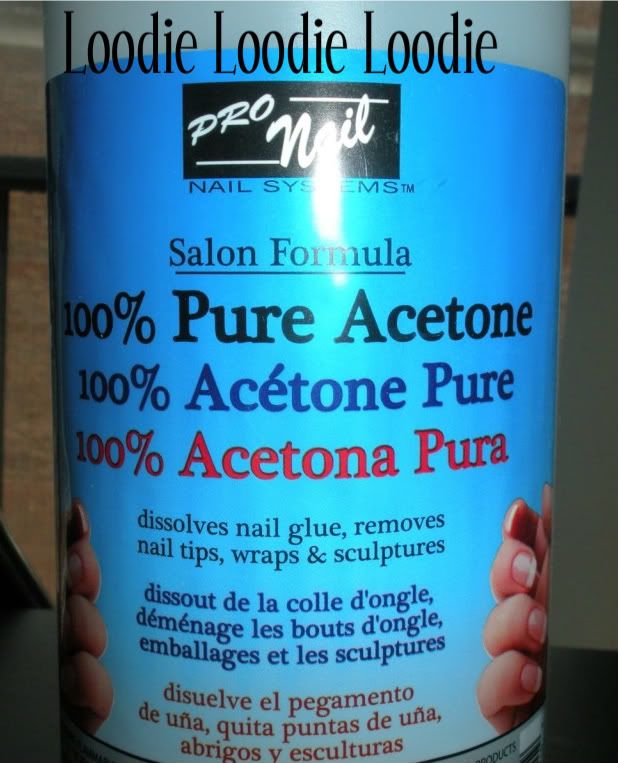
5. 100% Acetone
Stick to 100% acetone, other additives might inhibit proper adhesion of the gel polish.
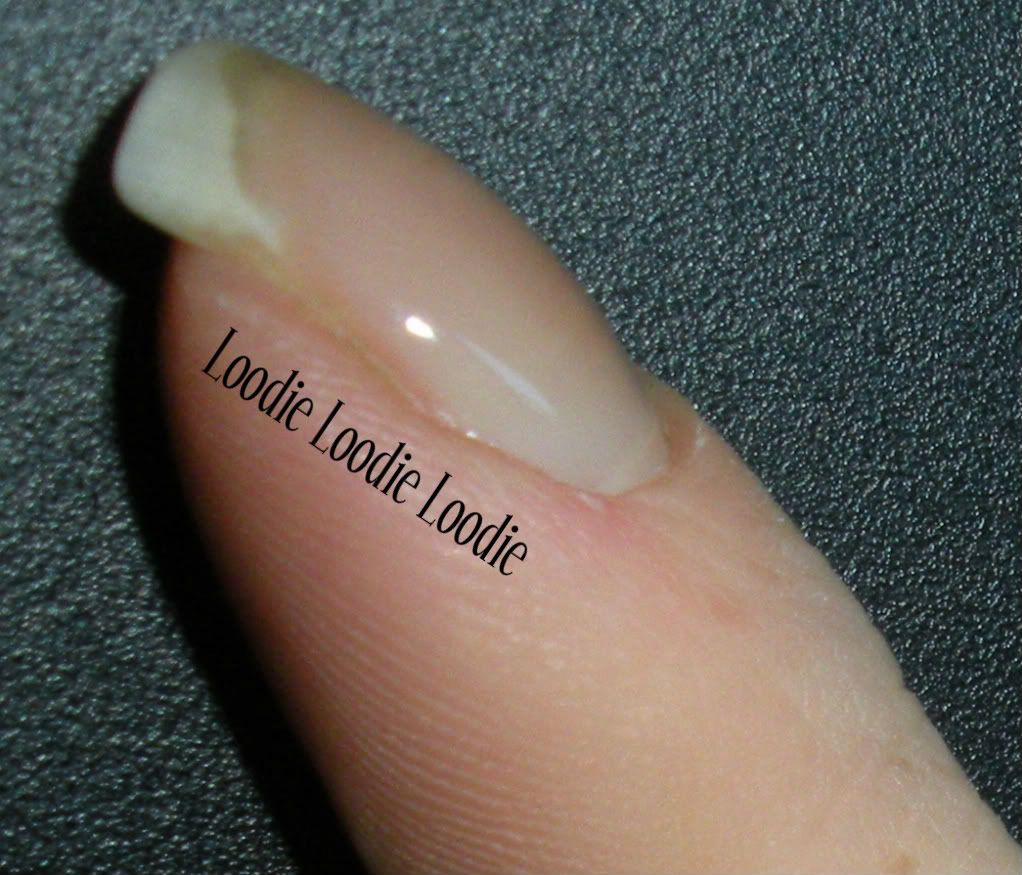
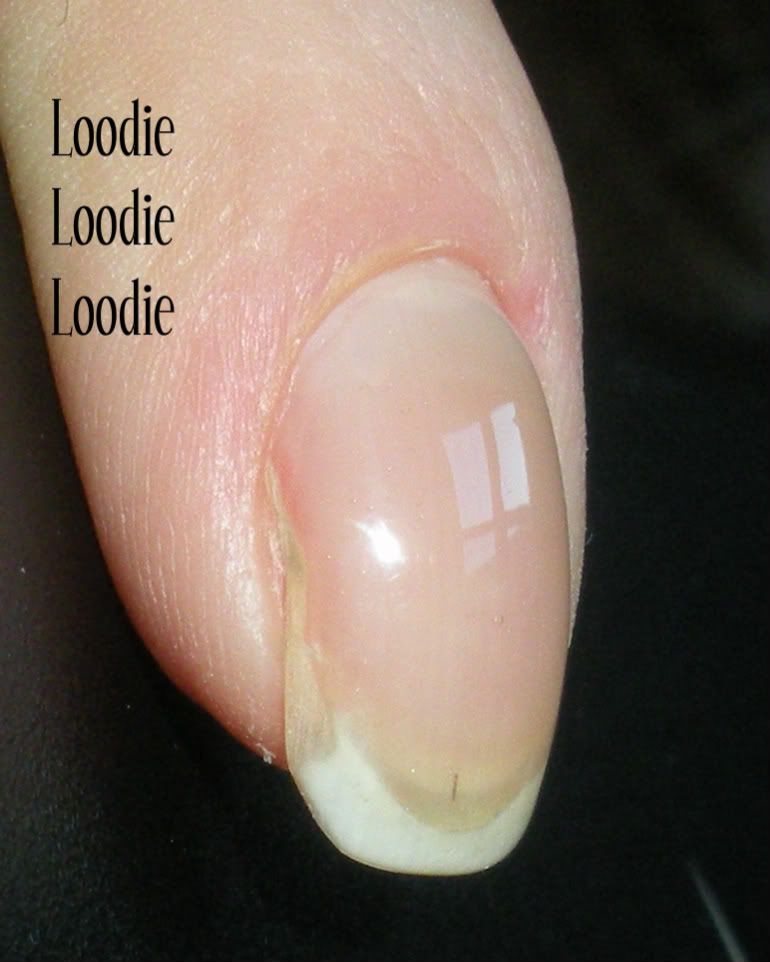
6. A nail to be fixed. First a little explanation. When my husband saw this pic he said "ewww, whats wrong with your nail." First, I almost cried, then wanted to punch him in the gut. Alas, karma stepped in and a millisecond after that statement he dropped the remote on his foot. Ha ha!. Okay, but really there is nothing wrong with my nail per say. My nail has always been somewhat see through at the side there (on both pointers), but as such it's a little weak there. If you look carefully (click on the pic) you will see there is actually a small tear. Now the fixing this nail needs is almost non-existent, but I really wanted to share this tutorial.
Here is Part II of the Nail Fix Series: Shellac Nail Prep and Application
Would you like to see these posts in VIDEO?! Click here.
Advantages:
1. No filing of the nail plate is required before application ... although meticulous nail prep is!
2. Most gel polishes are self leveling so no filing is required after application. The result is a more natural looking nail.
3. Gel polishes provide superior strength to traditional polish.
4. Gel polishes provide more "give" than normal gels and will not crack like nail glue fixes.
5. Gel polishes will last with polish changes if non-acetone remover is used or if contact with acetone is brief. However, if you prefer to change polish everyday, this technique may not be for you.
Disadvantages:
1. There may be a small learning curve and definitely necessary "equipment", but nothing too extravagant and definitely well worth it.
2. If you prefer to change polish everyday, this technique may not be for you since the extra exposure to removers will affect product longevity.
So what do we need and what do we do?
The goodies:
1. A gel polish. For this example I am showing CND's Shellac. I think it is by far the most well know out there at the moment. However, CND was not the first to come out with this fantastic type of product, but their marketing was extraordinary and that's why it's much more well known to non-nail fanatics as well. All you really need is either a base or a top or both. Actually, a light color like Negligee will also work. Using the base however will make the mani last. Other companies have just a base. I have a soak of gel polish "base" by a company called Nouveau Nail and its just as fabulous. Many gel polishes come in a bottle with a brush (like normal polish) while others come in a pot and you will have to provide the brush. I prefer the former because it's much more intuitive to work with, but in general applying these products is as easy as painting your nails ... period.
2. UV light. This is a very crapparoo lamp that I have had since 2003, but hey it works. I got this lamp free with a gel system I bought back in the day. It was a pretty nice gel and currently collecting dust in the closet. In general, most companies want you to use a specific lamp made especially for their soak off gel because it has the correct wattage and light intensity to cure their product properly in x amount of minutes, but ya know what, no thanks. They are expensive and I will keep in mind that their product may not work 100% without it. The main concern is that the product may not cure properly. As an example, CND's specific light for Shellac has a higher wattage and light intensity and as you can see from the picture I finagled my old light with tin foil for more intense reflection and I tried to decrease the surface area the light had to travel. Ewww, I know .... it looks ....
3. 99% isopropyl alcohol. 70% (rubbing alcohol) will not work as well to remove the inhibition layer at the very end of this process, so find the good stuff.
4. Timer!
5. 100% Acetone
Stick to 100% acetone, other additives might inhibit proper adhesion of the gel polish.
6. A nail to be fixed. First a little explanation. When my husband saw this pic he said "ewww, whats wrong with your nail." First, I almost cried, then wanted to punch him in the gut. Alas, karma stepped in and a millisecond after that statement he dropped the remote on his foot. Ha ha!. Okay, but really there is nothing wrong with my nail per say. My nail has always been somewhat see through at the side there (on both pointers), but as such it's a little weak there. If you look carefully (click on the pic) you will see there is actually a small tear. Now the fixing this nail needs is almost non-existent, but I really wanted to share this tutorial.
Here is Part II of the Nail Fix Series: Shellac Nail Prep and Application
Would you like to see these posts in VIDEO?! Click here.
Labels:
CND,
How to,
Nail Brake,
Nail Fix,
Naked Nails,
Repair,
Shellac,
Soak off Gel,
Tutorial
Tuesday, January 18, 2011
Nothing like leaking personal information ...
One more blog award, yeay! This one is the Stylish Blogger Award (or the "lets all get to know each other award") I'd like to thank Once Bitten, Silance is Loud and Polish Wasteland. I'm sorry if I missed one other.
So these are the rules to the award:
1. Thank and link back to the person who awarded you this award.
2. Share 7 things about yourself.
3. Award 15 recently discovered great bloggers.
4. Contact these bloggers and tell them about the award!
It's been some time since I received this award and I have been delaying the post simply because I am having an internal struggle about what to share about myself. In general, I am a pretty private person and so it's actually pretty ironic that I even blog, but then again it's not like I am showing my lady parts here, they're just nails. I guess it's in my nature to be fairly private and untrustworthy upon meeting new people. ALAS, I have thought of a few things ....
1. I have never dyed my hair. I totally enjoy my real hair color and for the most part am afraid that if I mess with it, it will never go back to it's original awesomeness. I have gotten several suggestions through out the years though, highlights, blonde, black (wtf), and so on. My current stance on the subject is that I would start dying it when I start going gray .... however that may take awhile ... my dad (who I most favor) is 50 and still no signs of gray and his mother doesn't really have gray hair either.
2. I have a thing for long hair. I was slightly traumatized as a young child and now find great difficulty cutting my hair. Lets go back a few years ... in Russia when you get lice, there is one solution ...cut your hair like a boy. So, you can imagine my devastation when some crap-dude decided to spread his lice to everyone. My parents made me a deal. "You can get your ears pierced if we cut you hair." Sweet deal! Well, guess what, hair was chopped and ears were not pierced. Sheesh! Cutting hair = sadness.
3. Since I'm talking about trauma, let's talk how my dad traumatized me when I was young. He used to like to say the reason I had freckles was because flies liked to poop on my nose and cheeks. F-ing hilarious .... for a 25 year old, traumatizing for a 5 year old. I love my dad though and he'd do anything for me, that's just his strange sense of humor. Silly guy!
4. Since we are talking freckles lets talk sun. I have an obsession with SPF. I wear at least SPF 70 on my face everyday. When I'm at the beach, I am constantly reapplying every hour. (Note: sunblock eats nail polish in such high doses, so fresh mani's are a must at the beach.) Since we all know freckles and wrinkles come from sun exposure I say this is not such a bad obsession ... that is until we all find out some other ingredient in the lotion causes cancer, BLARG!
5. I carry my own bar of soap to most places. I have had an allergy to an unknown ingredient since ~2000, which presents it self as hives and dry skin, and it wasn't until this year that I finally figured out what it was from. Curse you Red 33! Unfortunately, I can not wear many perfumes, lotions, and cosmetics. It's sad and a pain in the a$$. I do get some pleasure in rejecting the annoying ladies at the perfume counters though.
6. Okay another sob story, this time with a happy ending: When I first came to America I didn't know English. On my first day of school I was dropped off at the front office along with my sister. My sister was quickly placed in a classroom, but I think they forgot about me. I obviously couldn't communicate my needs so I just sat there and I guess they didn't know what to do with me so I sat there some more. Lunch came and went. My sister passed by the office in a single file line with her class on their way to lunch. We did the FOB wave as she passed :/ The desperation was obvious. To the rescue! My sis came back bearing TATER TOTS. It was heaven. The End.
7. I absolutely hate calling to order pizza. I think this stems from my early FOB experiences. I get all frazzled and don't know what to say. Sometimes I write down a script for myself, but then if the dude on the other line goes off script I'm screwed. Aaaahhhh!
Here are my pick's:
Acetone and Old Lacquer
Nikki's Nail Files
Nailbamboo
We are Fish
Enamel Girl
Did someone say nail polish?
Varnish Vixen
Diva's Lacquer Box
Rachel Marie's Nails
Nailstah
If you have been tagged before, no biggie, just do what you do. I have love for all of you :)
Labels:
Blog Award,
Introduction,
Tag
Thursday, January 13, 2011
Let's EAT!
I said before that I like to eat, but I have yet to post anything about it. I have things planned in my mind, but these things take time mainly because the pic's are on another computer and I keep forgetting about it.
Over the holiday I went downtown to eat .... all day long. Walk, eat, walk, eat, walk eat, you get the picture. Here is a summary of the deliciousness. I have to preface by saying in the beginning the hunger over took me and I ate before taking pictures, so sorry for the bite marks and crumbs in advance.
Breakfast:
We were originally going to go to a place in Eastern Market. Well, apparently they decided to move and neglected to leave a sign saying they were across the street. Okay, maybe we were dumb for not noticing the place across the street, but we ended up going to a way better place one block down. Their loss.
We went to a place called: le pain quotidien
I got the cheese/fruit spread with a crap load of delicious bread. I've had fresher cheese in my day, but the bread was TO DIE FOR.
I also got some soup. The soup was fresh, made that morning (from what the lady told me), but when it comes to soup, maybe day old soup is better, otherwise it tasted like water. Oh well.
The coffee was bomb diggity; random thought: that word reminds me of Blackstreet and makes me feel old.
My "lover" had french toast. It was pretty delicious.
Some lady was coughing up a lung for a good part of our meal, that was disturbing, but probably more embarrassing for her since everyone kept looking at her which made her choke on her food further. Weird.
Next stop: Coffee!
We went to a small little coffee shop in (literally) a hole in the wall called: Filter
(it's too bad I didn't take a picture, dang it!)
My lover was a total douche and let the barista order for him. I got a double espresso. Cool place, Good coffee.
Lunch:
A Greek place called Zorba's Cafe near Dupont Circle.
I got a kabob dish and tabouli on the side. My lover got a Yero and a salad (obviously Greek). It all came with bread, which after le pain was a pain to eat, so I didn't.
Maybe it was my hungry tummy, but the food was great .... and cheap, usually that combo is hard to find together.
Happy Hour and Dinner:
Both took place at Ten Penh
No pictures of happy hour sorry, but there was lots of beer flowing I assure you. So much so, the boy was even more douche like here and let the waiter order for him; okay, it wasn't the douchee-ness rather the drunkenness. Crap now that I think of it, we got an appetizer, but the brain cells have been fried and can't think of it ... not even after looking at the menu online, Big ol' Dang! Anyway, the boy got Sea Bass. He was satisfied, but didn't care for the nuts.
Okay completely unnecessary, but for once I was not in a chocolate mood, which wouldn't have mattered anyway because they didn't have it. Instead, we got a plum wine and pear Saki.Funny Disturbing how I remember the alcohol.
We got a nice combo, one was sweet the other sour. Very Yummy.
I would not come here again, unless it was for the beer.
Overall a good day, can't wait to do it again.
Over the holiday I went downtown to eat .... all day long. Walk, eat, walk, eat, walk eat, you get the picture. Here is a summary of the deliciousness. I have to preface by saying in the beginning the hunger over took me and I ate before taking pictures, so sorry for the bite marks and crumbs in advance.
Breakfast:
We were originally going to go to a place in Eastern Market. Well, apparently they decided to move and neglected to leave a sign saying they were across the street. Okay, maybe we were dumb for not noticing the place across the street, but we ended up going to a way better place one block down. Their loss.
We went to a place called: le pain quotidien
I got the cheese/fruit spread with a crap load of delicious bread. I've had fresher cheese in my day, but the bread was TO DIE FOR.
I also got some soup. The soup was fresh, made that morning (from what the lady told me), but when it comes to soup, maybe day old soup is better, otherwise it tasted like water. Oh well.
The coffee was bomb diggity; random thought: that word reminds me of Blackstreet and makes me feel old.
My "lover" had french toast. It was pretty delicious.
Some lady was coughing up a lung for a good part of our meal, that was disturbing, but probably more embarrassing for her since everyone kept looking at her which made her choke on her food further. Weird.
Next stop: Coffee!
We went to a small little coffee shop in (literally) a hole in the wall called: Filter
(it's too bad I didn't take a picture, dang it!)
My lover was a total douche and let the barista order for him. I got a double espresso. Cool place, Good coffee.
Lunch:
A Greek place called Zorba's Cafe near Dupont Circle.
I got a kabob dish and tabouli on the side. My lover got a Yero and a salad (obviously Greek). It all came with bread, which after le pain was a pain to eat, so I didn't.
Maybe it was my hungry tummy, but the food was great .... and cheap, usually that combo is hard to find together.
Happy Hour and Dinner:
Both took place at Ten Penh
No pictures of happy hour sorry, but there was lots of beer flowing I assure you. So much so, the boy was even more douche like here and let the waiter order for him; okay, it wasn't the douchee-ness rather the drunkenness. Crap now that I think of it, we got an appetizer, but the brain cells have been fried and can't think of it ... not even after looking at the menu online, Big ol' Dang! Anyway, the boy got Sea Bass. He was satisfied, but didn't care for the nuts.
I got the Spice Crusted Tuna with Fried Calamari. It was okay. Tuna was nice, but had way too much sauce. Calamari was cooked nicely, but again too much crap-sauce. I could have done without the 3 cups of peanuts either. Thank goodness I was hammered so I could get some joy out of this dish. I suspect the boy's dish would not have been as good either.
Dessert: MORE ALCOHOLOkay completely unnecessary, but for once I was not in a chocolate mood, which wouldn't have mattered anyway because they didn't have it. Instead, we got a plum wine and pear Saki.
We got a nice combo, one was sweet the other sour. Very Yummy.
I would not come here again, unless it was for the beer.
Overall a good day, can't wait to do it again.
Tuesday, January 11, 2011
Light blue jelly franken
So there is this pretty blue color by Color Club called Factory Girl. One problem ... pasty city! I always get really disappointed when I put it on because it's like wet chalk. Ewww. I prefer a more shiney creamy consistency and look, hence this franken was born.
Since I am a scientist I should be much better at keeping record of how I make these things, but perhaps since it's my job and this is a creative outlet, those rules get thrown out the window. Sorry people, I will just give you estimates and even those are only as good as my memory and I'm no elephant.
Color Club Factory girl + Maybelline wet shine Ballet on Ice (40) + clear topcoat
1/4 +1/4 + 1/8
What weird measurements right? Basically, I didn't make a full bottle, slightly more than half.
The result:
3 coats with flash.

From the side with less flash.
Side with more flash
It's definitely less harsh and I like it lots more than the original.
yeay!
Since I am a scientist I should be much better at keeping record of how I make these things, but perhaps since it's my job and this is a creative outlet, those rules get thrown out the window. Sorry people, I will just give you estimates and even those are only as good as my memory and I'm no elephant.
Color Club Factory girl + Maybelline wet shine Ballet on Ice (40) + clear topcoat
1/4 +1/4 + 1/8
What weird measurements right? Basically, I didn't make a full bottle, slightly more than half.
The result:
3 coats with flash.

From the side with less flash.
Side with more flash
It's definitely less harsh and I like it lots more than the original.
yeay!
Labels:
Blue,
Color Club,
Franken
Friday, January 7, 2011
Blog Award ... Waa hooo!
Okay, so I didn't win an Emmy, but I did just received a blog award from alluring mum. Thanks girl. *hugs and love <3 right back! She herself has beautiful hands, nails and swatches as well as beauty products :) Check her out!
As a condition of the award I must choose a few of my fav's and share the love. Since you twisted my arm ... fine. Actually, I am happy to do it because I love reading and starring at other peoples nails as much as my own, lol.
My choices:
The Polished Perfectionist - has the most perfect nails ever ... period. She has fantastic pictures showing swatches in detail as well as descriptions.
The Unknown Beauty Blog - What hilarity! I love reading her stuff. I either chuckle or learn something (or both) with every post. It is both entertaining and informative! She writes mainly about makeup (tutorials and such), but also talks about polish. Her other blog.
These next two chicks are super creative and I love their nail art:
Silence is Loud - Amazing stuff. Love the tutorials.
Layniefingers - Really cool gif's accompany the tutorials :) love it <3
I hope you visit and enjoy them as much as I do!
To the receivers:
The rules:
Post about this award and copy the rules. Link the person that had tagged you.
Choose 3 - 5 Blogs you would like to tag and link them too. Leave them a comment on their blog that you've linked them.
Important: This award is for unknown blogs, so don't tag some 3000-Reader-Blogs! :)
Tuesday, January 4, 2011
Color Club Revvvolution Performance
Performance time for Roy G Biv.
In my experience, I have found this polish has got to be one of the toughest polishes to keep on longer than a few days without obvious wear and tear and chipping. Here is one way to do it.
Day 1:
Apply base and one or two coats of the color.
Base: My memory is shot... sorry.
Color: Color Club Revvvolution x2
Top: NONE
This color is awesome on so many levels:
1. Look at, just look at it
2. The application is BUTTA
3. It's opaque in one coat. Heck yes!
I have to admit I don't always wrap my tips, but always stroke down and so they look wrapped. Either way, I find that some up keep is necessary during the life of the mani.
Day 2:
Okay so obviously this love affair is already starting to fizzle. Really, wearing on day 2!? Redonkulous.
On day two, apply one coat of clear (not quick dry) and another coat of color.
Problem area's covered!
Day 3:
Well, *Roy* is at it again. It's really not that bad, but annoying.
So, lets paint them AGAIN!
This time around I added the color first and then the wrapped the tips with clear, which I didn't want to do because the holo might be affected.
I didn't really see any big difference after all was dried.
Maybe there is slightly more glare off the clear from the flash.
Ignore the white hair, lol, that's from my cat Coke.
Day 4:
I started to give up after this day. No more up keep.
It looks worse from the side than head on.
Not terribly bad. At least it hasn't chipped.
Day 5:
Again, it looks worse from the side than it really is.
Actually I thinks it's more the same as Day 4.
See, it's do-able.
Day 6:
About the same or maybe slightly more wear.
But what's really getting to me ... are my thumbs!
That is unacceptable.
It was the weekend and I thought I'd better change the mani, since my time is limited during the week. I changed it after 6 days, but the other fingers could have held out longer. My cursed thumbs!
6 days for a holo, not too bad! I will try a sticky sandwich next time. :)
Labels:
Color Club,
Holographic,
Performance
Subscribe to:
Comments (Atom)


